Zoom


|
Zoom |
|
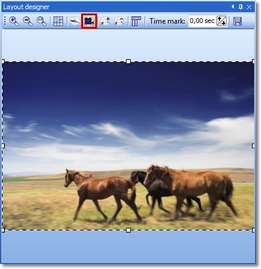
With AquaSoft ® SlideShow you can also zoom into your images. If you want to show a particular section of an image enlarged, you can generate this using the corresponding tools in the Layout Designer. In that respect, you can freely choose the area which you would like to zoom in on. You can apply Zoom and Camera pans to the SlideShow objects below:
You might find it useful to skim through the movements tutorial first since the zoom function is based on the movement path system. Zooming into an image easily Create a new slide show
Click on the image in the Image List or on the Timeline, so that the image is shown in the Layout Designer and the corresponding tools are enabled. Select the
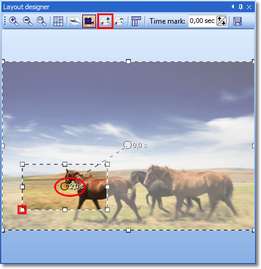
Now click the
So that the Transition does not have a disturbing effect on the Zoom, you can set the Transition in the Object settings of the image to None or increase the Timestamps. The 2nd marker is still marked (orange). First of all set the time there at 4 seconds. Then click the first marker in the Layout Designer and set the value to 3 seconds or more.
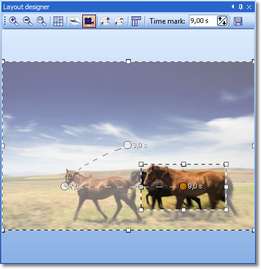
You can see that, by changing the time of the first marker, the subsequent markers also change automatically. In this way the movement set remains unchanged within the path.
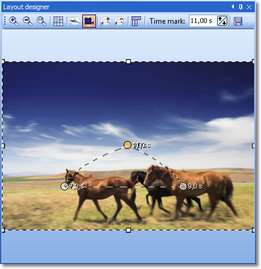
After clicking Motion in the image If you would like to zoom in on several sections of an image, you can now use a movement path in the image. Imagine you have a group photo and now wish to zoom in on the individual persons. However, you do not wish to constantly zoom in and out, but go over the faces in the image. For that purpose, you can now insert an additional movement marker with the
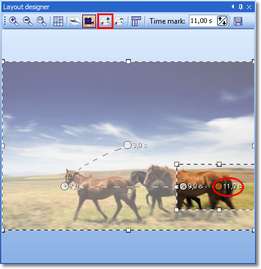
If you now play back the effect, you will now see that a camera pan is possible within the image. Using the time of the last movement marker you can control the speed. If you increase the time, the shot becomes slower. Zooming out You can have the image cross faded while you are zoomed in on the section, or first revert back to the overall image size. In order to revert back to the full size, insert a new movement marker. Please ensure that the last movement marker is selected.
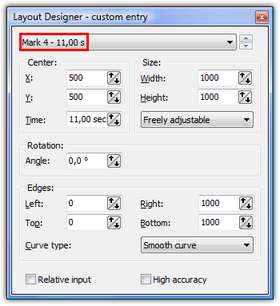
The easiest thing to do is now to use the custom entry. Retrieve this via the right mouse button or via the
At Marker 4 set 500/500 as the Center and 1000/1000 under "Size . As a result, the image at Marker 4 is displayed completely, again.
Now simply click
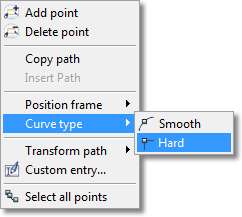
As you can see, it is very easy to zoom images. Simply insert movement markers and position them as desired and already motions enters your image. The movement path can be changed using the Curve type. Select Select all markers by means of the In the context menu which now appears, select Curve type/Hard.
You will now see the change in the form of the movement marker. This is now square, in order to represent the curve type chosen. After clicking
|
| Copyright © AquaSoft ® 1999-2009 www.dvd-photoshow.com |