Program overview


|
Program overview |
|
|
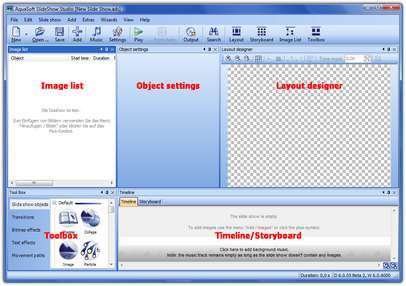
Structure of the user interface AquaSoft ® SlideShow includes several tools to edit your show. In the following graphics you get an overview over the available controls. Often will be talked about objects. Objects are all element that can be added to a slide show, e.g. images, text, music or collages.
The toolbar
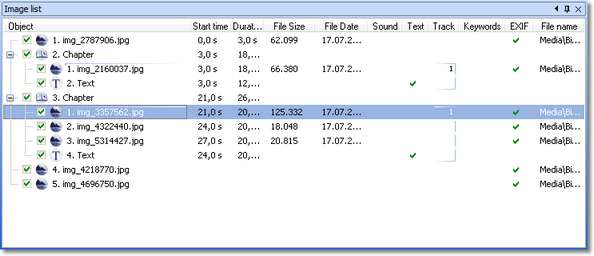
The Image list All objects of your current slide show are displayed in the "Image list". In addition, further useful information about the objects are displayed as well.
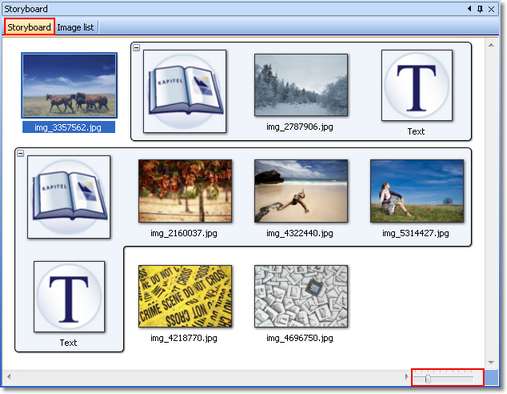
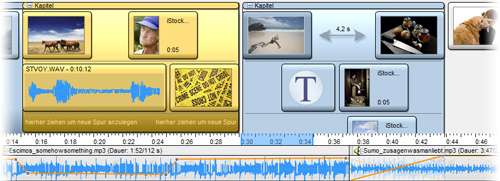
Here you can see the start time and duration of the objects. For images there is an entry for file size, file date and file name. A check mark in the "EXIF" column means that the image contains EXIF data (e.g. exposure date, camera model and image resolution). These can be displayed in AquaSoft ® SlideShow. More information about this can be found in chapter variables. Another important column is "Track". It shows in which track of the "Timeline" your object is located. If this entry is empty then your object is in the first track. But you can create multiple tracks inside a chapter, and the column "Track" informs you about the object's track number. Of course you can also see this in a graphical way inside the "Timeline". You can change the order of the images by moving them with the mouse. The Storyboard Here you can switch to the "Storyboard". It shows a small preview, called thumbnail, of all images in the show. This makes it easier to find a certain image in case your show grew rather large. Here too you can change the order of the images by moving them with the mouse.
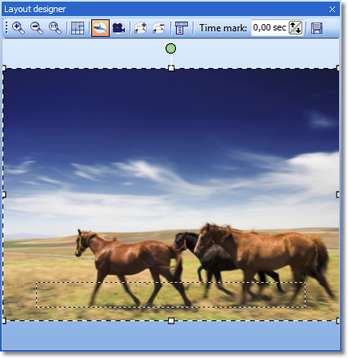
With the slider at the bottom edge of the "Storyboard" you can specify the size of the thumbnails. The Layout designer The "Layout designer" is your preview window. Here you can see how images and text will be displayed on the monitor.
The following icons are available in "Layout designer":
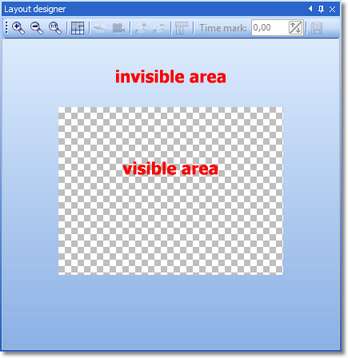
Zoom and camera pans can be set in "Layout designer" by defining movement marks. You can find the necessary buttons in the toolbar of the Layout designer. They will be explained in the respective chapters. There are two distinct areas in Layout designer - the visible and the invisible area.
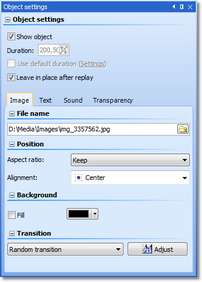
The visible area represents your monitor. Everything inside this area will be displayed later on the monitor. The invisible area is outside the visible area. We need it to be able to let text, images and other objects fly into the visible area. It means that movements can already take place outside of the visible area and then continue to move into the visible area. This way you can for instance let text run from left to right over the screen. The magnifier icons can be used to increase or decrease the size of the visible area. The Object settings Each SlideShow-object (image, chapter, collages, ...) has certain properties that will be displayed when you select the object in Image list, Timeline or Storyboard. In the following graphic you see the settings for an image. Objects and their properties will be explained in more detail later in this documentation.
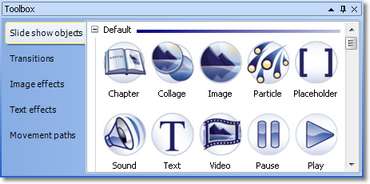
You can specify the duration of your image and its transition, for example. On the "Text"-tab you can add and format text. And on the "Sound"-tab you have the option to assign a special comment or sound to your image. The Toolbox The "Toolbox" is the place where you find all the objects that can be added to a slide show. You can click on them and drag them with held-down mouse button to position in the "Image list". This process is called drag&drop. By double-clicking an object it will be added at the end of the show.
When you click on the "Transitions"-tab in the Toolbox you find a large selection of pre-defined transition effects. Click on a transition and you will get a small preview of the effect. If you want to assign a transition to an image drag it with held-down mouse button to the image (drag&drop).
The Timeline The Timeline displays the temporal flow of your slide show and all containing images, texts and musical scores. By using "Chapters" you can create multiple tracks. Images and sounds can be spread over these tracks inside the "Chapter". You can find it in the "Toolbox" on the tab "Slide show objects".
Here you learn how to create multiple tracks.
|
| Copyright © AquaSoft ® 1999-2009 www.dvd-photoshow.com |