Multiple tracks


|
Multiple tracks |
|
|
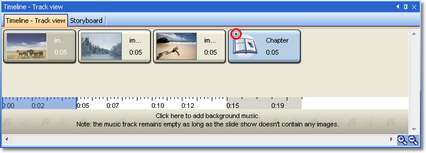
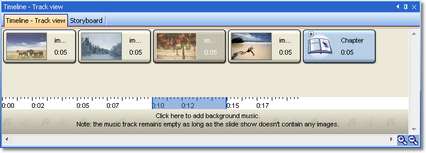
In AquaSoft ® SlideShow at first glance you only see an image and music track on the Timeline. This serves to provide a better overview. At positions where you require multiple tracks, the Chapter object is used. With this you can connect as many tracks as you want. In that respect, it is not predetermined which objects can contain a track. Therefore you can place images, music or texts on any track. You will find the Chapter object in the Toolbox under SlideShow objects.
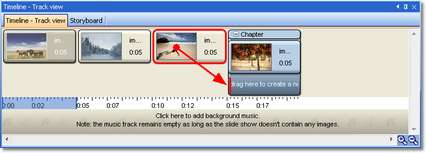
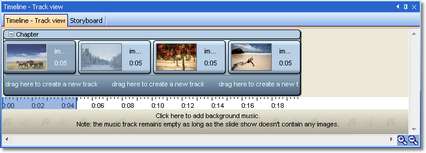
The Chapter can be inserted by double-clicking. You can, however, also drag it to the desired position on the Timeline or in the Image List with the mouse button pressed down. Insert a few images and a chapter into an empty show. The chapter is inserted empty. You will then have to move the desired objects into the chapter. You can do that on the Timeline or in the Image List or Storyboard. Click on an image and then drag it with the mouse button pressed down to the chapter.
If you go over the chapter with the mouse, the chapter is framed in red on the Timeline. Let go of the image there.
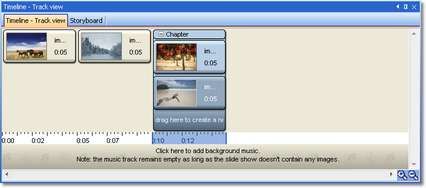
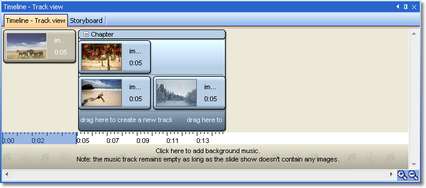
The chapter now contains a small plus icon.
This shows that the objects are to be found in this chapter. By clicking the plus icon you can open the chapter.
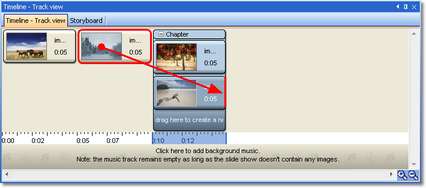
The red bar under the first image determines the starting position of the image. The image is inserted at this point.
The reference to a new track now appears under the second image. You can place as many objects as you wish on each track. In that respect, the red bar helps you to insert the objects in the correct position.
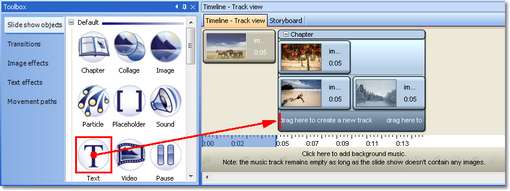
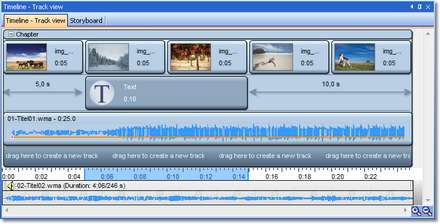
You can also insert SlideShow objects into a chapter directly from the Toolbox. First of all drag a Text object onto a new track.
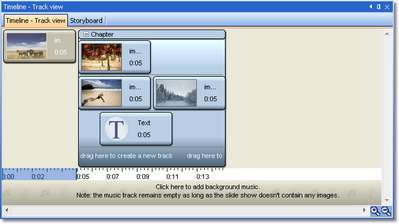
You can change the positions within the chapter by dragging the objects with the mouse. By clicking dragging the beginning and the end of an object, the Exposure time/Holding time of an object can be changed.
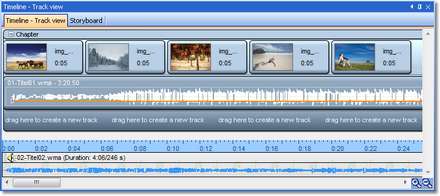
Example: Often we are asked how Track/Sound is set for only a few images. The background music should be faded out at this point, but not interrupted. Insert a few images into an empty show and a chapter.
Then move the images into the chapter. In that respect, the images should all be on one track.
Now drag a Sound object from the Toolbox onto the 2nd track in the chapter in exactly the same way as the Text object was inserted into the chapter above.
You can add Background music by clicking the corresponding track in the Timeline. Using the plus icon, you can insert the track.
The track is then shown on the Background music track of the Timeline.
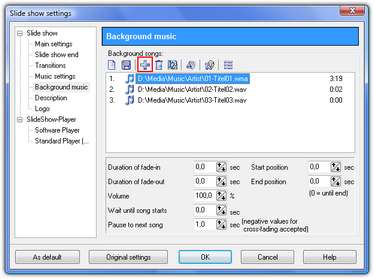
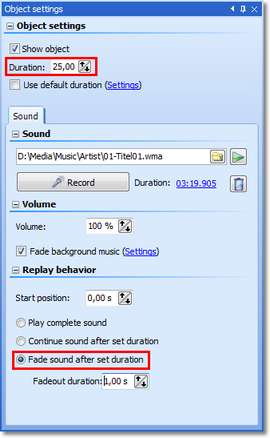
The Object settings of the Sound object should be displayed in the Object settings window. If not, select the Sound object on the Timeline by clicking it with the mouse. Should the playback length of the sounds be too long for you, you can reduce it. The relevant settings are marked in red in the illustration below.
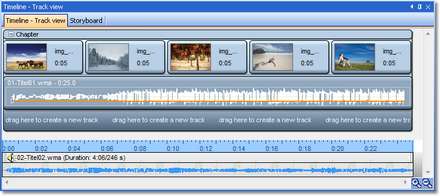
On the Timeline you will now see that the Sound fits in with the 5 images exactly. The Background music is cancelled during this period of time. If you insert yet more images behind the chapter, you will see how the background music track is continued.
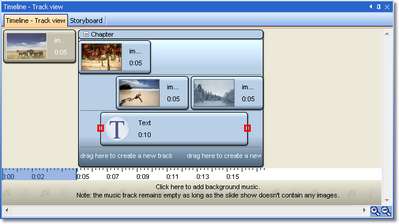
Images, texts and sounds can be combined in a chapter as desired.
The Chapter has a minus icon at the top on the left if it is open. You can close it by that means if you are no longer working on this chapter. That increases the clarity in a substantial show.
|
| Copyright © AquaSoft ® 1999-2009 www.dvd-photoshow.com |