Movements with alterations in size


|
Movements with alterations in size |
|
|
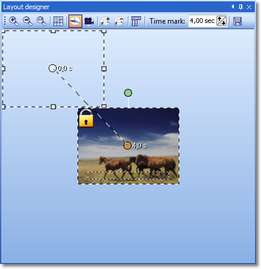
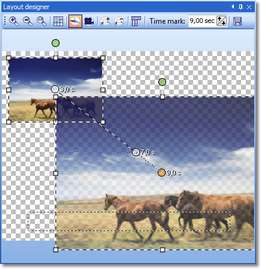
Images grow The image with the path set from the previous section also has to be modified slightly. You should see it like this in the Layout Designer:
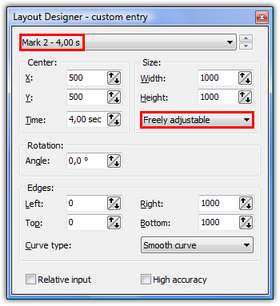
Now open Custom entry using the Select the 2nd marker and change the setting under Size to Freely adjustable.
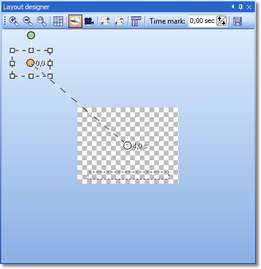
Then close Custom entry. It is possible to also carry out the next step from this menu, however we are choosing the Layout Designer directly. Using the positioning framework, reduce the image at the first marker, i.e. the marker which is outside the visible area. Then move the marker closer to the visible area.
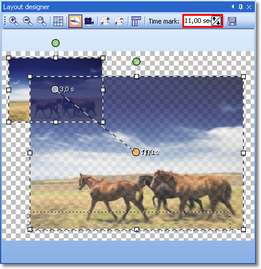
Now play back the show and you will see that the image is larger when it is in motion. You can select a Transition, or also "None", in the Object settings of the image. First of all, position the first marker in the visible area. Then restore the Layout Designer to Normal view. with Then access Custom entry.
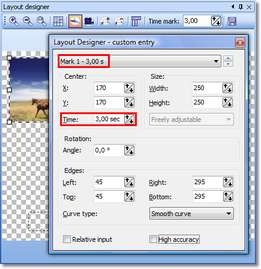
First of all set the values shown in the image. In the Object settings of the image select a Transition. Afterwards play back the effect. Now the image should fly back to its original position. For this, two additional movement markers are required. Click the 2nd marker in the Layout Designer and then insert an additional movement marker with
This marker is required to allow the image to stand still. The image should not become smaller again immediately. In this case a movement marker can be directly laid over a previous marker. To do that, you only now have to drag Marker 3 over the top of Marker 2.
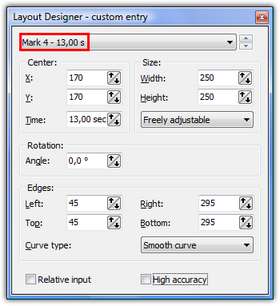
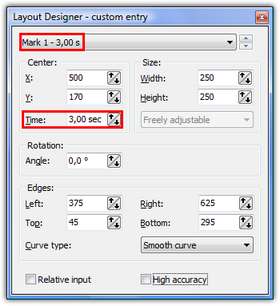
Then increase the time at the 3rd marker, as given in the image above. Then insert a 4th marker with Retrieve Custom entry via
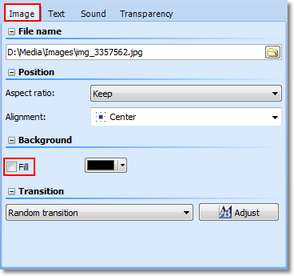
Now, under center and size set the values which have already been used at the first marker. If you now play back the show, you will see that the image is enlarged and then reverts to its original place. Now insert a new image into the show. Click on our image above once more and access the context menu via In the Object settings of the 2nd image you have to disable the Fill background function.
Now we will for once change the positions of the first and last markers. To do that, access the context menu via Marker 1:
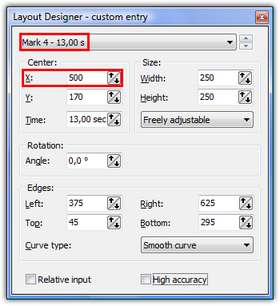
Marker 4:
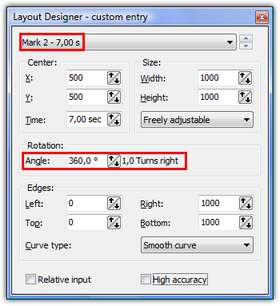
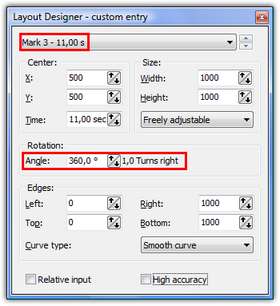
Then play back the show once in its entirety. And how do you like the effect? In SlideShow Studio you can use Rotations. This is easy to accomplish via Custom entry, too. Open the context menu for an image via
Play back the show. These movement paths can be used on the following Slideshow objects:
|
| Copyright © AquaSoft ® 1999-2009 www.dvd-photoshow.com |