|
<< Click to Display Table of Contents >> Static mask |
  
|
|
<< Click to Display Table of Contents >> Static mask |
  
|
 Static mask You can find the Static mask effect in the Toolbox under the Objects tab in the Live effects / Video effects section. A mask defines the area of your image or video that is visible or invisible in the presentation. The masks are available for selection via a gallery directly in the effect properties. The masks can be mirrored in size, scaled, rotated and moved - but unlike the Dynamic Mask effect - not additionally animated or changed over the display duration. The Static Mask effect is suitable, for example, for creating collages from different parts of the image or image styles. |
1 Insert the "Static mask"
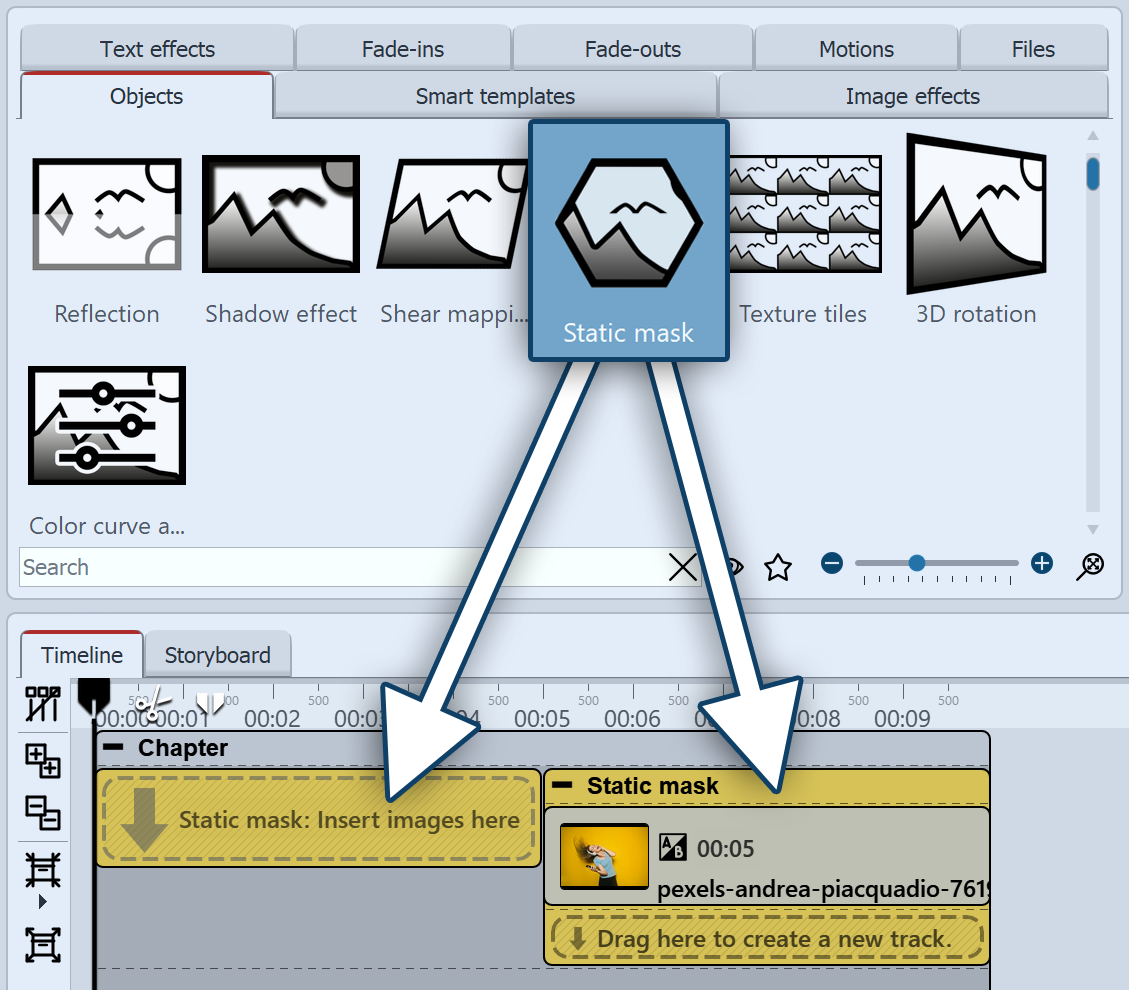 Static mask effect in the timeline To use the effect, you can drag it directly onto an image or video in the Timeline.You can also drag the effect directly to the Timeline and then fill it using drag-and-drop or using the Image object or the Video object. After you have inserted the image, click on the colored frame with the title of the effect in the Timeline. Now you can specify the settings for the effect in the Properties area. |
2 Settings of the effect
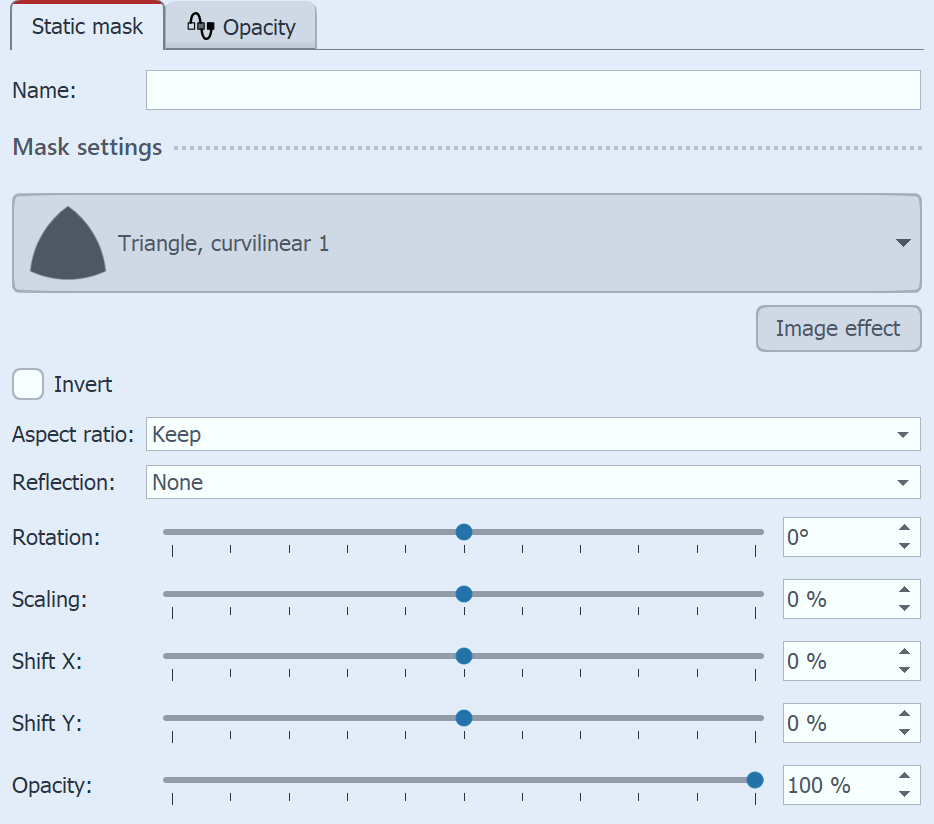 Settings for Static Mask Select a suitable mask shape in the properties, from the gallery by clicking on it and check the effect on your image material in the Layout designer. You can switch to another mask at any time.Using the Custom image icon in the mask gallery, you can insert your own graphics to be used as a mask. Invert can be used to invert the mask, i.e. to reverse the effect of the mask effect. As such, the mask has a certain aspect ratio. You can adjust this to your subject and, if necessary, Crop, Stretch or Keep the mask. With the selection at Reflection and via the slider for Rotation you can mirror the selected mask horizontally and/or vertically and rotate it freely. You can influence the size of the selected mask with the Scaling, with the Shift X/Y the position of the mask in the Layout designer. You can use the slider to influence the strength of the effect on your image. The lower the value, the more subtle the effect. The effect affects all objects in the effect. To show the effect result in a different place, select the colored effect in the Timeline. Now you can place the cropped image in the Layout designer by moving it with the mouse and resize it if necessary. |
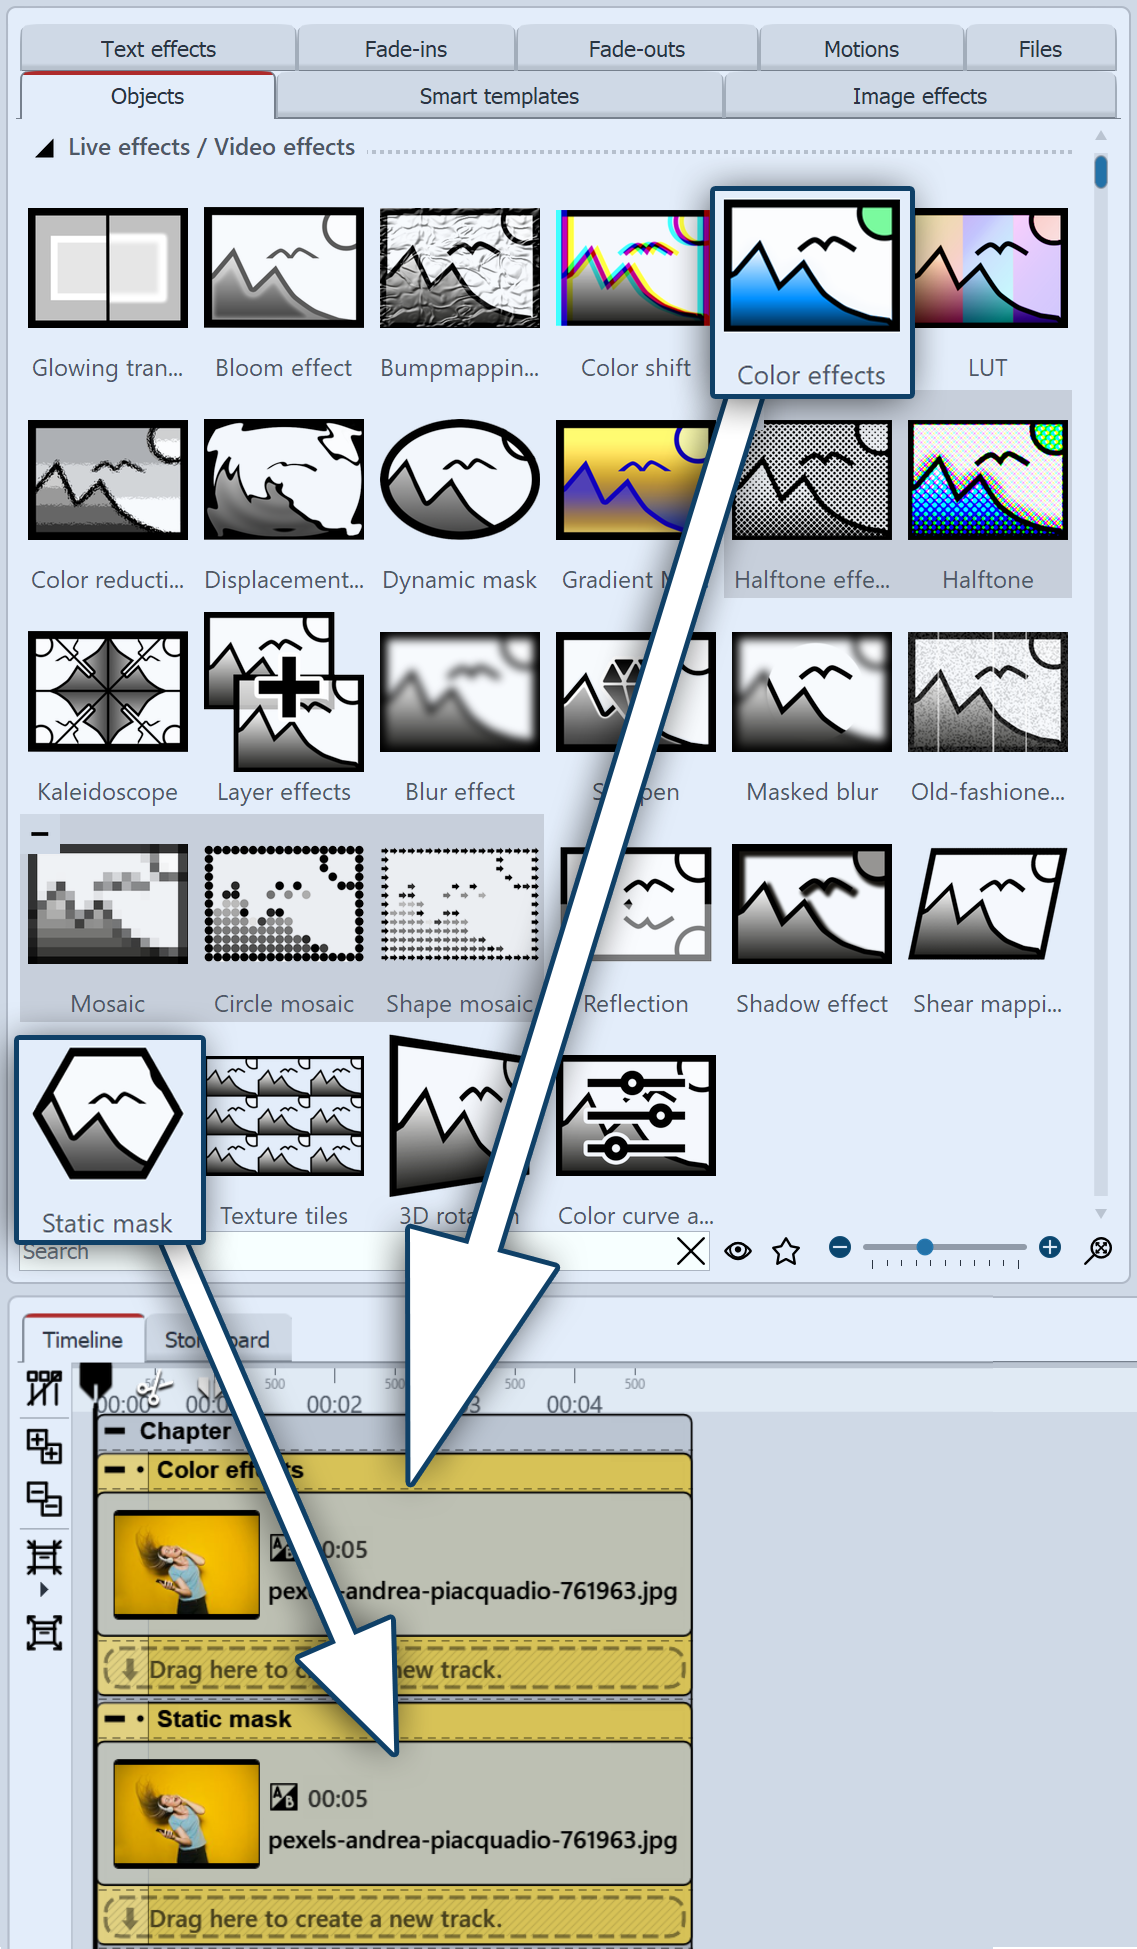 Structure with effects in the timeline 1. Paste a photo into the Timeline twice one below the other. Crop the images in the properties.2. The image in Track 1 serves as our background. Colorize the image in Track 1 by dragging the Color effects live effect from the Toolbox onto the image in the Timeline. Leave the Colorize effect preset and the Sepia hue. Your photo appears colored in the Layout designer. 3. Now drag the Static mask effect onto the image in the second track. In the Layout designer, you can already see the effect of the Static mask effect. Choose a mask that fits your subject. For this example, the mask "Double comb, wavy" was selected. |
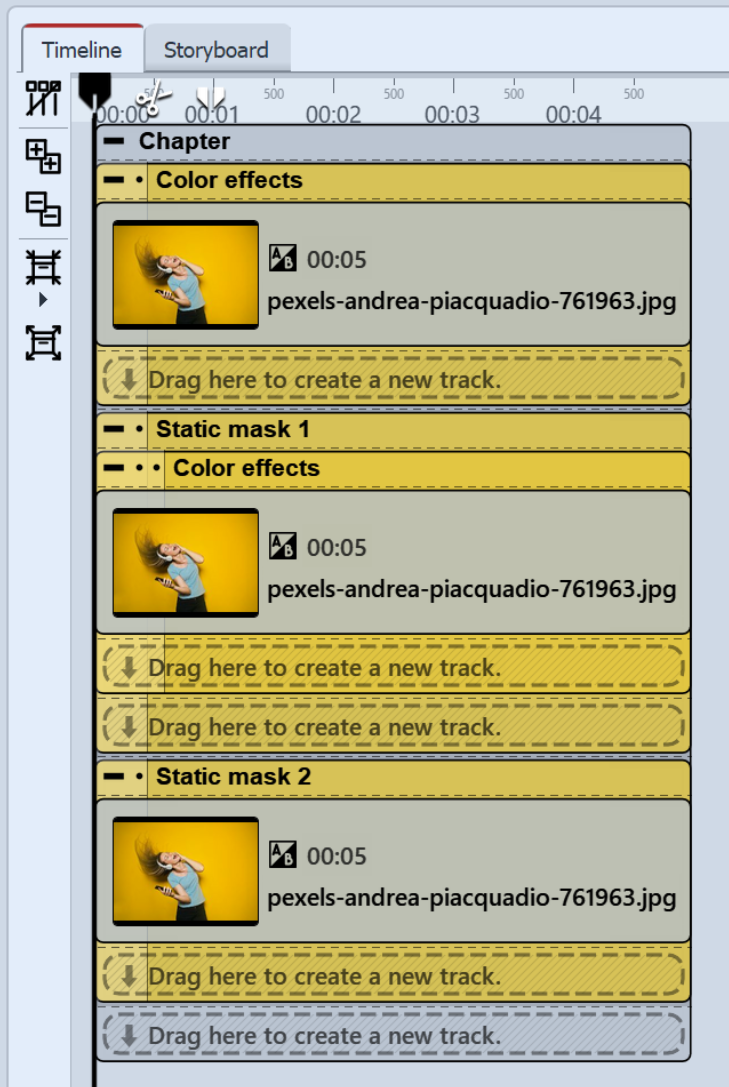 Structure with second static mask To enhance the effect with the different color variations of the photo, we add another effect layer.4. Copy the complete Static mask effect from the second track and paste it into the third track. You will not see any difference in the Layout designer yet, because the contents of track 2 and 3 are still identical. The content of track 3 should remain as it is. We will only edit the image in the middle effect once more. 5. Drag the Color effects effect onto the image in the first Static mask effect again. This time, choose a different hue to colorize. Then switch to the settings of the Static mask effect. For Scale, choose a higher value, for example 15%.
|
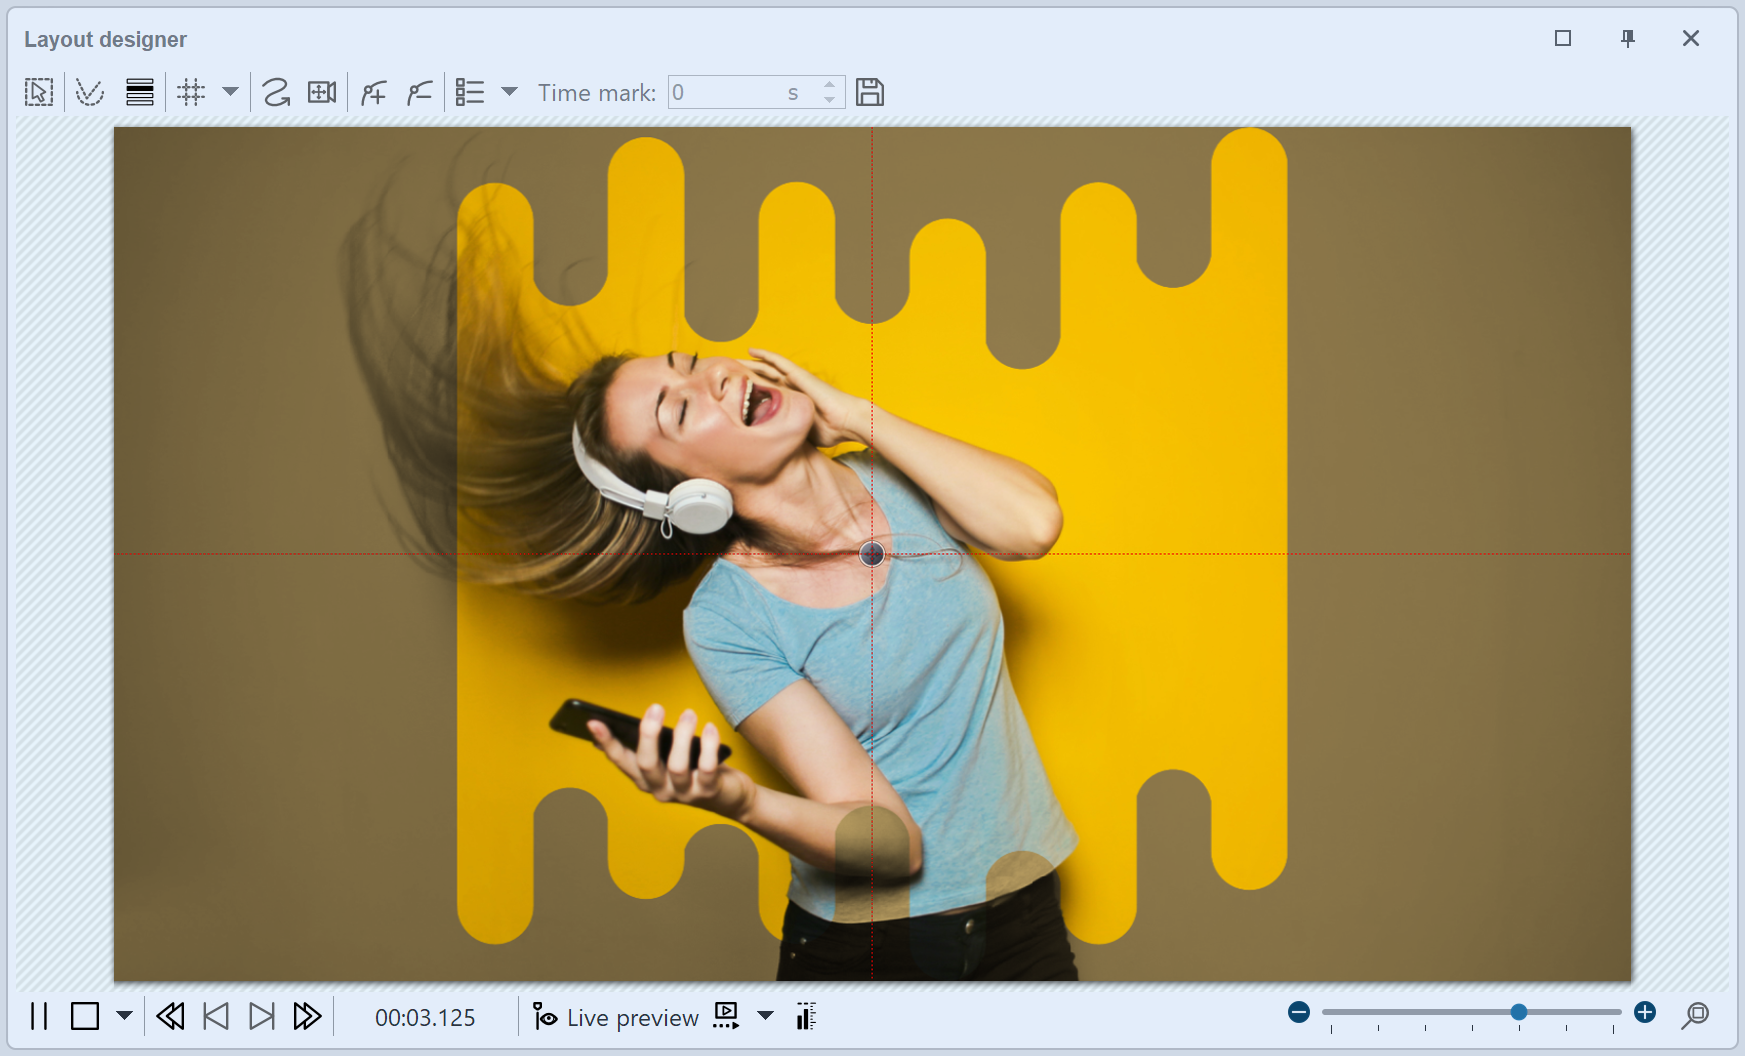 Example with "Static mask" in Layout designer |
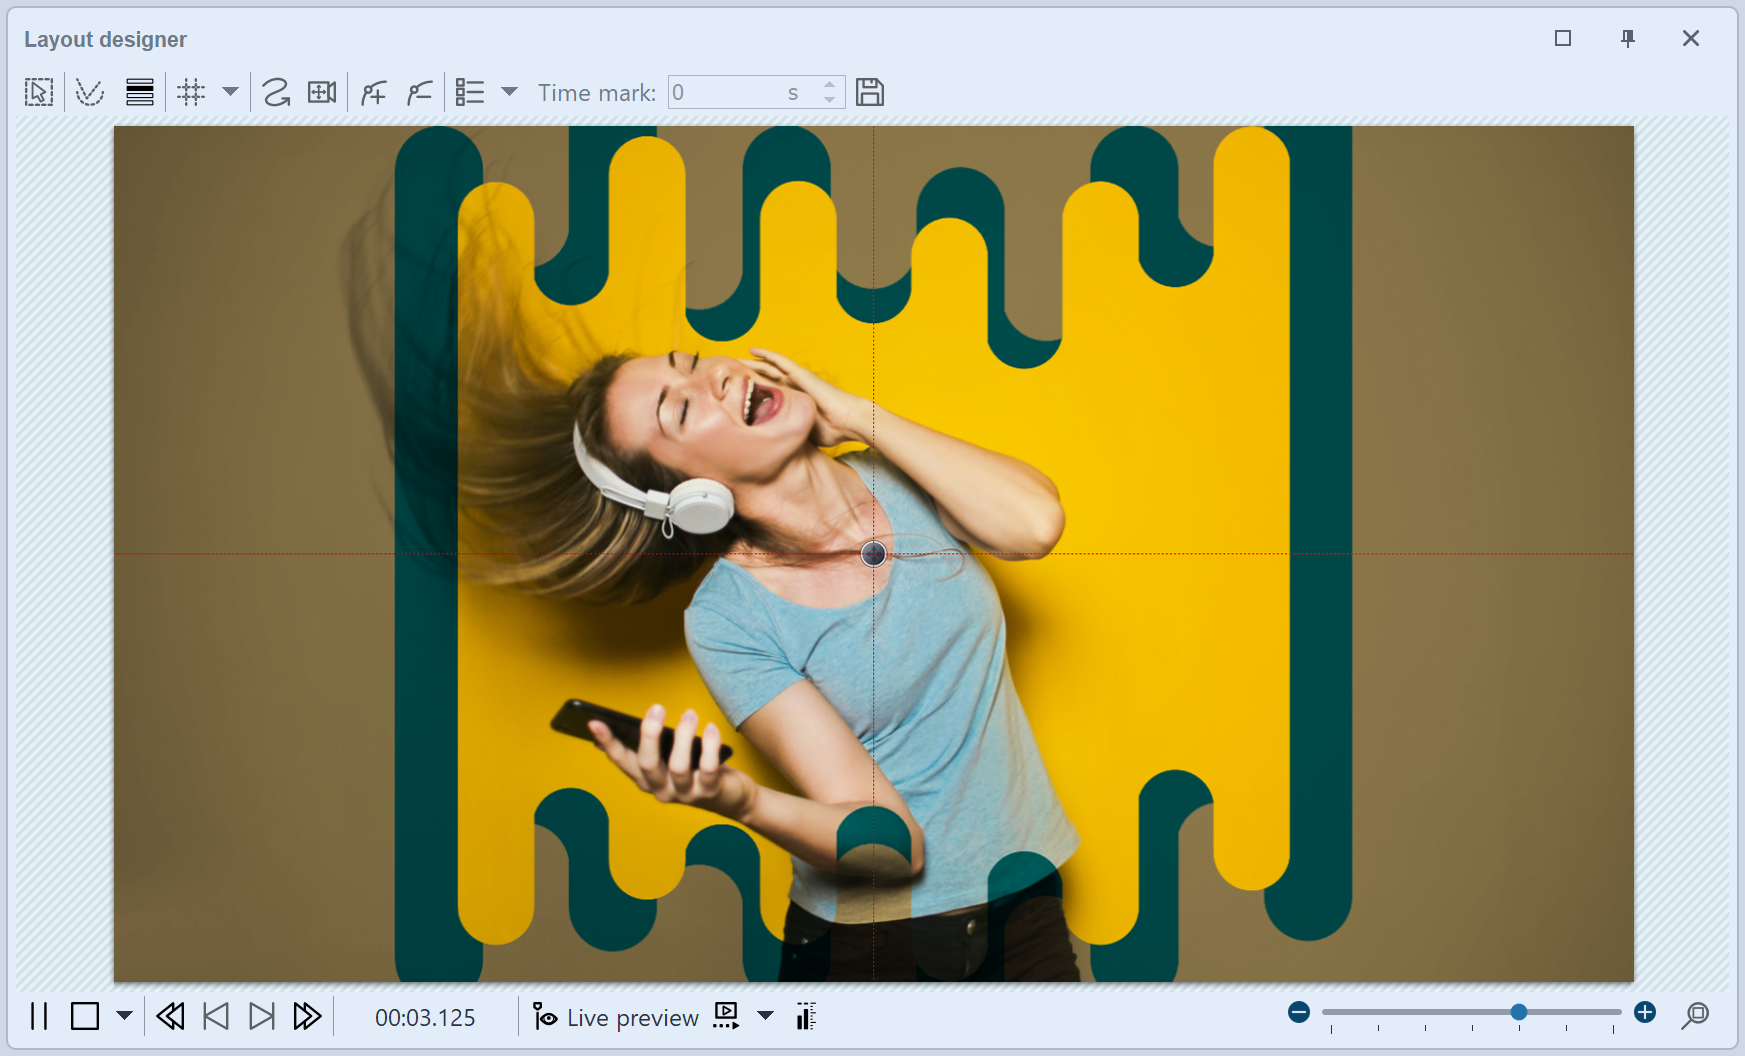 With additional effect "Static mask" |
|
The video "Bild ausschneiden mit Maske" and the video "Statische Maske für Vordergrund-Hintergrund-Effekt" show how diverse the design possibilities are with the Static Mask effect. |