|
<< Click to Display Table of Contents >> Masked blur |
  
|
|
<< Click to Display Table of Contents >> Masked blur |
  
|
 Masked blur You can find the effect in the Toolbox below the tab objects in the live effects section. With the masked blur you can blur specific areas of an object (text, photo, video, Flexi-Collage). |
|
You can find a finished project here - file - open - sample Project which used the motion blur. You can also copy the example project and insert it into your project. There you will be able to change the text. The sample project can be found under the title "Text with momentum". |
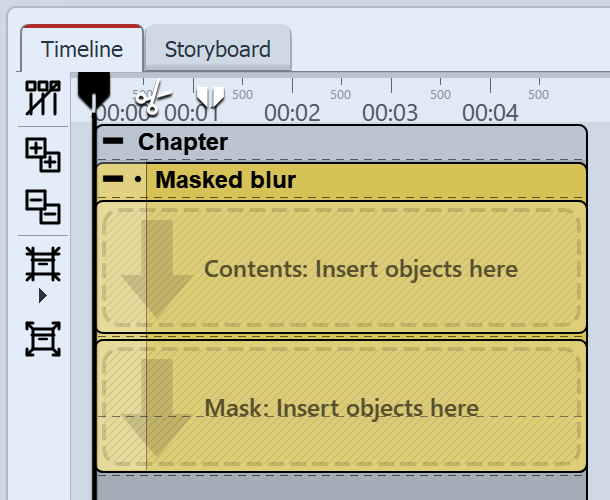
 Areas of the Masked blur effect in the timeline Drag the effect from the Toolbox into the Timeline. In the content field, drag the video or the image onto which the masked blur will be applied. Into the mask area, drag the graphic which will characterize the masked area. You can assign individual effects to all the objects which are in this effect, for example, a motion path. In this way, the mask can be dynamically presented and, for example, can pan across the image and, by doing so, show various areas which have been blurred. |
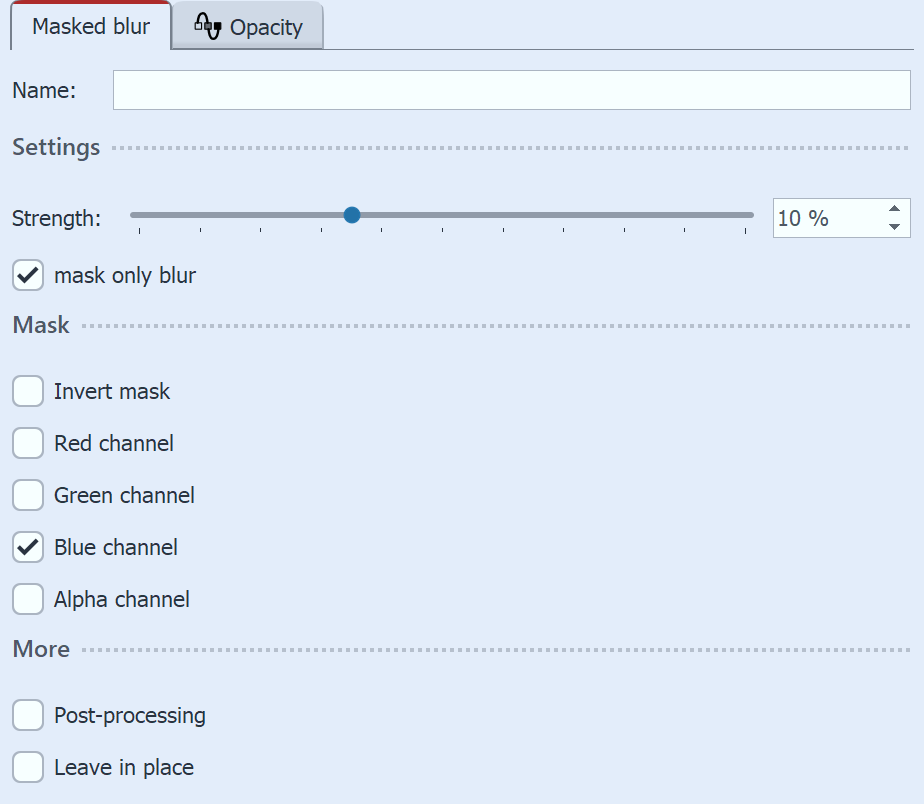
 Settings for the Masked blur Click on the yellow frame of the mask so that you can adjust, via settings, the behavior of the masked blur. |
Setting |
Meaning |
Strength |
Here you define the intensity of your blur, or how strongly blurred you wish your object to appear. In STAGES, this effect can be modified over time. |
Inverting the mask |
Exchanges the color values, so that previously unmasked areas are masked, and vice versa. |
Red channel / green channel / blue channel |
Masks do not have to consist of gray scale, but can also be colored. Using the controls, you can influence the various channels. |
Alpha channel |
Activate consideration of the alpha channel. |
Only mask blur / soft focus |
Displays the preview of the entire effect in the Layout designer. |
Post-processing |
This means that the effect will be applied to all elements which are enclosed within the effect borders. |