|
<< Click to Display Table of Contents >> Ken Burns effect |
  
|
|
<< Click to Display Table of Contents >> Ken Burns effect |
  
|
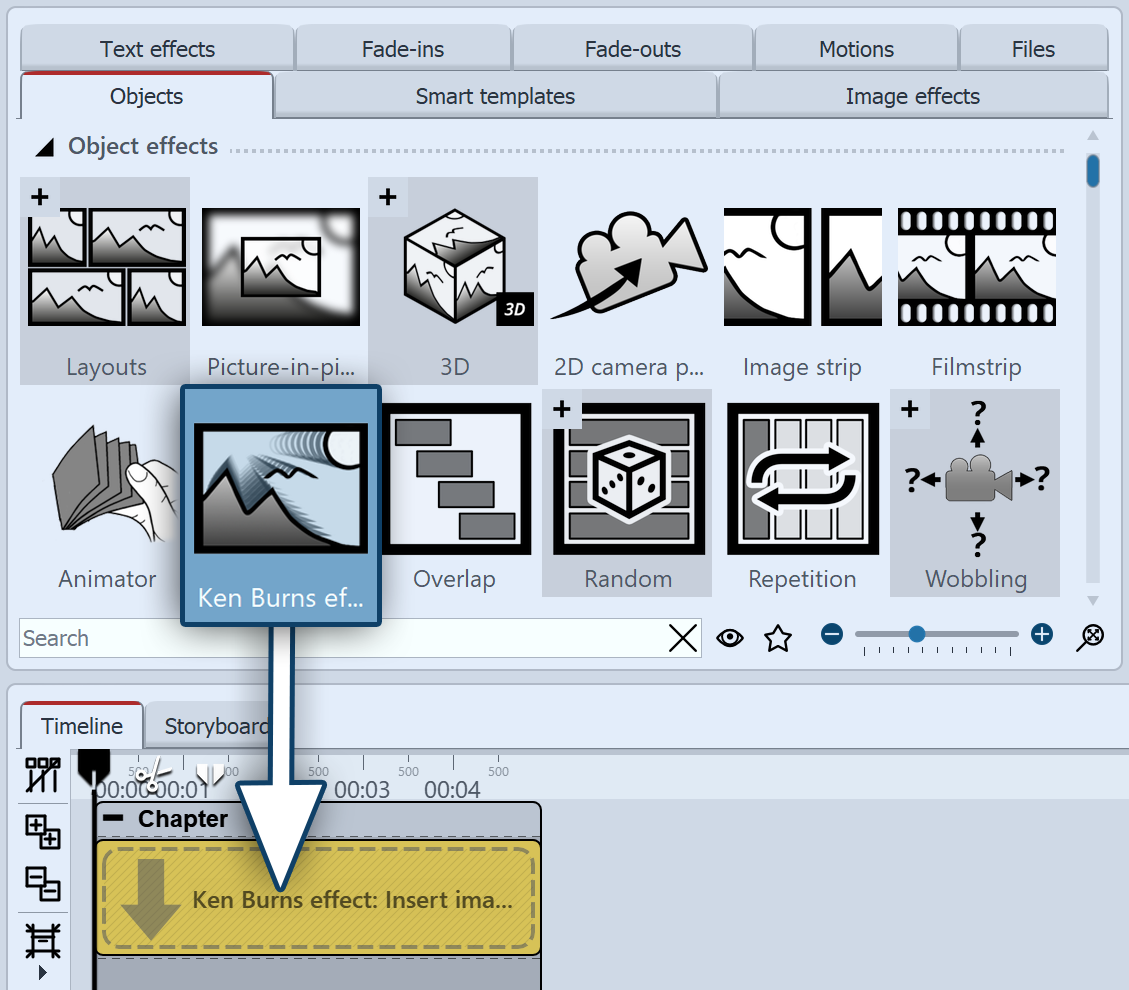
 Ken Burns You can find the effect in the Toolbox under the Objects tab in the Object effects section. The Ken Burns effect slowly zooms in or out on interesting areas of the image. It adds movement to the image, making photos look more vivid and drawing the eye to details. Videos or Flexi-Collagen can also be inserted into the effect. Follow these instructions to quickly and easily add the Ken Burns effect to any number of images. If you want to create the Ken Burns effect manually rather than automatically, see the instructions in the "Ken Burns manuell erstellen" chapter. |
 Drag effect from the Toolbox to the Timeline Start with an empty project and drag the Ken Burns effect from the Toolbox to the Timeline. |
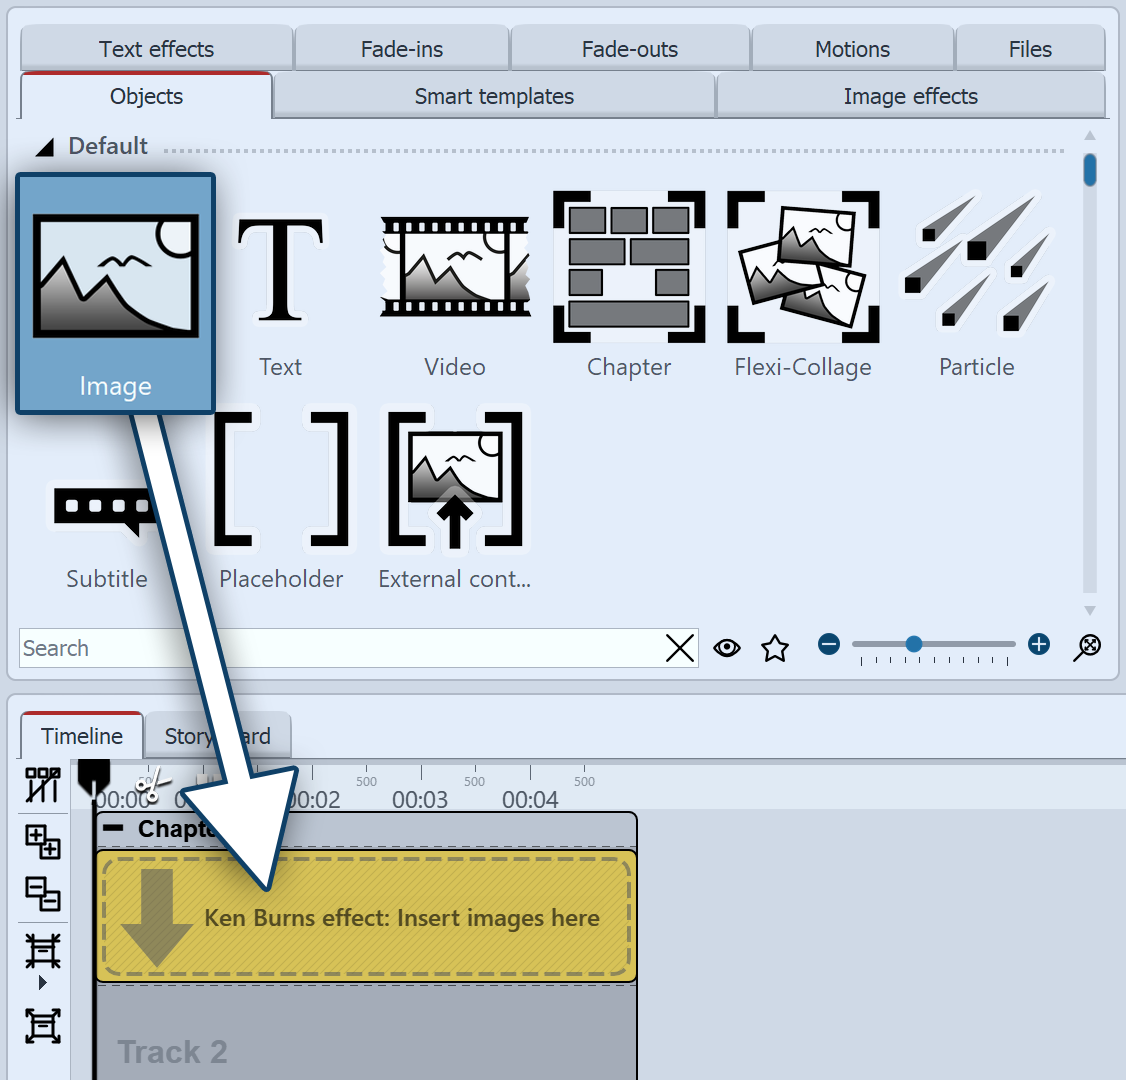
 Insert images Now drag an image object into the effect. Then select one or more images. You can also open the Files tab and drag images into the effect from there. |
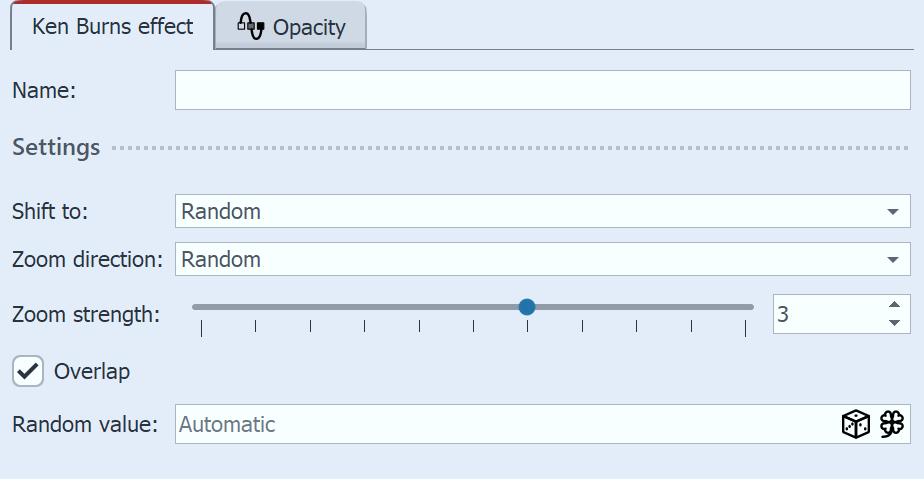
 Settings for Ken Burns effect Click on the colored border of the effect in the Timeline. In the Object settings area (on the right in the Default workspace), you can now specify further settings for the Ken Burns effect. •Under Displacement to you can choose from different directions in which the Ken Burns effect should move. •Under Zoom direction you can specify whether to zoom out of or into the image. •You can influence the Zoom strength with a slider or enter a value directly. •If the Overlap option is checked, the images will merge smoothly. |
|
The effect is presented in our "Ken-Burns-Effekt für Fotos" video. |