|
<< Click to Display Table of Contents >> Add transcription |
  
|
|
<< Click to Display Table of Contents >> Add transcription |
  
|
Generate automatic captions for videos or sound objects with speech or vocals and make speech visible in text form. This allows subtitles to be displayed directly in the video and customized. Creating karaoke videos or adding images to podcasts are other possible use cases.
The automatic transcription is created with the help of artificial intelligence (AI). Your audio data is transcoded on your device. Depending on the size of the language model, this requires large amounts of RAM (approx. 7 GB) and a lot of computing power.
|
When you start the AI-supported transcription for the first time, the necessary software is downloaded once (online connection required) and saved on your computer (approx. 1.46 GB). It is then permanently available in the program.
|
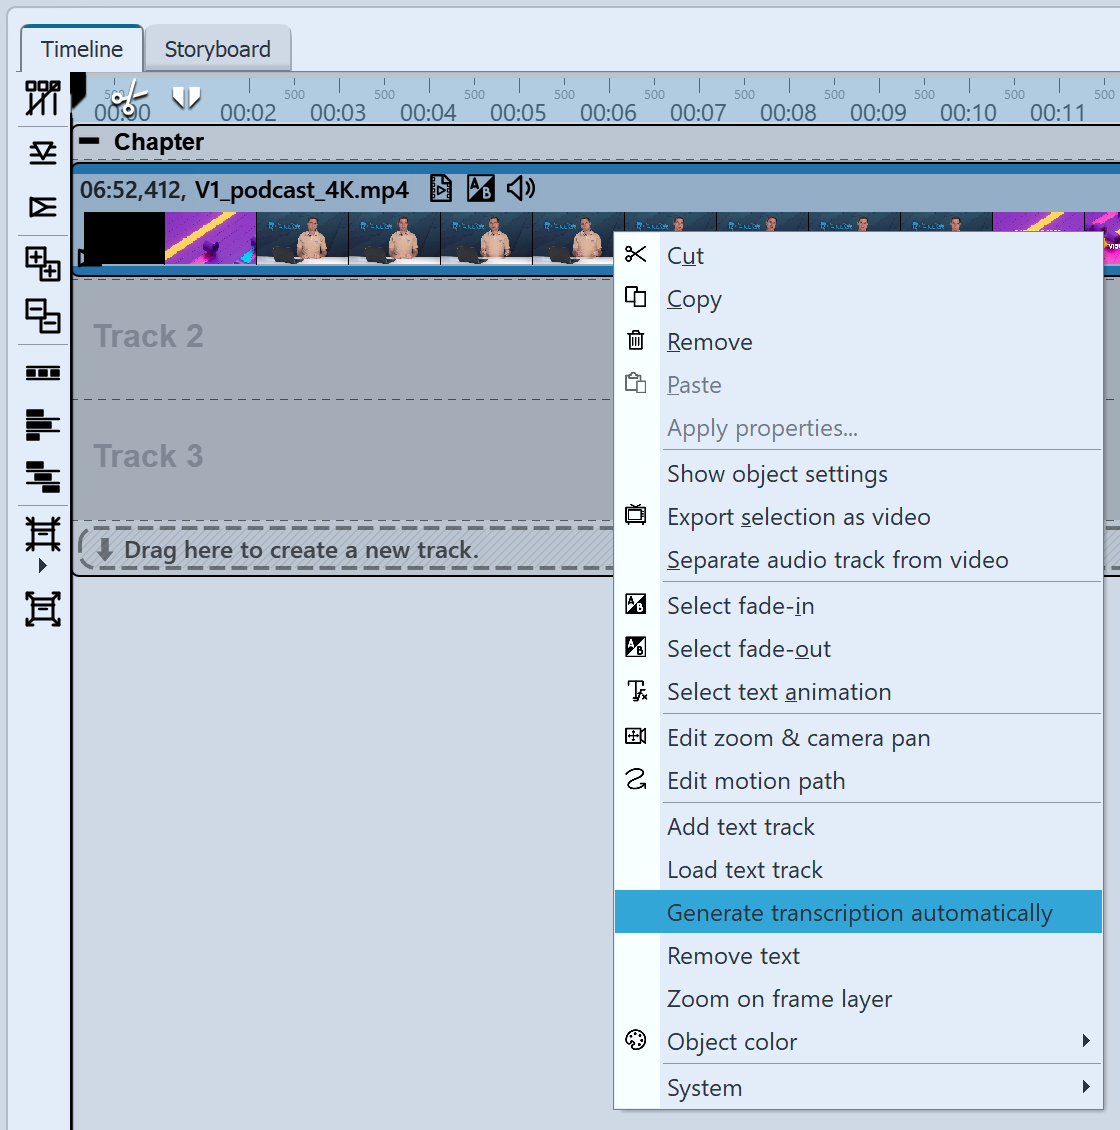
 Start automatic transcription at Timeline Insert a sound object (e.g. a song with vocals), a voice recording or a video in which someone is speaking into the Timeline. To start transcribing, right-click on the video or sound object in the Timeline and select Generate transcription automatically. |
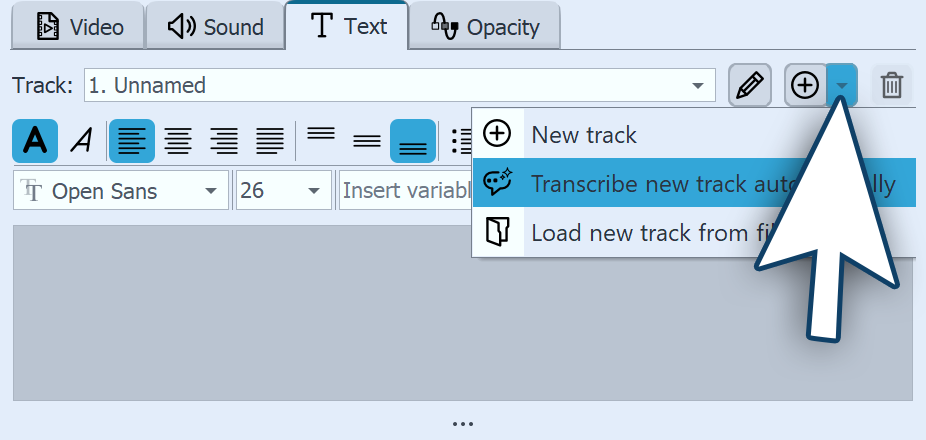
 Start automatic transcription in the properties Alternatively, go to the Text tab in the Object properties, click on the Plus icon and select Transcribe new track automatically.
|
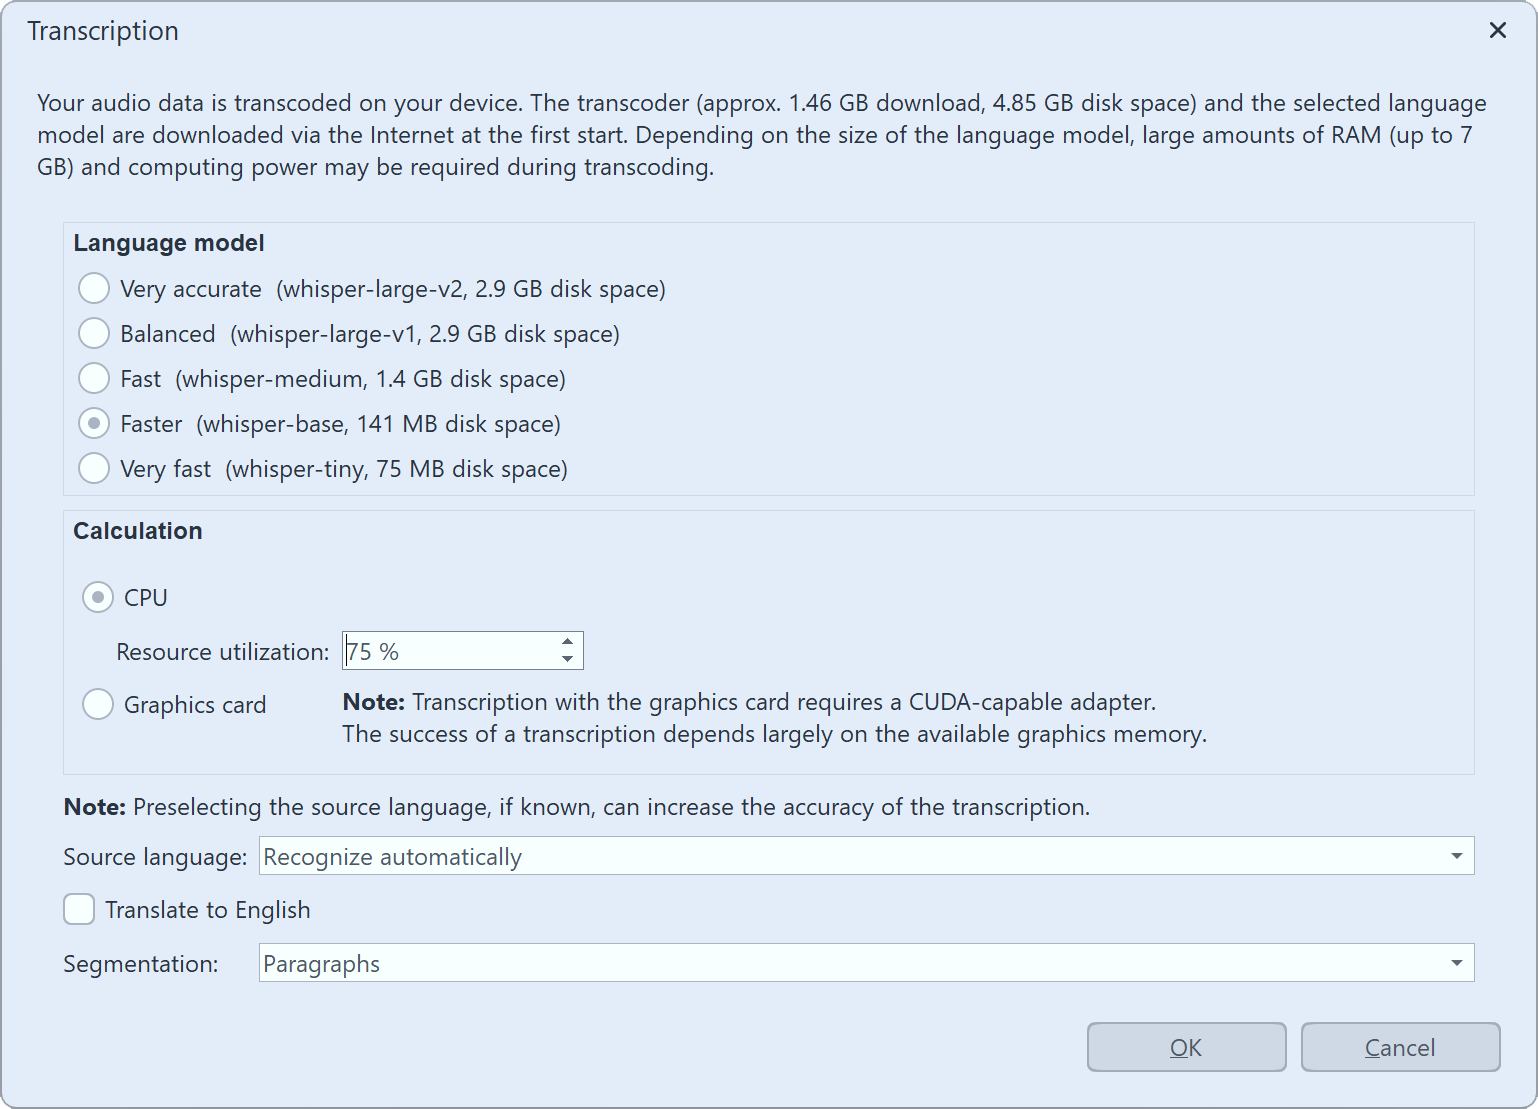
 Settings for the transcription In the next step, you can select the language model and thus influence the accuracy and speed with which the text is to be analyzed. The calculation can be carried out in the CPU or - if technically possible - by the graphics card. How long the transcription takes depends not only on the selected model settings but also on the performance of your hardware and the volume of text to be transcribed. Segmentation is used to define how many timing marks are generated. When segmenting words, each word receives a timing mark. If you select Paragraphs, you will receive the text with a separation into longer phrases. Words and paragraphs identifies paragraphs, which in turn are segmented word by word. Click OK to start the transcription. |
 Transcription symbol on the Timeline The transcription takes place in the background. At the bottom of the Timeline you will see an animated transcription symbol during the process. By clicking on the symbol, you can monitor the progress of the transcription or cancel the transcription. If a transcription is ready, you will receive a corresponding message here. |
 Language model is downloaded The first time a language model is used, it is first downloaded (Internet connection required). Once the download is complete, the transcription starts automatically. The entire object is always transcribed, regardless of whether it is cut in the Timeline or not. Click Close to close the window and continue working on the project while downloading or transcribing. |
 Apply the transcription As soon as the text has been transcribed, you will receive a message. Click the Insert button to transfer the transcription to the project. Go to the Properties of the transcribed object. In the Text tab you can now see the text and its text timing. |
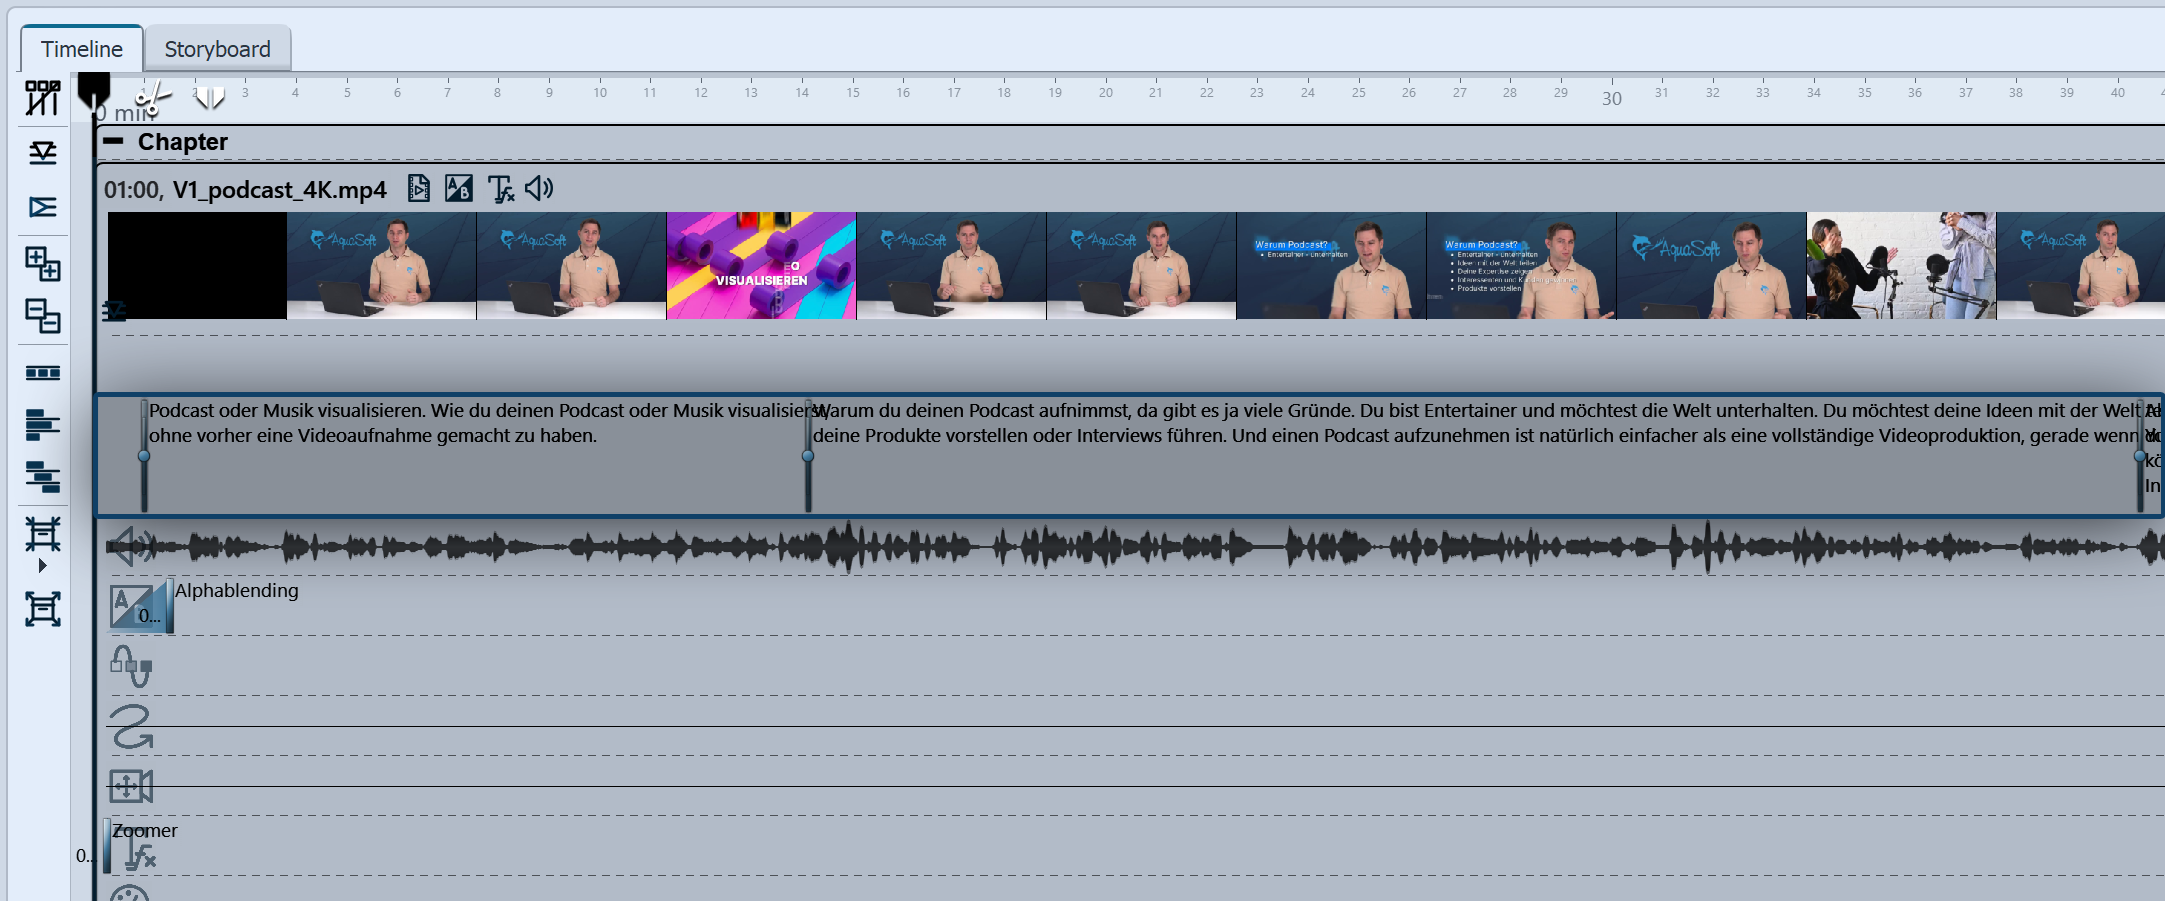
 Finished transcription in the keyframe track You can also see the text content and its timing in the object's keyframe track. Check the generated text in the object text properties and make corrections if necessary. The generated timings can also be customized. You can find out more about Text timing in the chapter of the same name. |
To remove a transcription, right-click on the video in the Timeline and select Remove transcription. Alternatively, go to the Properties of the object on the Text tab, select the text track to be deleted and click on the Trash bin icon.
If you already have subtitle files (*.srt, *.vtt or similar) for a video, you can also load these into your project. Click on the video in the Timeline with on the right and select Load transcription. Select the desired file from your computer. You can also load the subtitle file in the properties of the video, on the Text tab via the Plus symbol.