|
The Text objects which you have already become acquainted with in the previous section can also be animated with a movement path. In other words, they can "fly" across the image.
For this purpose, the Layout Designer provides the necessary tools.
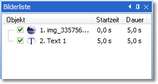
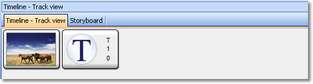
Insert an Image and a Text object into your show.
Then click the text in the Image List or on the Timeline. In the Layout Designer the tools for the movement path are now enabled.

|
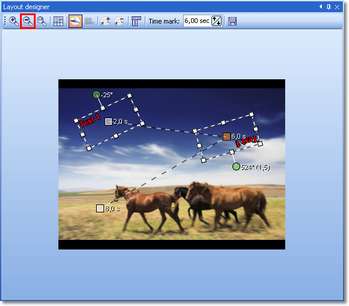
This is the icon for switching, in the Layout Designer, into the mode for movement paths. There is yet another mode for camera pans and zoom. Since this function is not available with the "Text object, the icon for the movement path mode is active.
|

|
Use this button to insert new movement markers. The course of the movement is established on the basis of these points.
|

|
In order to remove movement markers that have been set, the latter must be selected in the Layout Designer and can then be removed with this button.
|

|
In this respect, an additional menu for the movement markers is opened. This is explained more precisely later on.
|
|
The chronological course of a path is established with timestamps. They thereby determine how quickly the sequence should occur. That is clarified in an example below.
|

|
Newly created movement paths can be saved using this button and later conveniently reused. This function is only available in SlideShow Studio.
|
Inserting a movement marker
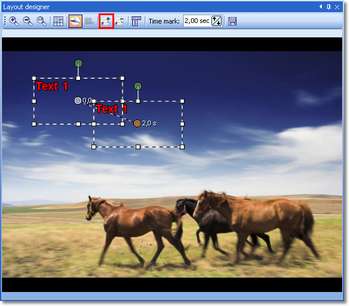
Insert a movement marker by means of .
|
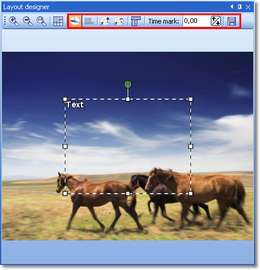
Positioning a movement marker
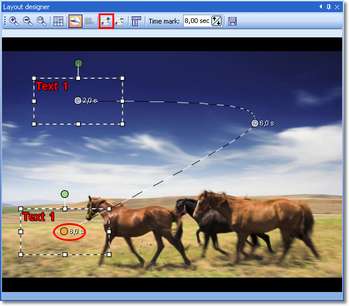
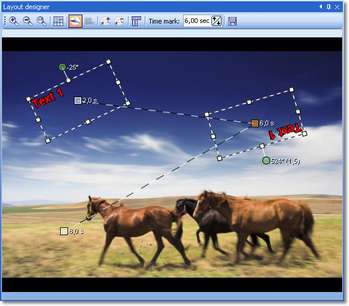
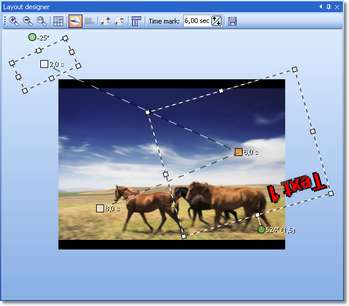
You can now drag the movement marker inserted in the Layout Designer. For that purpose you have to click in the text area and then drag the latter with the mouse button pressed down.
The orange dot shows you which movement marker has been selected
Now you can replay the show by clicking  and watch how the text moves. and watch how the text moves.
|
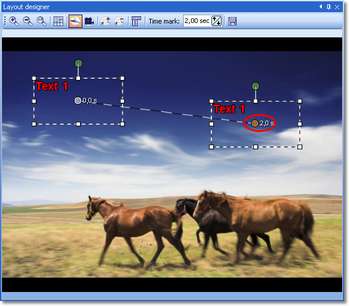
Chronological sequence
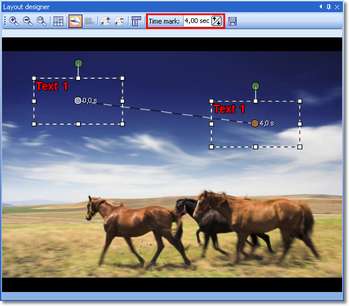
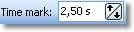
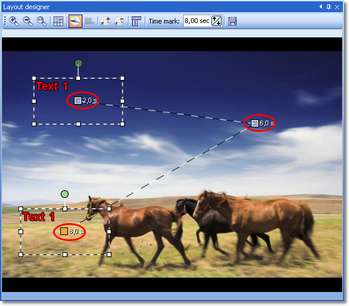
With Timestamp you can control the sequence. If you increase the time, the sequence becomes slower. If you reduce the time, the sequence becomes faster.
First increase the Timestamp of the movement point and then replay the show.
|
Starting time
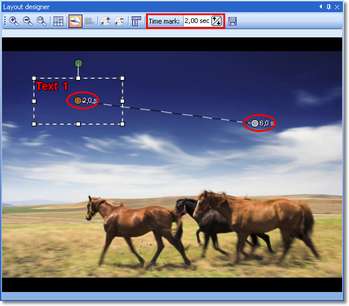
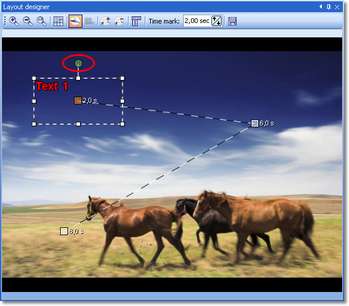
If the movement sequence is only supposed to begin after a time delay, you can increase the Timestamp with the first movement marker. For that purpose, click the movement marker and then increase the time unit. The subsequent movement markers will automatically be adapted.
|
Inserting further movement markers
You can insert as many Movement markers as you like. The new movement marker is always inserted behind the marker selected.
Select the last movement marker and with insert a new marker and position it in the Layout Designer.
Play back the show. You will find that the last part of the movement path elapses faster than the first part. You can control this for the 3rd movement point via the Timestamp.
|
Hard and soft curves
In the course of movement you can choose between hard and soft curves. With Hard curves the path will run exactly in accordance with the movement points. With Soft curves a round course of movement will take place. You can use both curve types within one path.
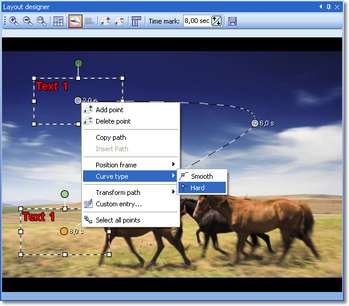
Mark a movement point. Via the right mouse button you will get the menu for this movement marker and can change the Curve Type there.
With all 3 points change the Curve Type.
You will see that the movement markers now have a rectangular marking point. With Soft curves these points are round.
In order to see the change in the path, play back the show.
|
Rotating text during movement sequence
In SlideShow Studio you can rotate or swing texts during a movements sequence also.
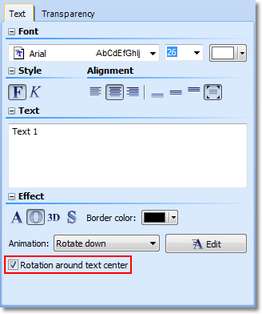
For this purpose there is a green handle above the Text field. More extensive information about the rotation functionality for Text you can find here.
First rotate the text at the first and second movement markers. Rotations through 360 degrees are also possible, to create complete rotation.
Play back the show. You will see that the rotation center is, in this respect, the midpoint of the text box. Should the rotation center be the center of the text, in the Text properties enable the Rotation in the center of the text function.
Letting the text fly in from outside
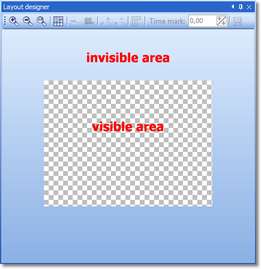
There are two areas in the Layout Designer. Firstly the visible area, and then the invisible area.

|
Enlarges the visible area in the Layout Designer.
|

|
Reduces the visible area in the Layout Designer.
|

|
Restores the normal view/window size.
|
Continue to use the show just created.
Reduce the visible area with in order to see the invisible area in the Layout Designer.
Now select the first movement marker and drag it into the invisible area.

Starten Sie das Abspielen der Show. Der Text fliegt nun von außen in das Bild hinein.
Zoom function for text
Just like rotation, this function is only available in SlideShow Studio.
Traveling along a movement path Text can increase and decrease in size. The smallest size is defined by its specified font size.
Select the 2nd movement mark and increase the size of the "position frame" of the Text-field.
Start to play back the show. The Text will now fly into the image from outside.
Further options
Via the context menu for the movement markers can be opened. With a right-click on a marked movement point, this menu can likewise be opened.
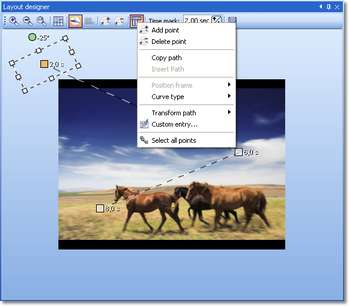
Some options have already been used above. The following further options are available:

|
A movement path already created can be copied and thus re-used with a slide show object. If you copy a movement path from a text object, this can also be inserted in the case of an image.
|

|
With this option, you re-insert a copied path from the clipboard.
|

|
If you want to be sure that the text or the image does not change size in the course of your movement path, you can set the Use the size from the previous one option here.
|

|
There are hard and soft curves with a movement path. The course of a movement can thereby be modified.
|

|
A movement path can also be mirrored or rotated. You will find the available options under this point.
|

|
A movement path can also be mirrored or rotated. You will find the available options under this point.
|

|
With this all movement markers can be selected. Thereafter it is possible to drag the movement path as a whole.
|
Manually entering the path
Manually entering the path enables the movement points to be positioned exactly.
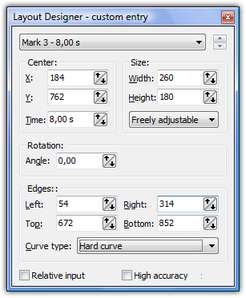
The Layout Designer is specified with a size of 1000x1000. The center of the image is therefore 500x500. Here you can directly specify the positions and sizes. You can also change between the individual markers in this window.
|