A great thing about the internet is the fast and simple sharing of any photo you take. The sad thing is there are a lot of copycats, too.
So how do you protect you photos or at least let everyone know that you are the photographer? You use a watermark. 🙂
In this blog post I will show you how to create a simple watermark with AquaSoft SlideShow.
Step 1: Create a new track
You don’t want to put a watermark on each single picture, so we create just one watermark which stays for the whole show.
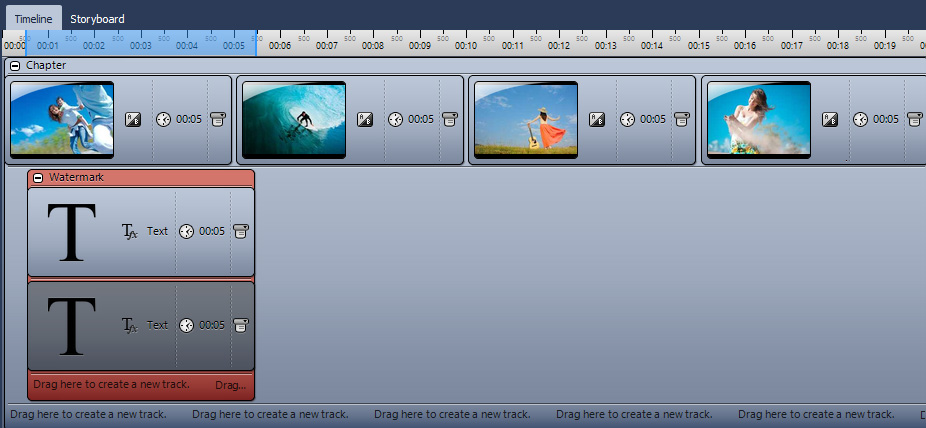
Drag a Chapter-Object from your Toolbox into the Timeline and drag all the pictures you want to have in your show into this chapter.
Create a new track by dragging a Flexi-Collage under your pictures on “Drag here to create new track”. Drag two Text-Objects into the Flexi-Collage like you see in the screenshot below.
Step 2: Arrange your text
Now there are two Text Objects in your Layoutdesigner. Drag and reposition them as you like. I would recommend putting them near to your focal point, thus it won’t be so easy just to crop the image to get rid of the watermark.
Here’s another tip for you. It always looks great if you choose two fonts which compliment each other, like Julius Sans One and Josefin Sans. You can find a lot of free fonts at dafont.com.
Here’s another tip for you. It always looks great if you choose two fonts which compliment each other, like Julius Sans One and Josefin Sans. You can find a lot of free fonts at dafont.com.


