|
<< Click to Display Table of Contents >> Program overview |
  
|
|
<< Click to Display Table of Contents >> Program overview |
  
|
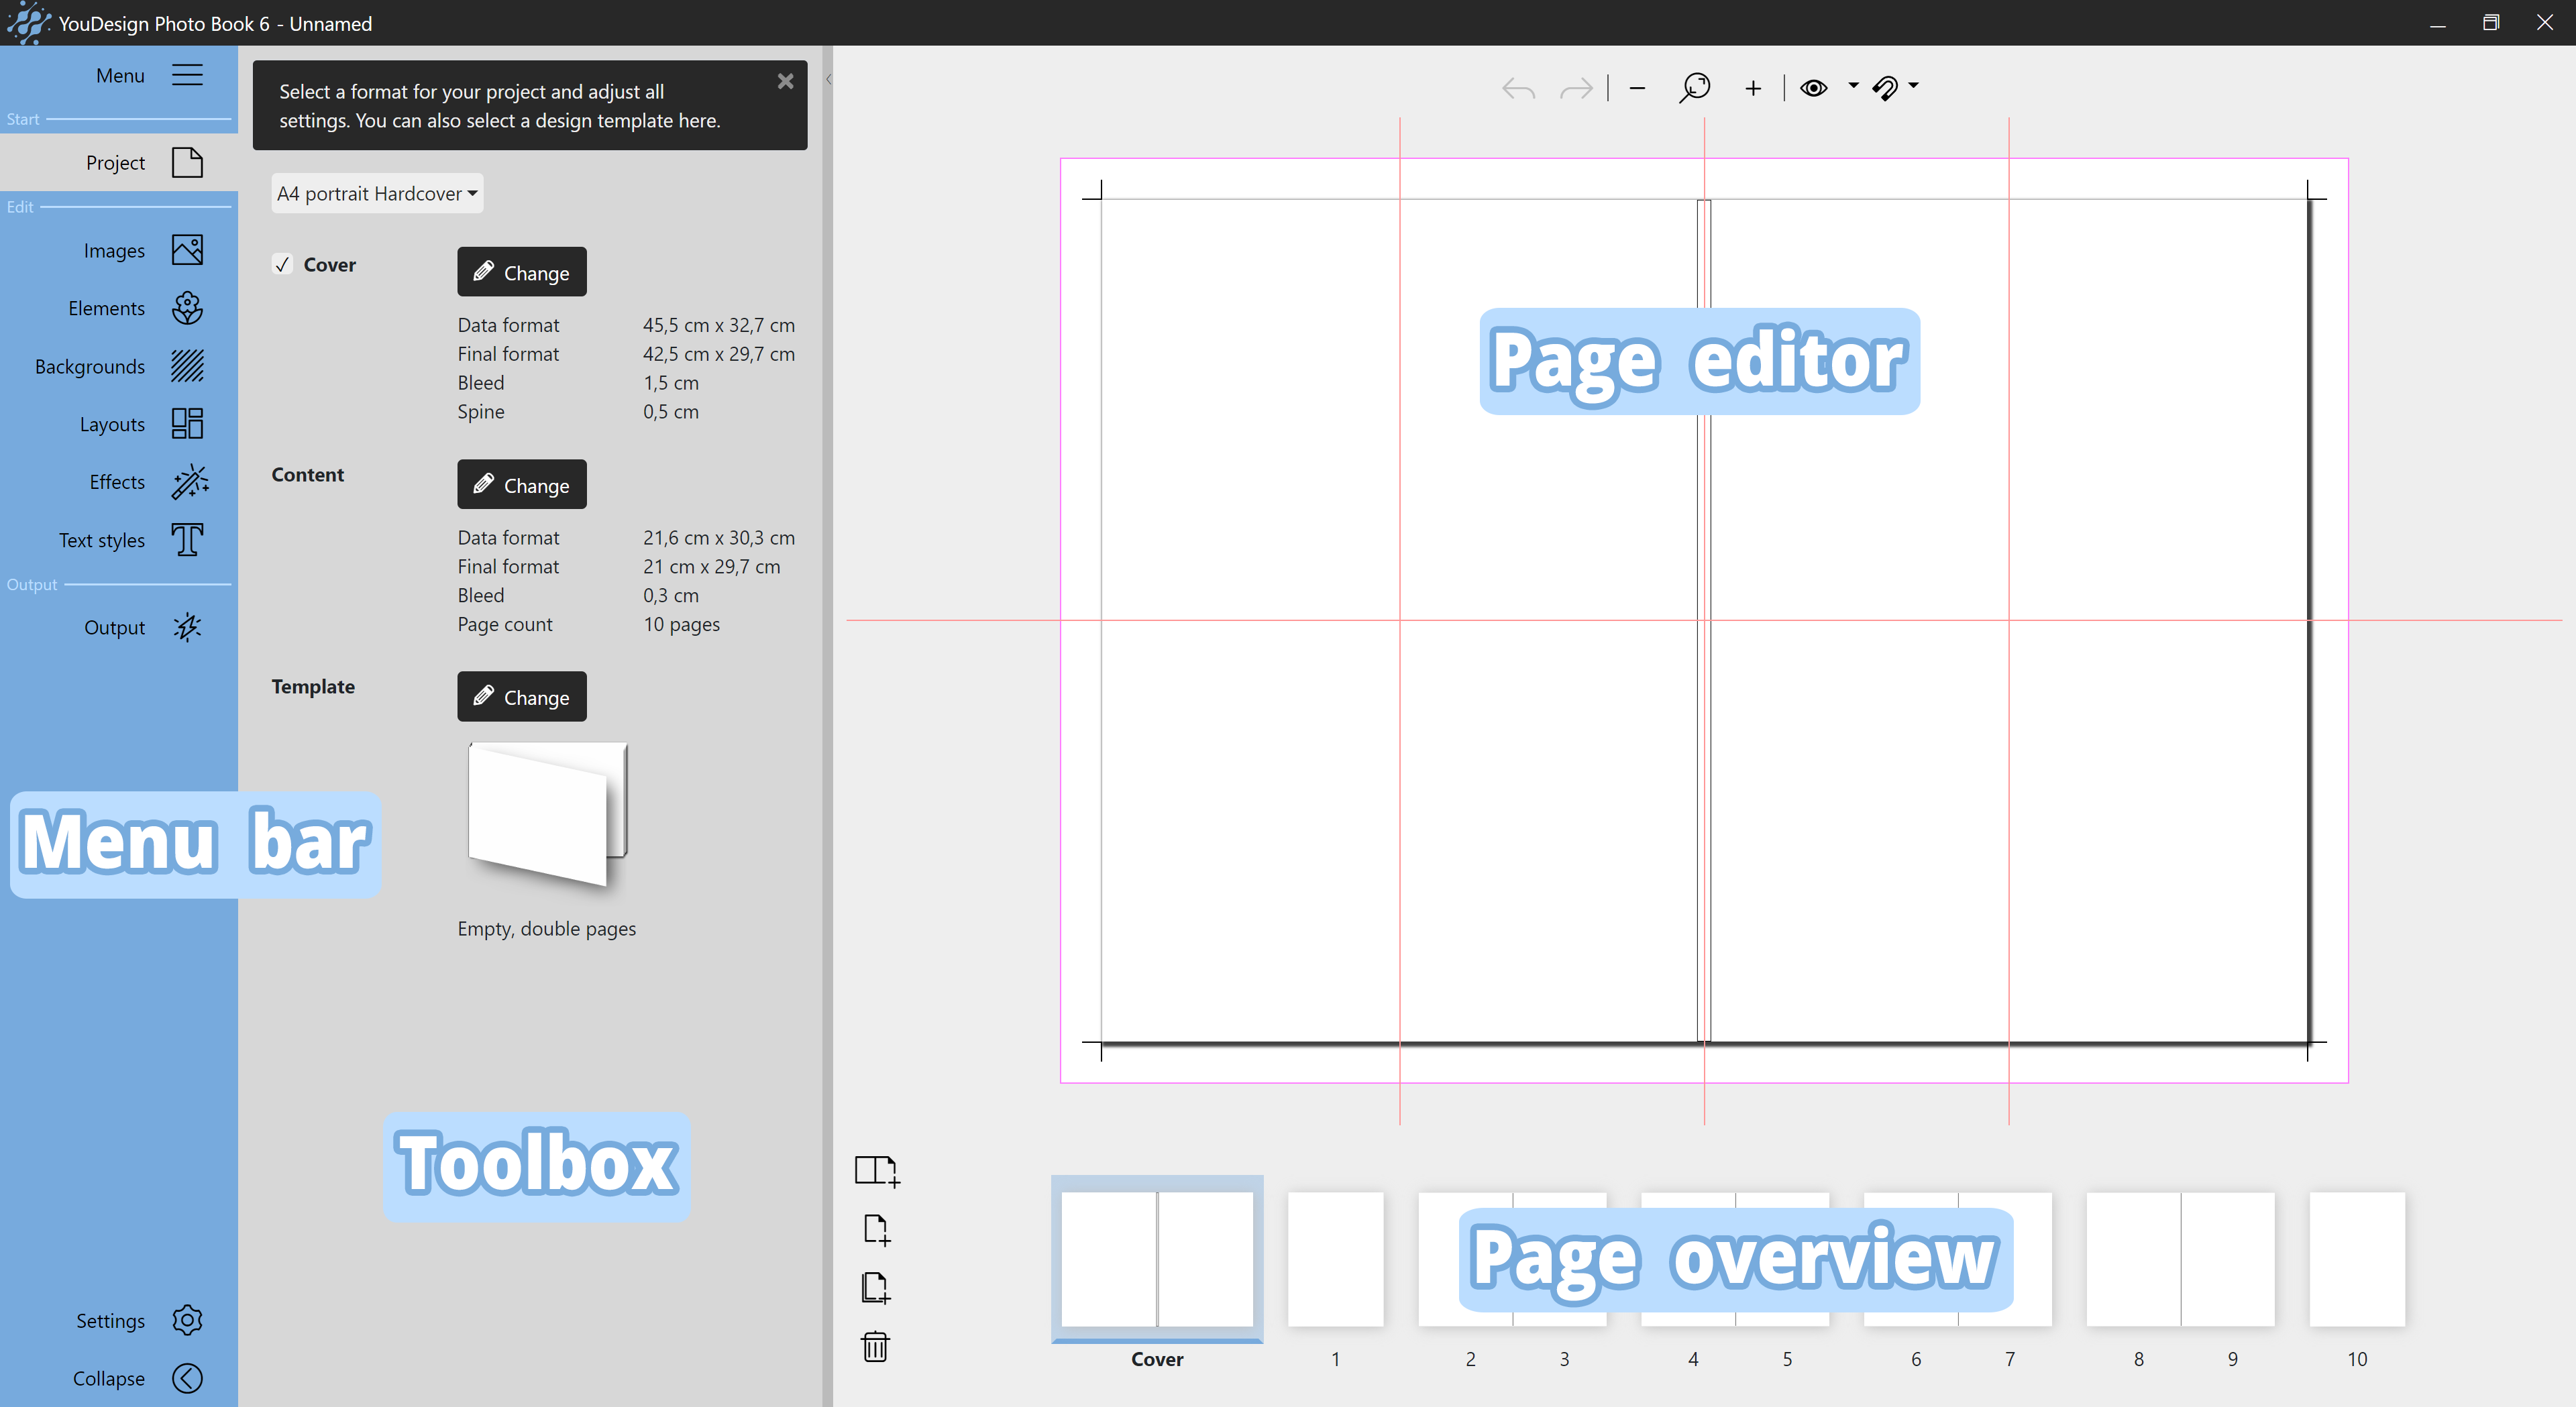
After starting the program you will see this view.

Program overview
Use the colored Menu bar on the left edge to select your work step from the Start, Edit, Output areas.
Next to it is the Toolbox with all the tools available for the currently selected menu item.
On the right you will find the Page editor, the workspace, and below it the Page overview.
|
Create new project, Open project, Save project, Save project as, Archive project, Exit program |
|
Select template, customize template or make settings for own template |
|
File browser, from which images are dragged to the page editor, and image tray, for bookmarking images |
|
Decorative elements for use in the Page editor |
|
Full-page background designs for use in the Page editor |
|
Image arrangement layouts for use in the Page editor |
|
Effects for photos, decorations and text elements for use in the Page editor |
|
Text objects for use in the Page editor |
|
Project output |
|
Activate/deactivate language settings, hints and dialogs |
|
Minimize/maximize the Menu bar |
In the Toolbox you will find the tools for creating your photo book. The detailed descriptions of the tools can be found in the following chapters.
For the tools Images, Elements, Backgrounds, Layouts, Effects, Text styles you will find a slider at the bottom of the Toolbox to change the zoom level of the Toolbox.
With Search and a keyword you can search the respectively opened Toolbox. Click on the crossed-out circle symbol to remove your search word. You will then be shown all the selection options again.
In the Page editor, you can see how images and text are arranged on the book pages. The Page editor is your workspace for placing objects.
Move images, backgrounds, decorations and texts to the desired position. Use the handle points on the objects to zoom in or out. Arrange your images using image layouts and apply image effects.
|
Undo last action (can be executed multiple times) |
|
Restore last action |
|
Reduce page view / Enlarge side view |
|
Zoom page view to full size |
|
Activate/deactivate display of bleed, crop marks, center lines Pro version Show/Hide Ruler, Show/Hide Custom auxilliary lines |
|
Enable/disable snapping to centerlines, page margins, rotation grid, bleed, elements. Pro version Enable/disable snapping for Custom auxilliary lines |
 Toolbar with top ruler Rulers Pro version In the Pro version, the Page editor is bordered by rulers on the left and top. You can show/hide the rulers at the Grid item. |
You can use the following tools to align objects on a page or spread.
|
Alignment: Align to selection / Align to side / Align to left side / Align to right side |
|
Align left / Align right / Align top / Align bottom |
|
Center horizontally / Center vertically |
|
Mirror axis: Center of the selection / Center of the page / Center of the left side / Center of the right side |
|
Mirror vertically / Mirror horizontally |
You can find application examples for Change alignment and Mirror in chapter "Layouts"
Right-click on objects in the Page editor to find more functions.
|
Properties - changing properties of the element |
|
Edit crop - crop image or change image crop |
|
Cut - cuts out the selected element |
|
Copy - copies the selected element |
|
Paste - inserts an element from the clipboard |
|
Delete - deletes the selected element |
|
Placement - change the arrangement of the element |
The properties of an object can also be opened by double-clicking on an element in the Page editor.
In the lower Page overview, click on the individual pages or the book cover to edit them in the Page editor. With the icons on the left edge you can add or remove book pages.
|
Inserts a new double page after the selected one. |
|
Inserts a new single page after the selected one. |
|
Duplicates the selected page and inserts it after the selected one. In the next step you can enter the number of copies. |
|
Deletes the selected pages. |