|
<< Click to Display Table of Contents >> Archiving and PC presentation |
  
|
|
<< Click to Display Table of Contents >> Archiving and PC presentation |
  
|
A lot of time, work and effort often goes into an extensive and effective presentation. It is annoying when this work is lost. When your presentation is complete and ready to be shown, the Archive, Protect and Share Project wizard gives you the option to
•save the presentation and all the files used
•export the presentation for playback on another PC
•burn a CD/DVD with the backup or the PC presentation
With archiving you can be sure that all used data (images, music, videos) are really together in one place. An archived project contains only relative file paths and can therefore be moved around on your PC as you wish without the risk of images not being found. The archiving function thus also helps you if you want to move from one computer to another with a project you have started.
|
It sometimes happens when opening old projects that images are no longer displayed. |
A project consists of various files. These include images, videos, and music tracks. All these data are located on your hard disk or other storage media that you have connected to your computer. In ads project, the images, videos and music tracks are not saved again. The program only remembers the location where the files can be found, thus saving disk space.
If you want to save all the files belonging to your project in one directory, the Archive, Protect and Share Project wizard will help you. If you also want the archived project to be directly playable, a player can be archived along with it.
The wizard helps you to burn your projects with all data on CD/DVD or archive them on the hard disk or USB stick.
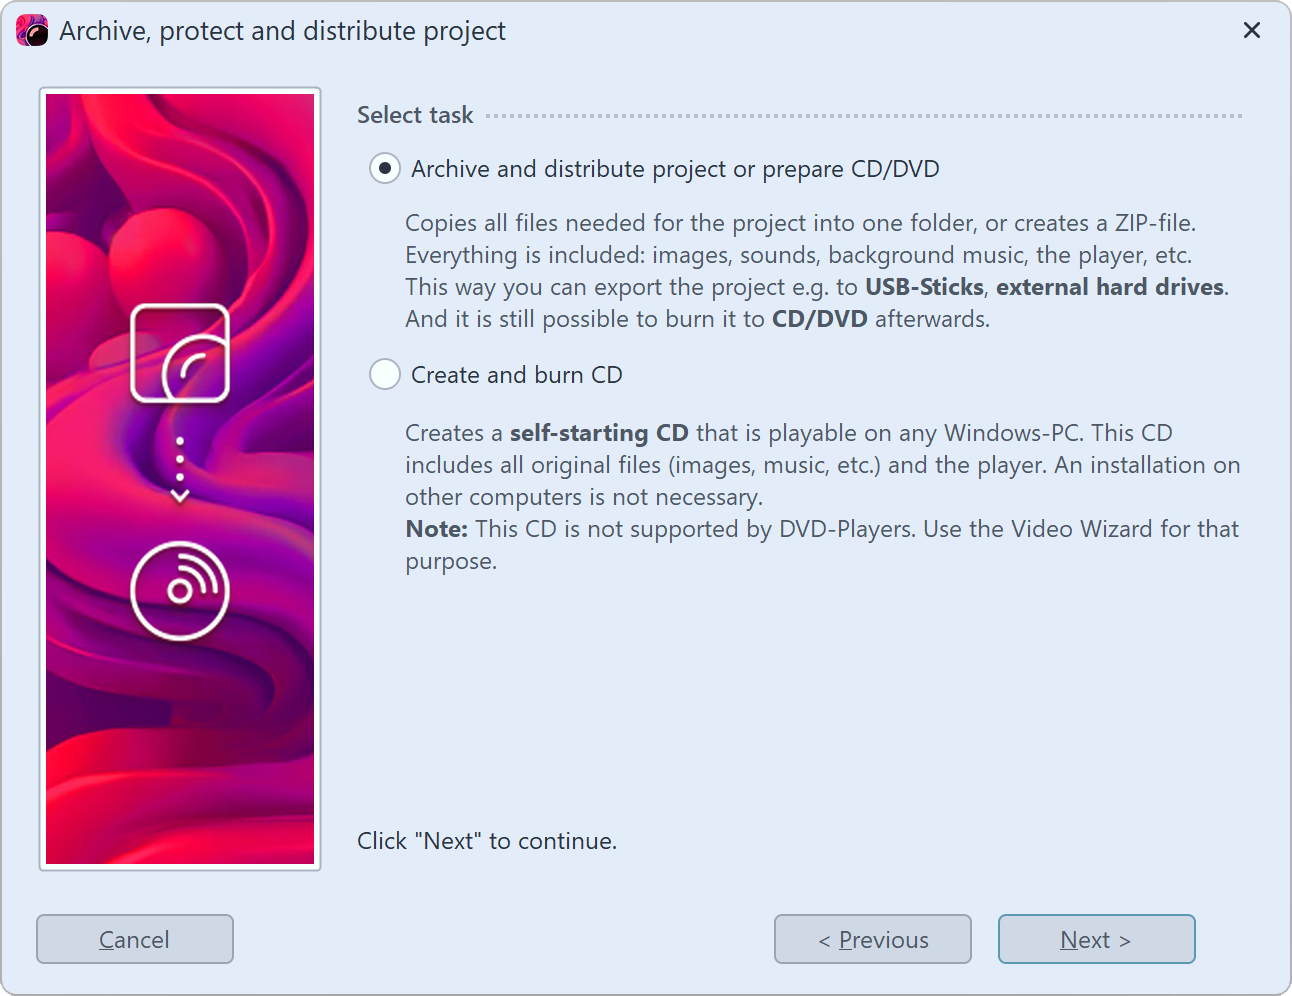
 Task selection 1 Open wizardUnder Wizards you will find the Archive, Protect and Share Project wizard. After the introduction, click Next. Two options now await you: |
1. Archive, share project or prepare CD/DVD.
You can create a directory or zip file from your project here. This storage method is ideal for archiving your projects, sharing them via virtual file storage, hard drives or USB sticks.
2. Create and burn a CD
Create a CD that starts itself when you insert it into the drive. The program software does not need to be installed on the computer where the CD will be inserted.
Select an option and click Next.
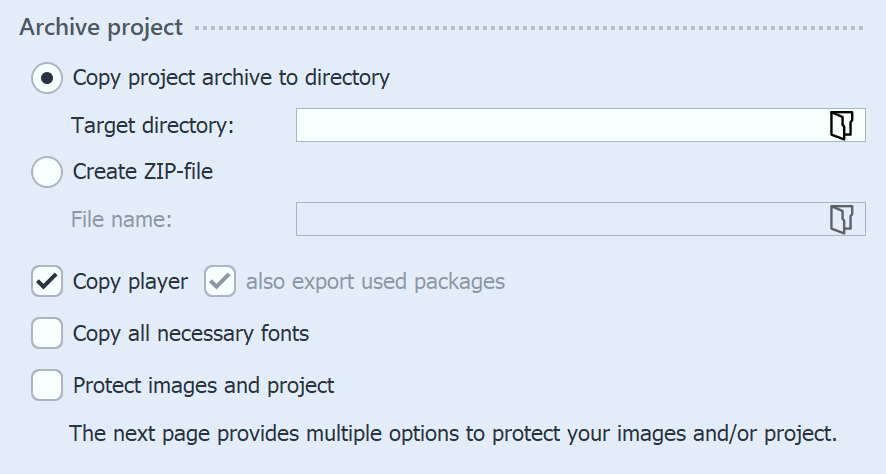
Option 1: Archive project  Archive project This option allows you to save all data (ads file, images, music, videos) in a common directory, so the project can be archived optimally. You can then save the finished directory on a USB stick or on an external hard drive, for example. Under Destination directory, specify where the data should be saved. |
If you want to create a zip directory right away, activate the corresponding option. When you have enabled the option, click the small folder icon in the File name field. Then select a location and enter a file name.
You should copy the Player and the used packages to be able to play the presentation on computers where AquaSoft Vision or Stages is not installed. Without this Player, you will not be able to play the presentation there otherwise. Without packages, some effects might not work properly as well as program's own files or elements from extension packages might not be displayed. Click Next and the desired operation will be started.
When archiving only for the own computer on which AquaSoft Vision or Stages is installed, the Player and the used packages do not have to be archived as well, since the program resources can always be accessed here.
Copy required fonts - If you have used special fonts that may not be available on other PCs, you can copy the fonts used in the project so that they will play on other computers later without any problems.
Protect images and project VIDEO VISION STAGES - If you want to share the project but do not want to allow access to your images, you can encrypt your images.
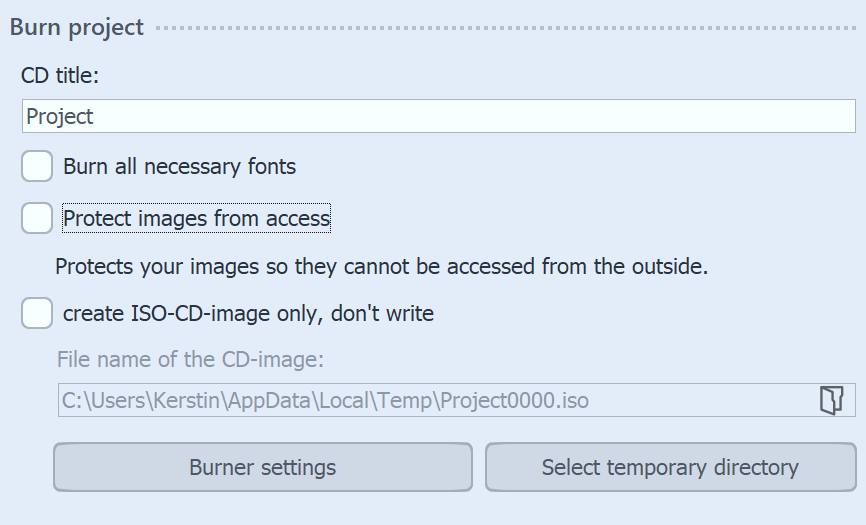
 Create and burn a CD Specify a title for the CD/DVD. This title will be used as the name of the CD/DVD. If you have used fonts that you are not sure are installed on other PCs, you can burn them to the CD/DVD as well. Protect images from access - If you want to share the project but do not want to allow access to your images, you can have your images protected. Please see the notes in the previous section. If you only want to create an ISO image, select this option. The project is not burned during this step. |
|
If you edit an already exported project and change files in the process (images, sounds, videos, fonts), then the project must not only be saved, but exported again, especially if you want to play it from an external storage medium. Only then is it guaranteed that all newly used resources are also present at the archiving destination. |