|
<< Click to Display Table of Contents >> Output as video |
  
|
|
<< Click to Display Table of Contents >> Output as video |
  
|
 Video Formats in Video Wizard (Video Vision) In AquaSoft Vision and Stages you have many different options to create a video from your project. There is something suitable for almost every purpose and for every device. The Video Wizard helps you find the right video format for your purposes. |
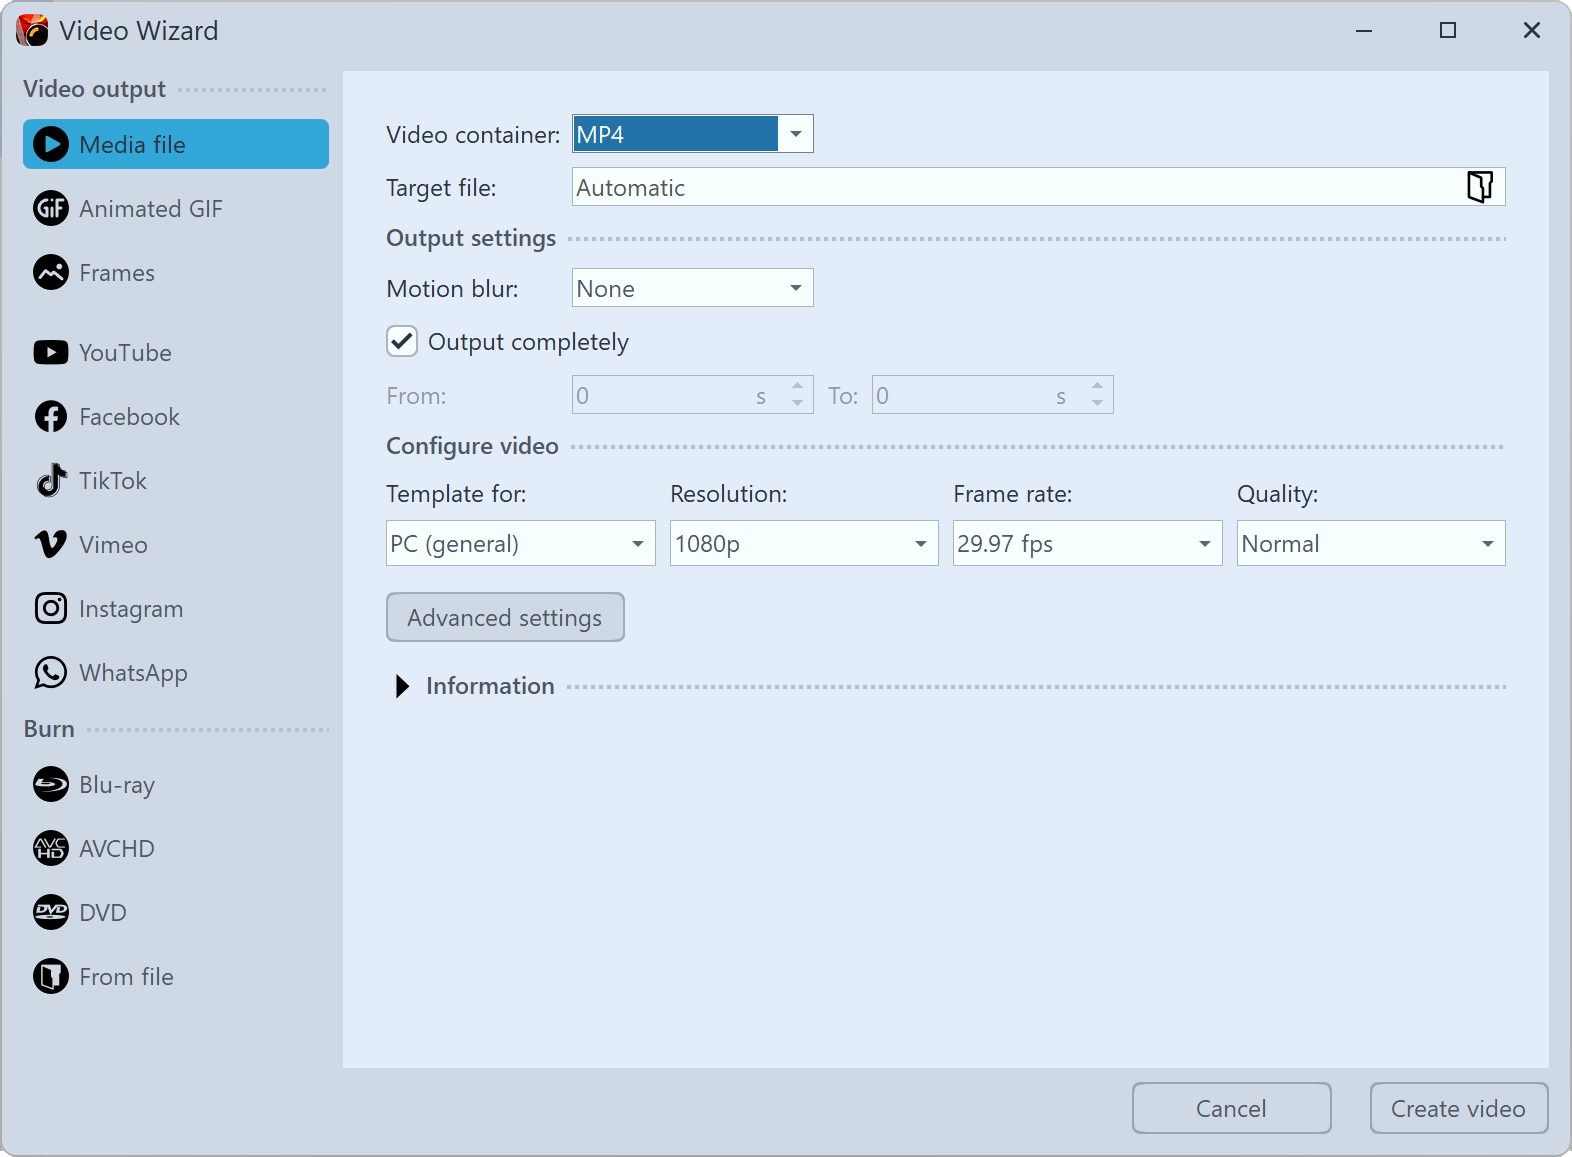
To get to the video creation, call up the Video Wizard via the Wizards menu. Then, under Video output in the left column, select the desired video format.
Media file |
A wide range of video formats, such as MP4, MOV, MT2S and more. Suitable for PC, TV, tablets and smartphones. |
Animated GIF |
Export your project as GIF. Suitable especially for smaller animations. |
Frames |
Save PNG or JPEG files from your project. |
Social Media |
Create videos that are already optimized for popular video portals or social media platforms. You can upload the results there directly. The prerequisite for this is an account with the desired network. |
 Video Wizard with information unfolded (Video Vision) For each media file type, the Video Wizard already provides settings. As soon as you make a selection at the Video Container item, you get suitable templates and setting options. Under Template for you only have to select which resolution you need - the Video Wizard will do the rest for you. Under Destination file you specify in which directory the video file should be saved, here you can also give the file a name. With one click on Create video, the video will be generated.
|
 Video assistant with supersampling option (Stages)
|
Option |
Meaning |
Video-Container |
Here you can change the file format. |
Target file |
Select the location of the file here by clicking on the folder icon. |
Motion blur |
VIDEO VISION STAGES Choose whether to create the project with or without motion blur. |
Output completely |
If the checkmark is set, the complete project will be calculated as video. Otherwise you can choose which from-to range of the project should be exported. |
Supersampling |
STAGES The image is calculated with higher details and then scaled down to the target resolution. With supersampling (activated by setting 2x), the calculation time increases. |
Template for |
Here you can choose from various presets that fit specific devices. |
Resolution |
Number of pixels in the height. The width is automatically calculated to match the aspect ratio. |
Frame rate |
Anzahl der Einzelbilder pro Sekunde |
Video encoder |
Auswahl verschiedener Codecs zur Komprimierung der Videodatei. |
Quality |
Darstellungsqualität Hoch, Normal oder Niedrig - mit jeder Einstellung erhalten Sie qualitativ gute Ergebnisse. Je höher jedoch der Wert ist, desto größer wird die Videodatei. Wägen Sie wenn nötig sichtbare Unterschiede der gewählten Darstellungsqualität gegen die Dateigröße ab. |
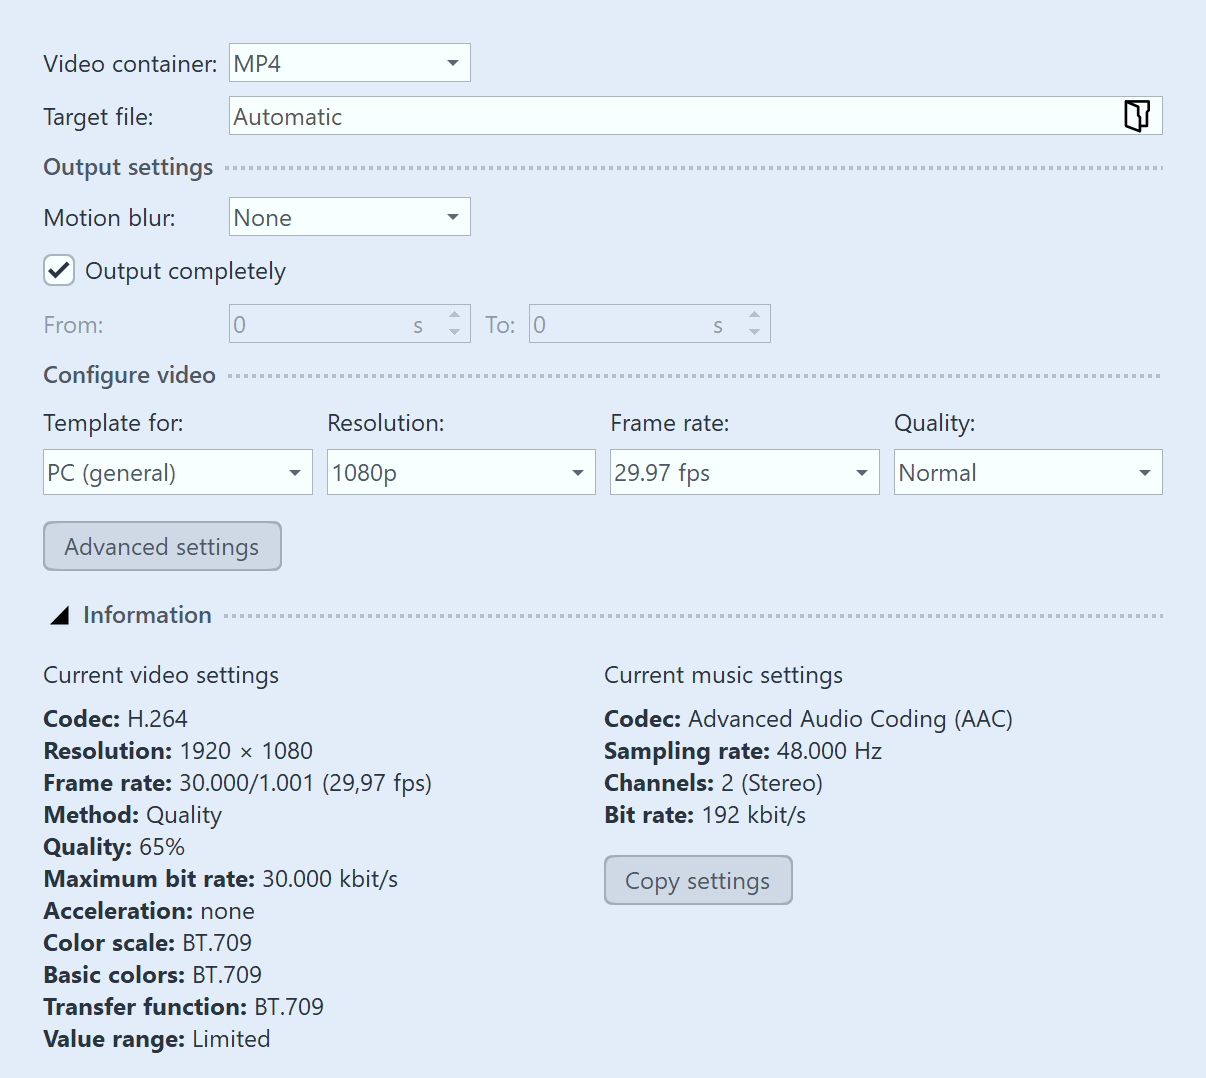
Expand the Information item to see details about the selected export setting.
The Copy settings button copies the selected settings to the clipboard. Paste them into text files or mails for your documentation purposes if needed.
3 Advanced settings VIDEO VISION STAGES
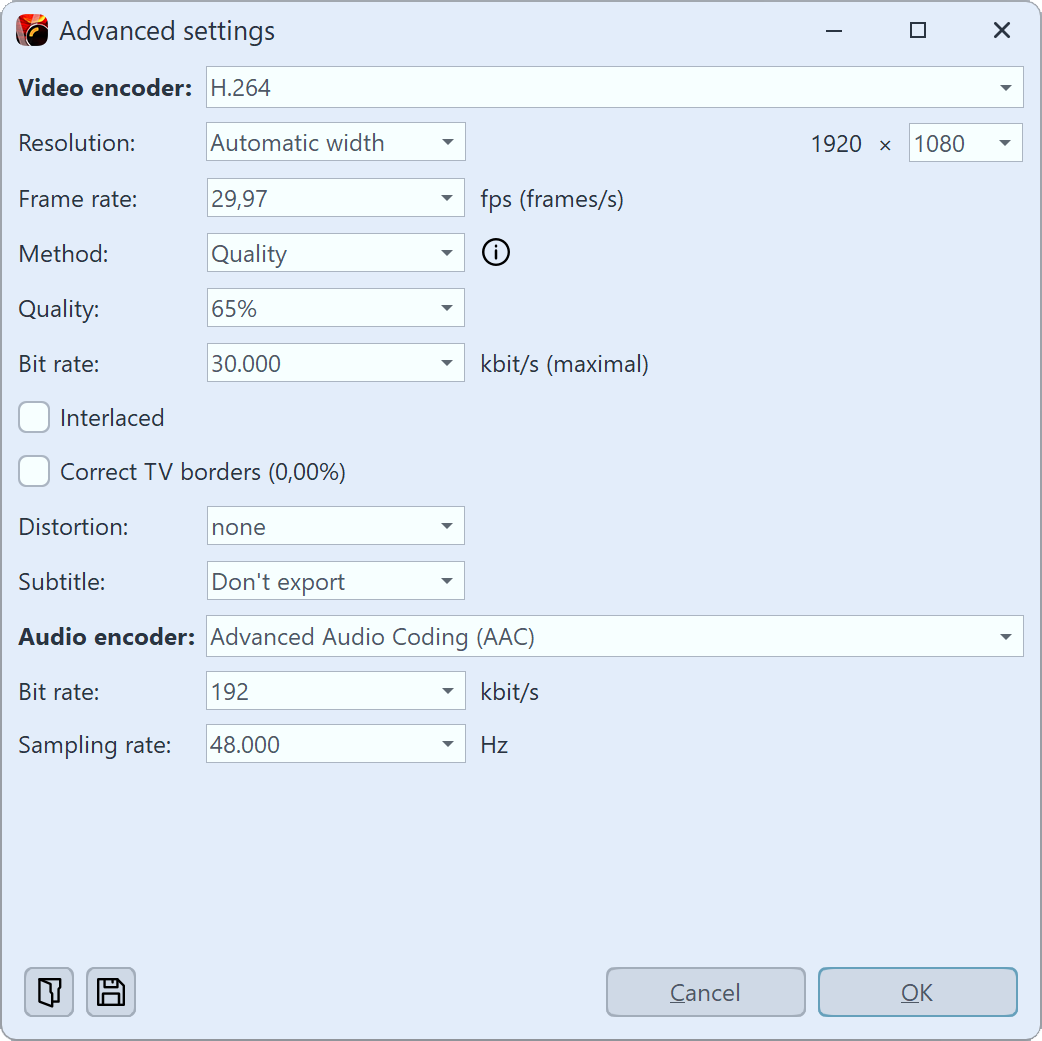
 Additional settings If you want to make more advanced changes to the settings, you will have full access to them in the Advanced settings section. Click the Advanced settings button to modify the templates. You can save your own settings as a template for later use. To do so, click the save icon at the bottom left. The template is created as a vwp file. After reopening the video wizard, you will find your template with for selection in the template list. You can manage your saved export templates via the folder icon at the bottom left.
|
Video encoder / Acceleration |
Method according to which your video is compressed. Depending on the selected container format and codec, different setting options are available. Depending on the graphics cards available in the system, hardware-accelerated encoding can also be selected here. If no hardware acceleration is selected, only software encoding is used. |
Resolution |
Number of pixels in height and width. The width or height is automatically calculated to match the aspect ratio. Individual values can also be set via the Free resolution selection. |
Frame rate |
Number of frames per second. |
Color depth STAGES |
The color space can be exported with 8 (default), 10 or 12 bit color depth, depending on the selected encoder. |
Acceleration |
Here you can activate hardware-accelerated encoding (if necessary, run Search for acceleration hardware... first). |
Method |
Quality selection: Here you specify the display quality. The higher the value here, the larger the file. At 85% the highest display quality is already reached. You can select 100% if you want to further process the video in another application and the generation loss should be reduced when rendering again. For normal videos, the setting with 100% should not be used, because you have an extremely large file volume, but visually would not provide any added value. |
Bit rate |
Data volume output in kbit per second |
Interlaced |
Half-frame method to make movements appear "smoother". |
Correct TV borders |
Some TVs cut off the edges of the film. How much this happens varies from device to device. To make the full image visible, the wizard can reduce the image. You can also set different edge distances for this purpose. |
Distortion |
As a rule, the default "None" can be retained. This setting is only relevant for the special case of DVDs, since their image size of 704 × 576 or 720 × 576 corresponds to neither 4:3 nor 16:9. If you now create an MPEG video for a DVD, for example, you must first select the appropriate template (e.g. DVD (PAL, 16:9)) according to the selected project format, and the pixel format is then automatically adjusted to "fit 16:9 presentation". |
Subtitle |
Existing subtitles can be integrated into the video file as metadata or saved as an SRT file. |
Audio encoder |
Selection of different codecs to compress the audio file. Selecting "No audio" creates a video without sound. |
|
Photos and videos are displayed in the program with 8 bit color depth. Photos are converted to sRGB, any embedded color profiles are detected during loading and taken into account during conversion. |
|
Deepen your knowledge about creating video in our blog post "Videoerzeugung – Diashow als Video ausgeben". |
For all devices for which you want to create a video, you should first take a look at their operating instructions. There are almost always listed the video formats that the device can play. The video formats given here are only recommendations, not all devices accept these formats reliably.
Device/Purpose |
Video format |
Smartphone, Tablet-PC |
MP4 with H.264/H.265 encoder |
TV |
MP4 with H.264/H.265 encoder, M2TS, each with procedure Bitrate (constant) |
Multimedia hard disk |
MP4 with H.264/H.265 encoder, WMV, M2TS |
PlayStation Vita/Portable |
MP4 with H.264 encoder |
Apple devices |
MP4 with H.264 encoder, MOV with H.264 encoder |
Transparent Videos |
WebM |
 Click folder icon Click the Folder icon under Target file. Choose a location on your computer that you can easily find again. After creating the video, you can then transfer it from the location to the USB flash drive. Alternatively, you can also choose the USB stick as the storage location.
|
|
The way a USB flash drive is formatted plays an important role if the video file created is larger than 4GB. |
The various export options make it easy for you to publish your presentation on your own homepage or on the web. The video can either be stored at a video portal or on your own web space. The advantage of the video portal is that you already get a player that can play the video. By means of an easy-to-copy code, you can embed the video on your homepage with little effort.
See the "Web / Social Media" chapter for more information.
If you want to share the video on your own storage, you need a separate player to play the video directly. Some video formats are played by current browsers (you may need to install an extension) without a player, including the WebM video that you can create using the Video Wizard.
7 Output result
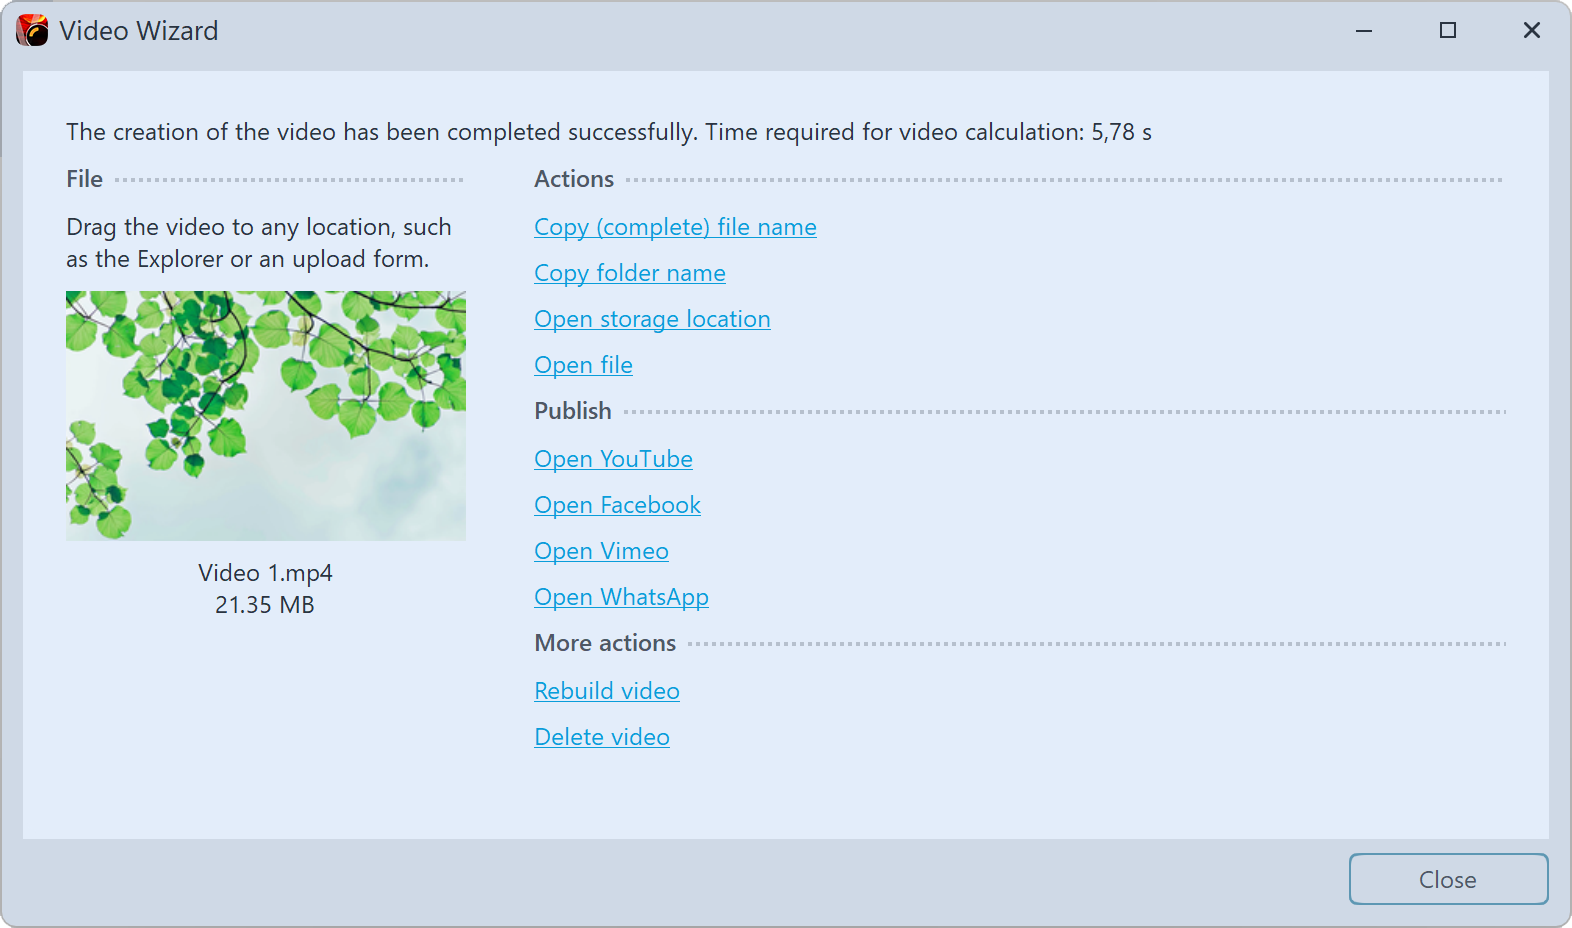
 Output result If the video was created successfully, you can play, process or share the result. Start playing by double-clicking on the video thumbnail or via Open file.
|
|
Learn how to export videos with motion blur in the video "Natürlichere Animationen mit Bewegungsunschärfe (Motion Blur)". |