|
<< Click to Display Table of Contents >> Subtitles in different languages |
  
|
|
<< Click to Display Table of Contents >> Subtitles in different languages |
  
|
VIDEO VISION STAGES
Subtitles are suitable as language translation and as an aid to understanding. They help to ensure that your message is accessible and can be appreciated by a wider audience.
You can create multiple subtitle tracks if you want to include subtitles in different languages.
If you save your Project as a video and upload it to e.g. YouTube or Facebook, you can choose to superimpose subtitles on these platforms.
|
The subtitles are not intended as a substitute for the caption or Text Objects. They will not appear in your presentation. Only when exporting to video, the subtitles are included as metadata in the video file. It is for the respective video player software to view and format the subtitles. |
We recommend that you create the subtitle track as a last step before completing your project. At that point you will already have all sounds and videos in the right place and know at exactly at which point you have to use subtitles.
In the following guide you will learn how to generate and display subtitles.
It is ideal if you have a good overview of all the subtitles in the Timeline. For this, package your project into two Chapters.
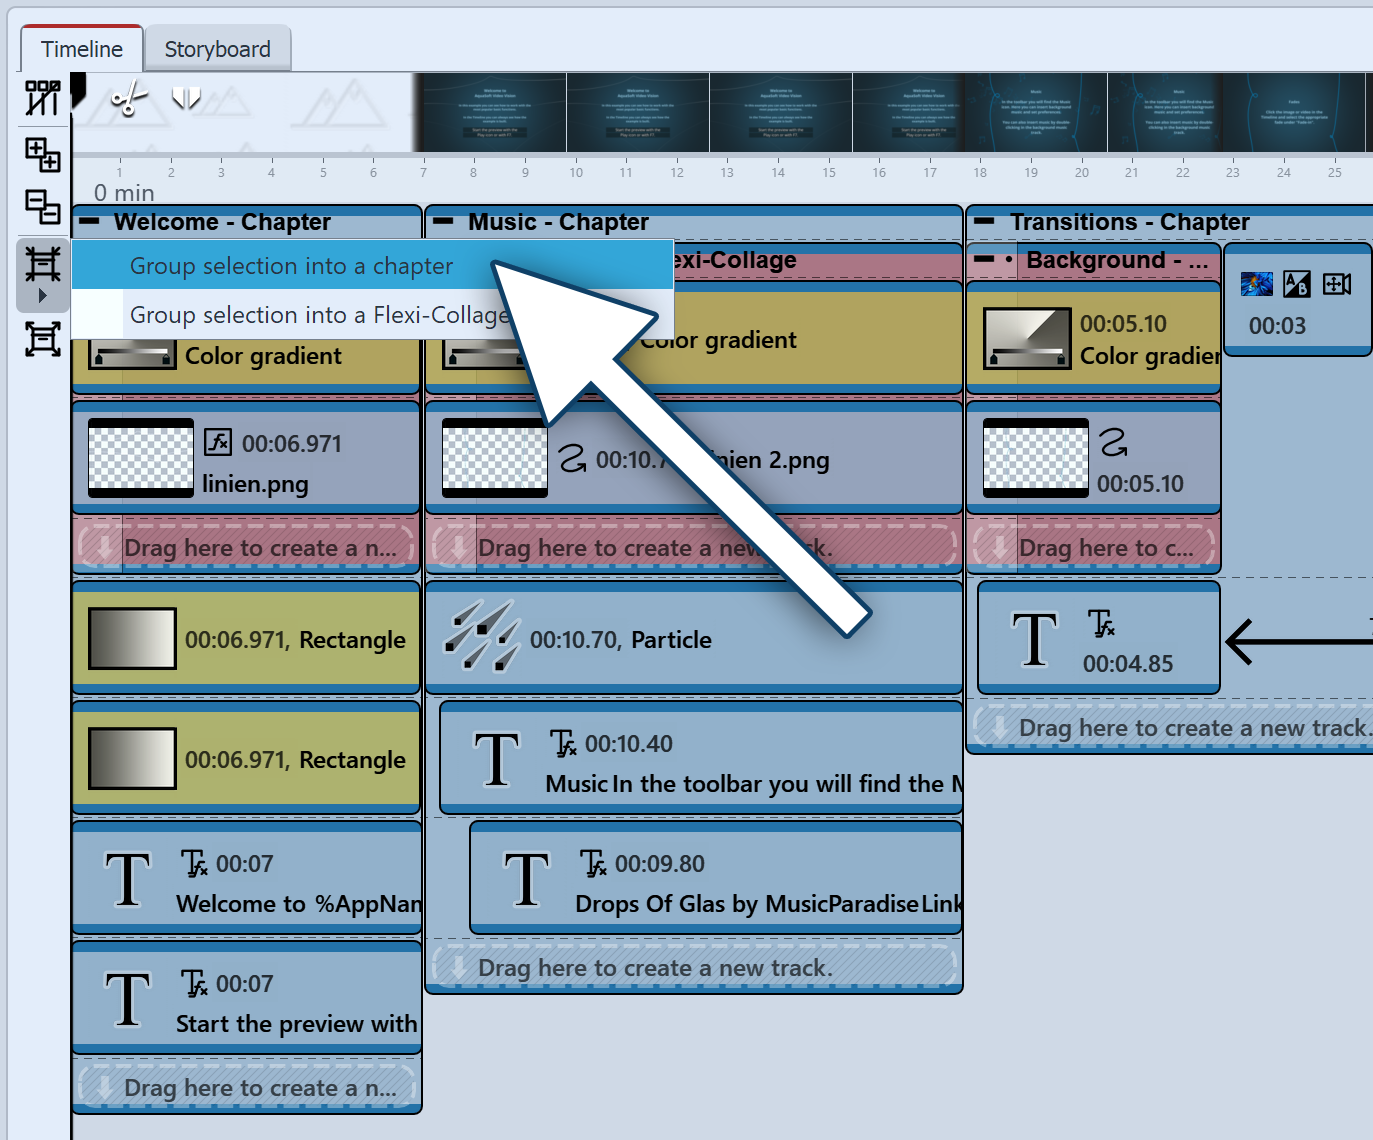 Combine selected objects into chapters First select the complete project in the Timeline. Click the Group icon on the left edge of the Timeline and select Group selection into a chapter. |
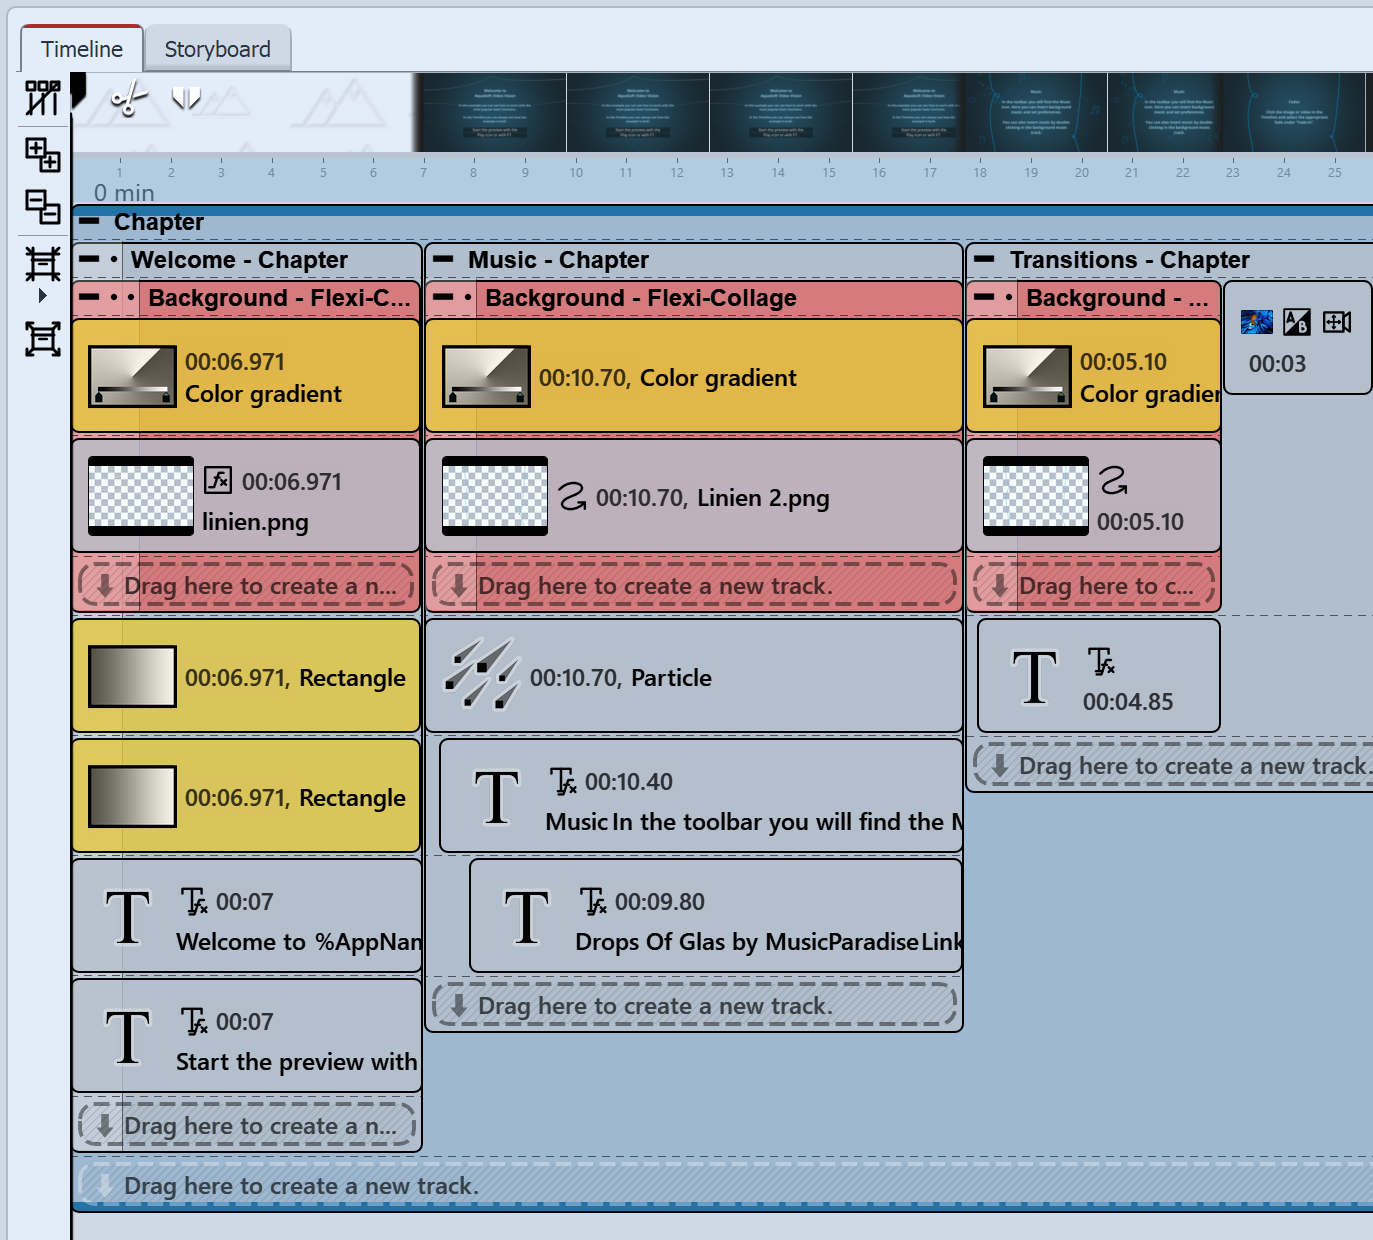 All objects are enclosed by chapter All objects are now enclosed by the new Chapter object. |
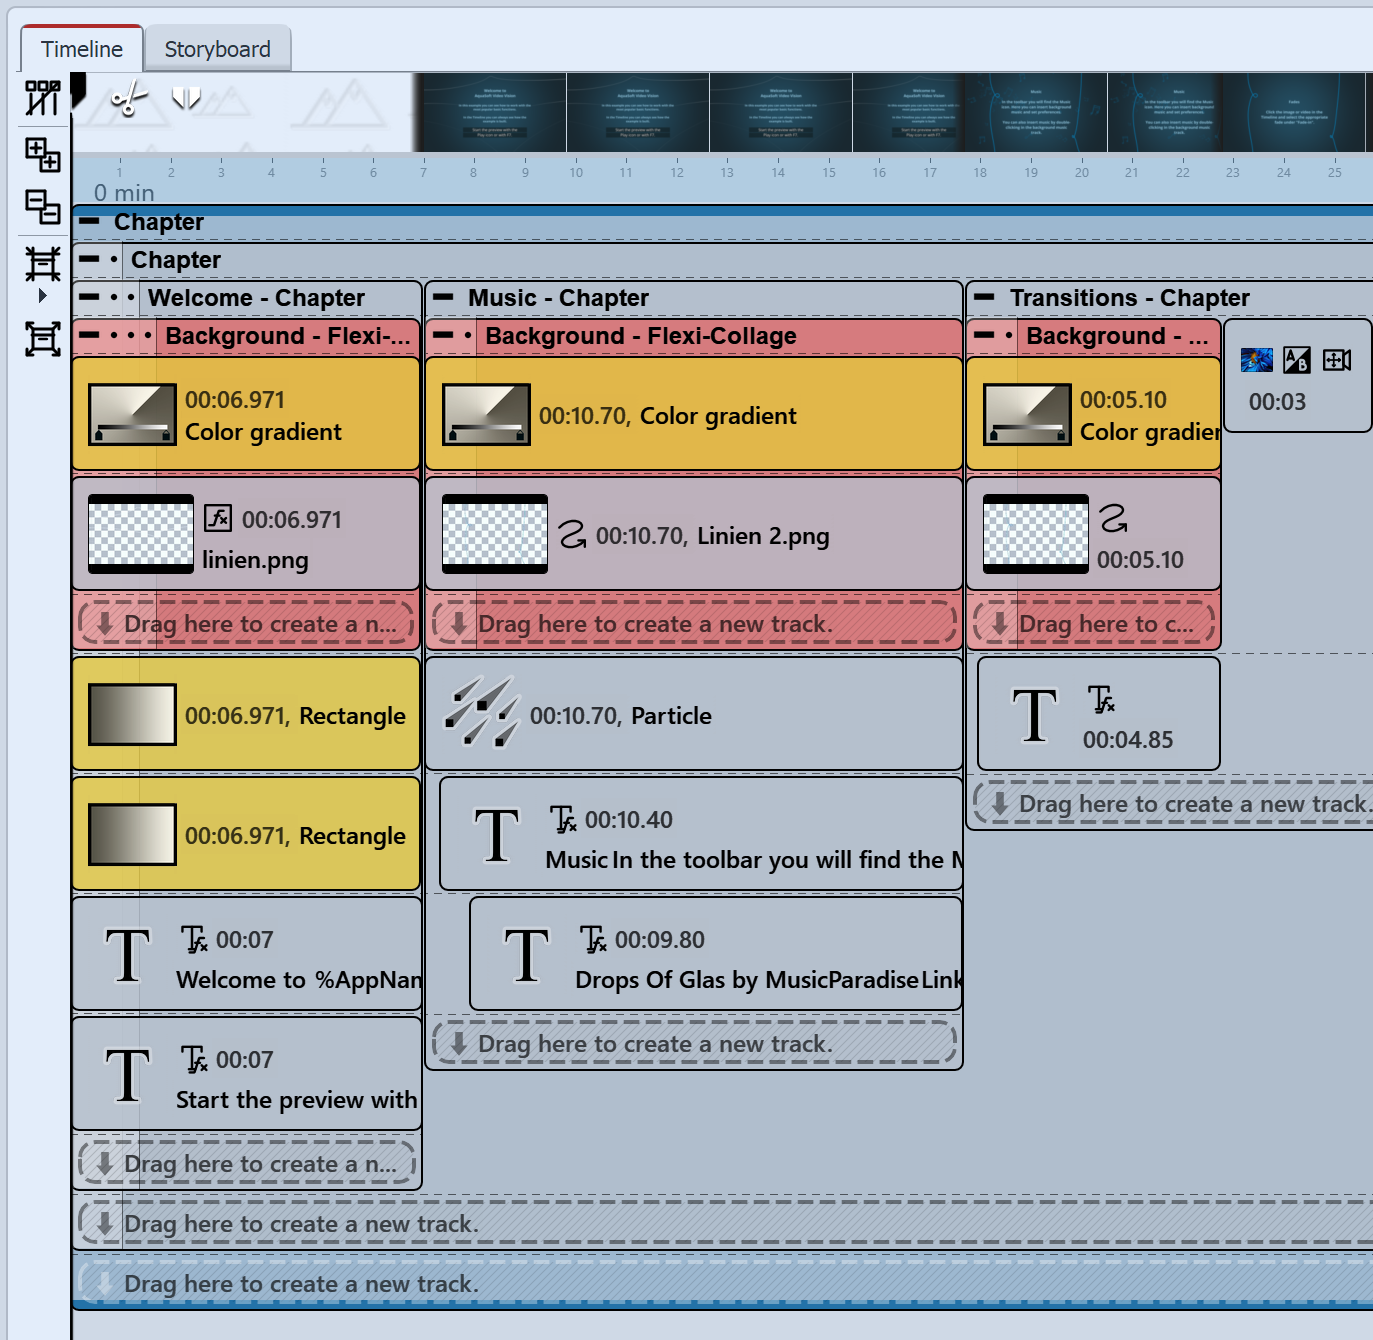 Chapter is enclosed by further chapter Repeat the last step to put the existing Chapter into another chapter: Select the collapsed Chapter and click the Group icon on the left Timeline border again. Select Group selection into a chapter again. Collapse the inner Chapter object by double-clicking on the Chapter frame or clicking once on the Minus symbol. Now you have a clear Timeline and, when you unfold the inner Chapter object again, you can view the contents of the project in detail. |
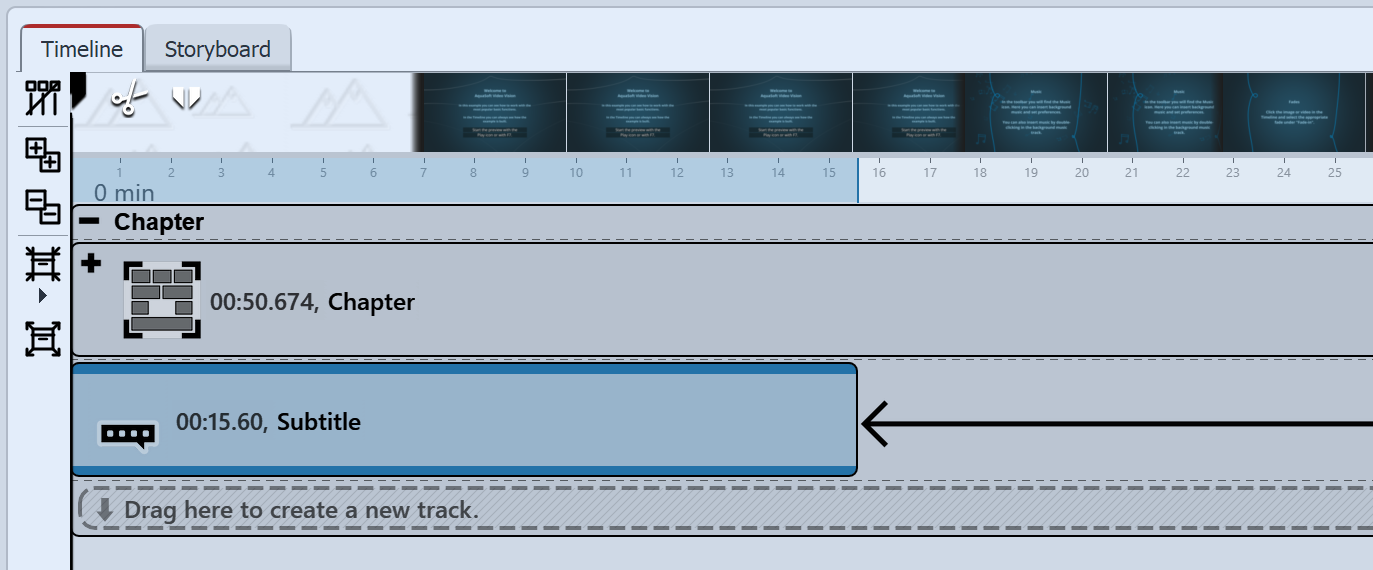 Drag Subtitle object under Chapter object You can now insert a Subtitle object under the inner Chapter object. Drag this from the Toolbox under the Chapter object. You will also need a new Subtitle object for each new time period in which something is to be subtitled. Always remember to set the correct language there as well. |
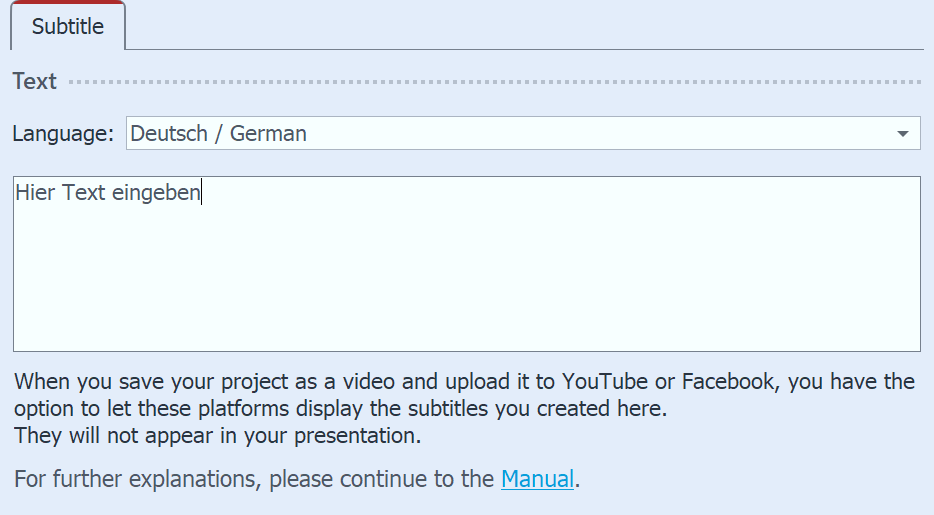 Select the language and enter the text In the Properties window, select the language. If you want subtitles for multiple languages, you can add under Subtitle object in language 1 another Subtitle object in language 2. |
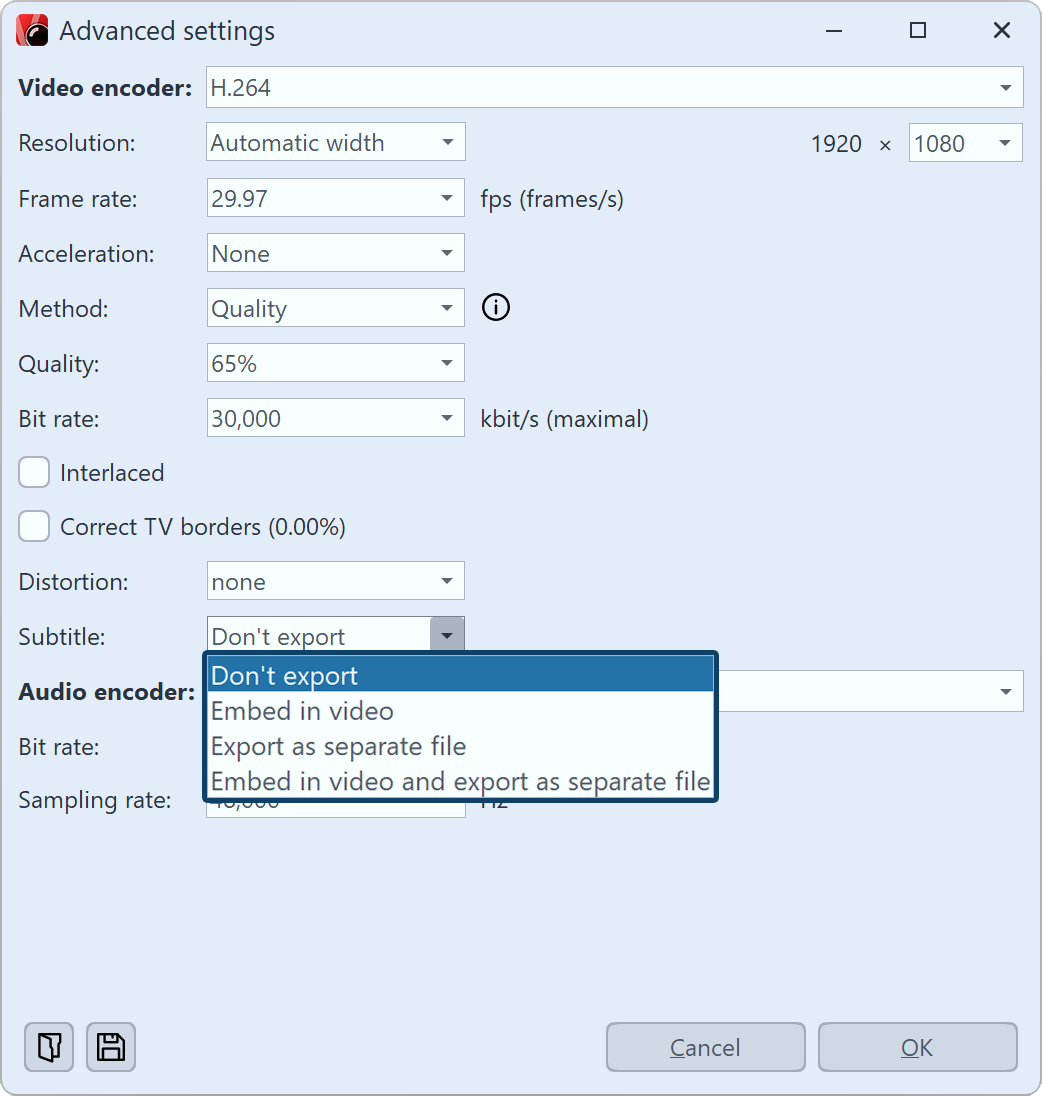 Subtitle output If the video is put out as an MP4 file you can also export your subtitles. Proceed under Assistant to Video Wizard and select MP4. •Do not display •Embed in the video •Put out as a separate file •Embed in the video and put them out as a separate file |
If you issue the subtitle file separately, you will receive an SRT file You can insert this into the video on YouTube or Facebook. This will automatically generate a suitable subtitle track and, on YouTube, also a transcript. With YouTube especially, the benefits are that this makes the video more accessible and can be found more easily in a search if certain keywords appear frequently.
If you embed the subtitles into the video, only a suitable player will be able to display them. You must activate the player's subtitle display track.