|
<< Click to Display Table of Contents >> Text design |
  
|
|
<< Click to Display Table of Contents >> Text design |
  
|
In the text field you can enter your own text for your image or text object. You can change the font size, color and type of the text. You can also give the whole text a text effect For this there are text-friendly effects available. However you can also create effects yourself in the image editor.
|
You can find a finished project under File / Open / Sample project which contains various formats. The sample project can be found under the title "Quote with image". |
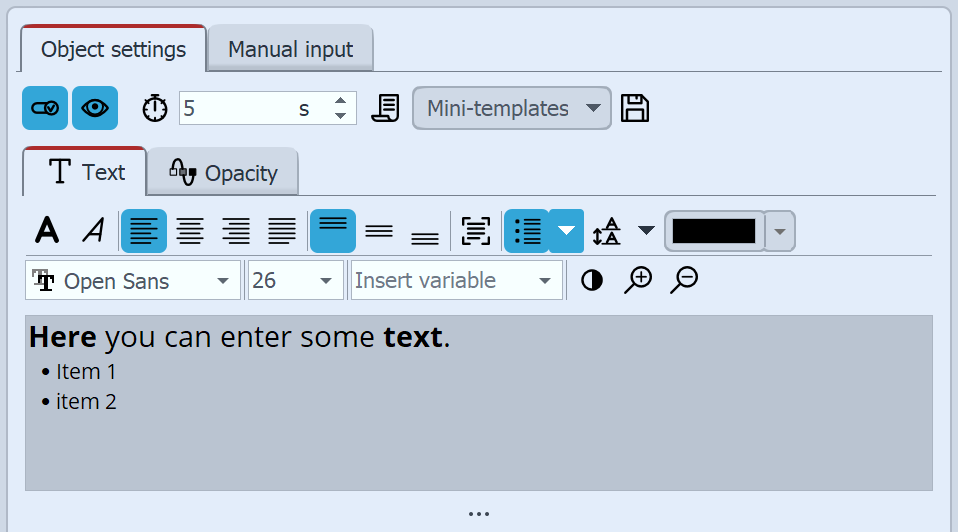 Combining text styles In the properties field, click on the text tab. Here you will see an empty field. Click the field and enter your text. If you need more space, drag the text box to make it larger with the help of the shaded area, which is located centrally below the text box. With the magnifying glass icons you can zoom in or out to make the writing in the text field seem bigger or smaller. If you need more space, drag the text field larger using the three dots located centrally below the text field. You can use the magnifying glass icons to enlarge or reduce the display of the font in the text field. The background color of the text field can be adjusted so that you can see the text better. To do this, you can switch between light and dark by clicking on the black and white button. If you want to make changes to certain areas of the text, highlight the field and then set, for example, the font or color. If you want to customize the entire text, you can click in the text box and use the key combination Ctrl + A to select all. |
|
If red rectangles are displayed when selecting a font in the font list, this is an indication that the corresponding symbols cannot be displayed in this font and will be replaced by a standard font in the project. |
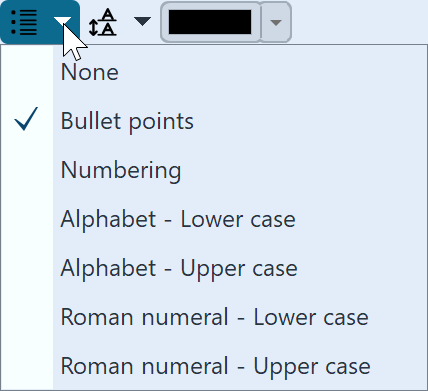 Enable list style For additional formatting of text you will find at the List button the possibility to use bullets and numbering in a list. Select the desired type of display. Clicking Enter in the text field adds another enumeration. The color of the markers results from the text color. |
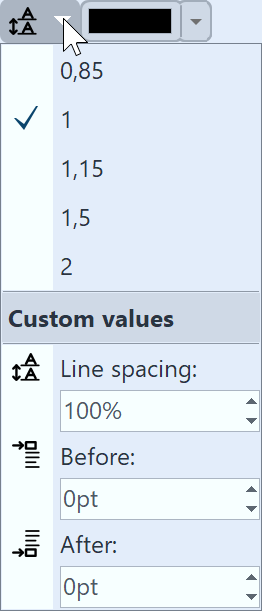 Change line spacing To increase or decrease the space between two lines of text, place the cursor in the text input field at the end of the desired line. Then click the Line spacing button and select the desired spacing value. If you want to adjust the line spacing for the entire text, you can click in the text input field and use the key combination Ctrl + A to select the entire text. Then change the line spacing. It will be changed for the entire text. |
 |
|
Activates the text border for the text in the text box. |
|
Activates the shadow for the text in the text box. |
|
Activates the text effect for the text in the text box. By clicking the arrow located next to image editor, a separate text effect can be created. However you can also use a ready-made effect from the Toolbox. You can find these in the image effect tab in the section Text friendly. |
Contour color |
If you have clicked on the Contour icon, you can select a color for the letter border here. |
Shadow color |
If you have clicked on the Shadow icon, you can select a color for the shadow here. |
Opacity |
The value affects the opacity of the text while leaving the opacity of the letter border. This allows the interior of a text to be transparent while still displaying the outline. |
|
If you want to use image effects for texts, see our blog post "DiaShow 10 neue Funktionen: Bildeffekte für Texte"for more tips and design ideas. |
 Editing text animation In addition to the normal settings for color, font and font size, you can also assign a border and a shadow effect to the text in the Object settings window. Under Animation, you can select an effect for the text to fade in or out. If you click the Tfx Adjust icon next to the Animation selection, you can customize each effect. If an existing text animation is modified, it appears with an asterisk after its name.If an existing text animation is modified, it appears with an asterisk after its name. |
|
You can also get the text animation editing window by right-clicking on an image in the Timeline and using Select text animation. |
In the menu for editing the text effect you will see, in addition to the adjustment options, a preview of the selected animation. In addition, you can choose not only a Fade-in for the text, but also a Fade-out. This can be controlled in just as much detail as the fade-in. To do this, select the Zoomer option in the upper field.
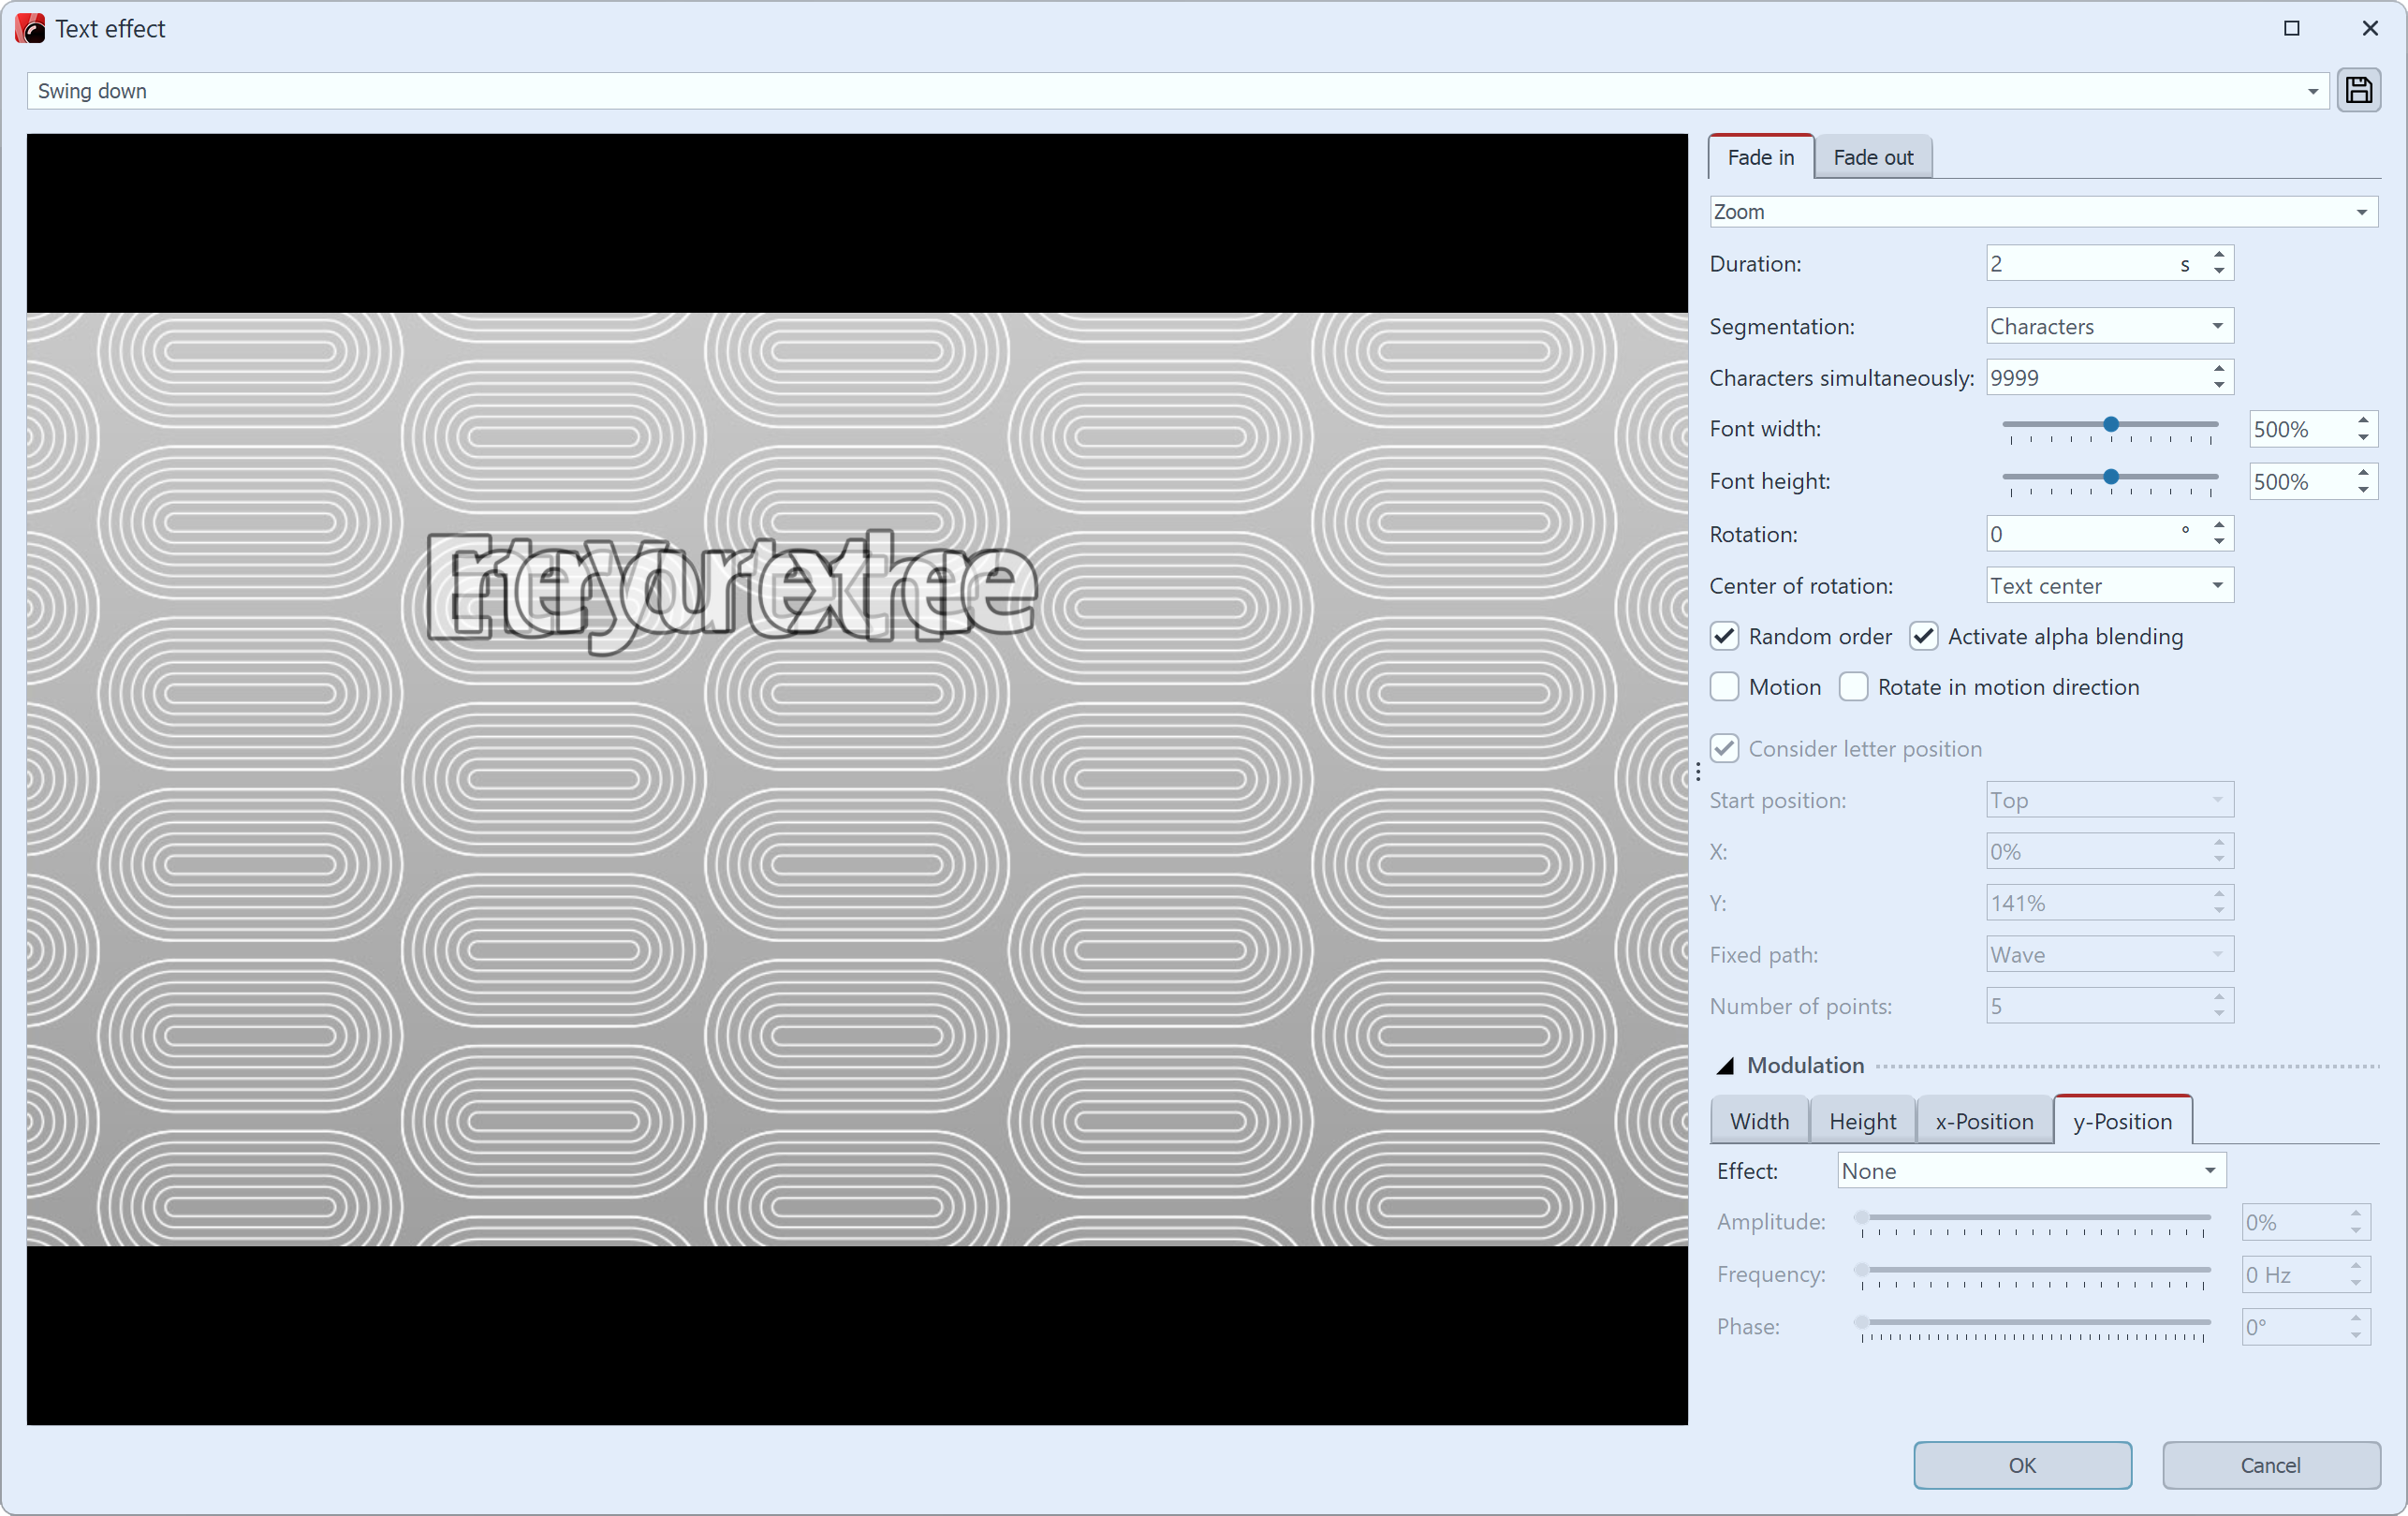
Edit text animation with preview
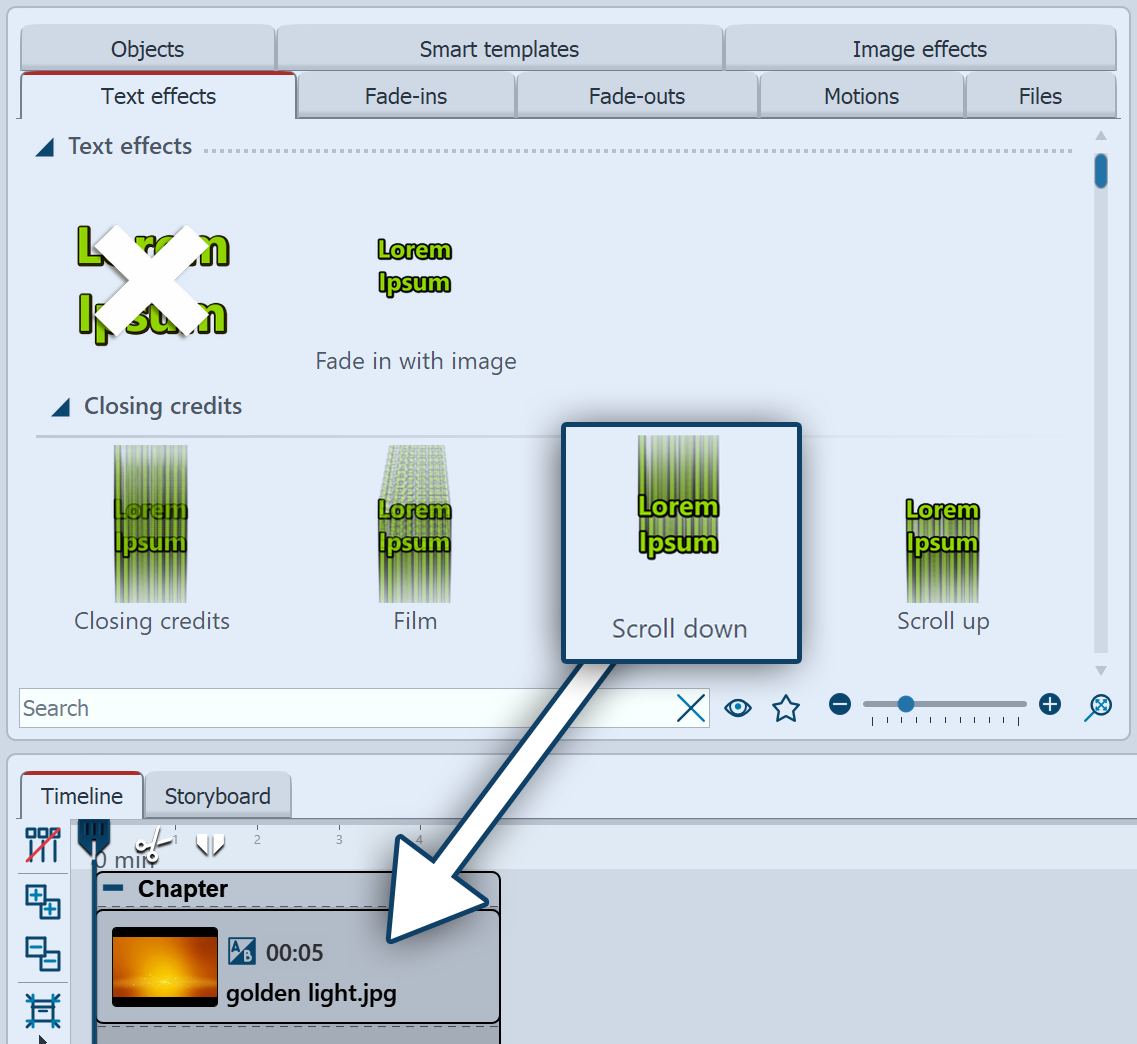 Drag text effect onto image in the Timeline or Layout designer Text effects from the ToolboxIt is not only through the Object settings window that you can select a Text effect. In the Toolbox you can call the same Text effects as under Object settings. Drag the desired Text effect from the Toolbox onto the image. If you want to use the same Text effect for all images, select all images by pressing the keys Ctrl + A . Now double-click on the desired text effect. To remove a Text effect, first select the object in question in the Timeline. Then double-click the "Remove text effect" icon at the very top of the Toolbox. |