|
<< Click to Display Table of Contents >> Program overview |
  
|
|
<< Click to Display Table of Contents >> Program overview |
  
|
|
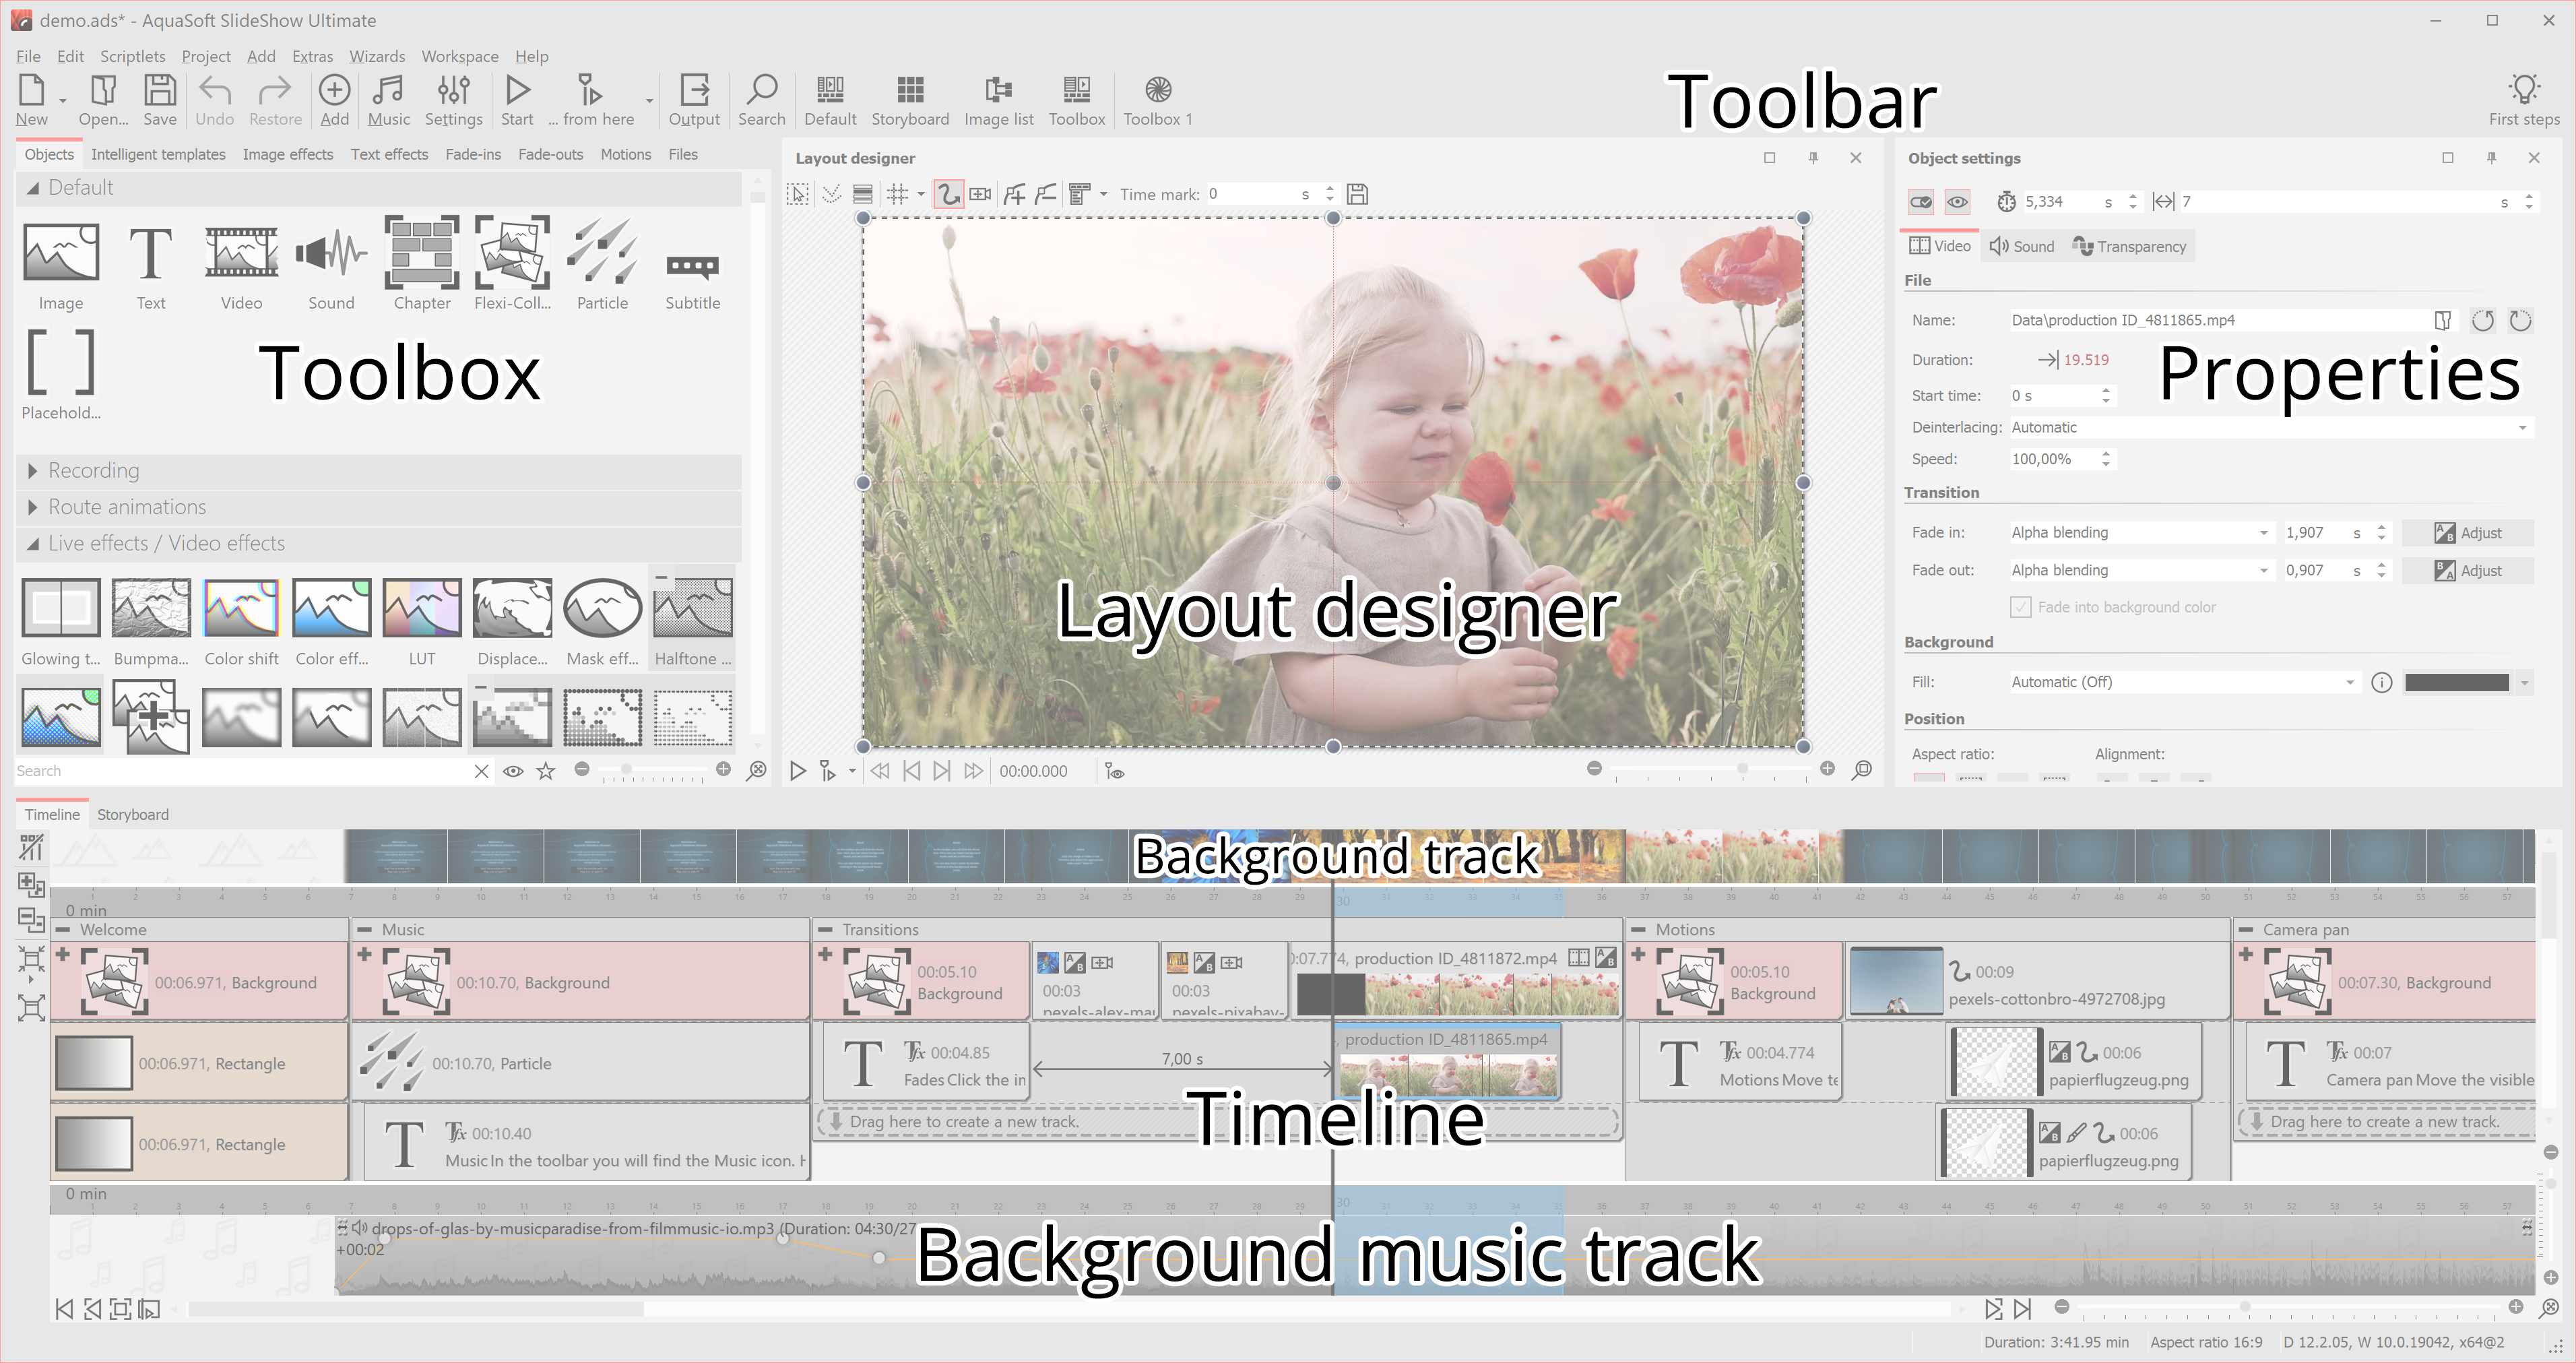
The description of the controls refers to the Default view. You can set this under View / Default. |
AquaSoft Vision and Stages contain a large repertoire of tools that you can use to edit your project. In the following graphic you will find an overview of the most important controls. We will often talk about objects here. Objects are all elements that can be inserted into a project, e.g. images, texts, music, videos, Flexi-Collages and more.

Areas of the program
The Toolbar

Toolbar at the top of the user interface (Video Vision)
Under Workspace / Icons with captions you can switch the labeling of the Toolbar elements on and off.
The individual symbols of the Toolbar:
|
Creates a new empty project. |
|
Opens an already saved project. |
|
Saves your project. |
|
Undo / redo last action. |
|
Adds images, videos and sounds to your project. |
|
Opens the dialog for inserting the background music. |
|
Opens the Project settings. These settings apply only to the currently opened project. |
|
Plays your presentation from the beginning. |
|
Plays the presentation from Playhead position or from the marked position (switchable). |
|
Opens the Output Wizard for creating videos, Blu-rays and DVDs. |
|
Allows searching for texts, file names and keywords in the project. |
|
Loads the Default workspace of the program. |
|
Loads the Storyboard workspace of the program. |
|
Loads the Image list workspace of the program. VIDEO VISION STAGES |
|
Loads the Toolbox workspace of the program. |
|
Loads the Vertical timeline workspace of the program. STAGES |
|
Loads one of your saved workspaces of the program. VIDEO VISION STAGES |
Properties / Object settings

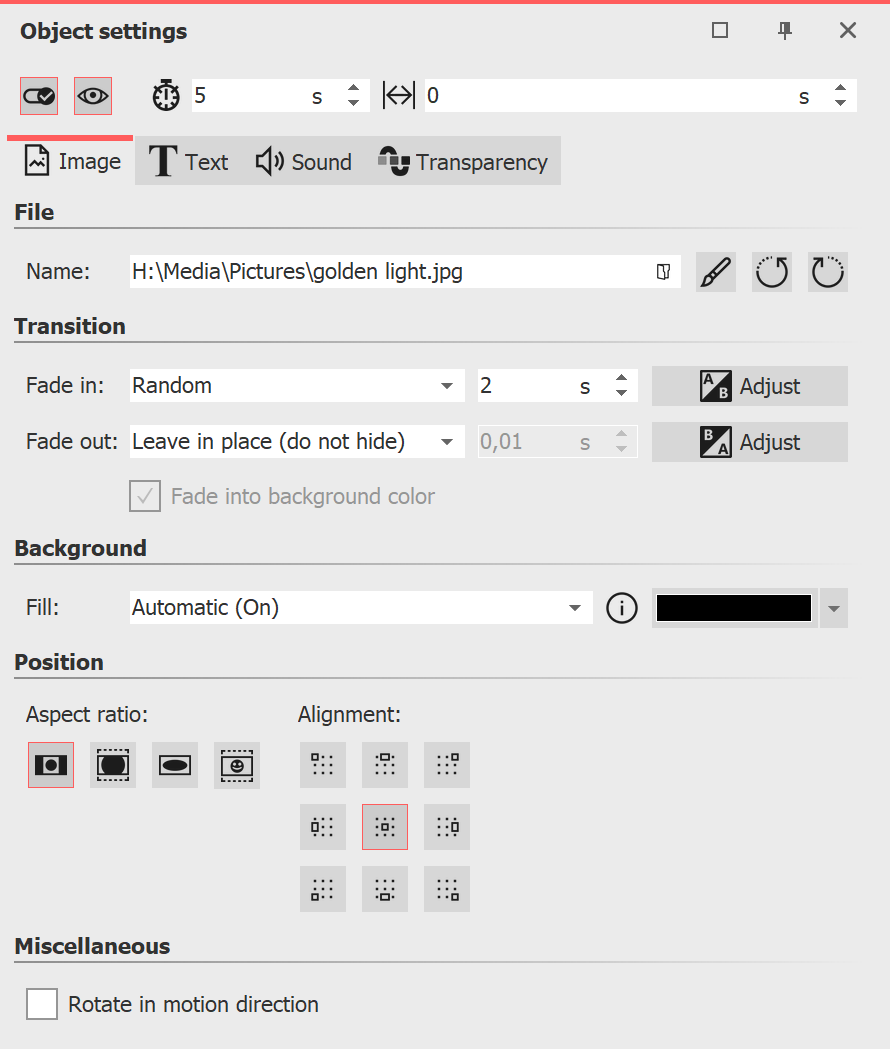
Properties of an image object
Each object has certain Properties that are displayed when you click on the Object in the Image list, Timeline or Storyboard. In the example here, the Properties of an Image object are displayed.
Here you can determine, for example, the display duration (under Duration) of your image and the type of Fade-in and Fade-out.
On the Text tab, you can label the image and set text formatting. On the Sound tab, you can assign a self-recorded comment or sound to the image. On the Transparency tab, you can set a transparency curve.
The individual objects and their properties are explained in detail in the chapter Properties of objects.
The properties of effects are explained in the Live effects and Object effects chapters.