|
<< Click to Display Table of Contents >> Assigning transitions |
  
|
|
<< Click to Display Table of Contents >> Assigning transitions |
  
|
In AquaSoft Vision and Stages a distinction is made between Fade-ins and Fade-outs. Use the Fade-in to define how the image should be faded into your presentation. With the fade out you can set how the image behaves when you leave the display.
|
Fade-outs are only needed in special cases and do not need to be selected for each image. Select fade-outs only when you are working with multiple tracks. The objects in the first track should not receive a masking. |
In an empty project, first add photos or videos. To do this, use the Add button in the menu bar or the Add menu item. You can also insert several images at once by selecting them with the mouse in the file selection window. To do this, hold down Ctrl on the keyboard and then click on the desired images.
|
With which fade-in and fade-out an image is inserted into your project is determined by the setting under Extras / Program settings / Default image settings. This default fade can be adjusted individually for each object. |
You can assign Fade-ins and Fade-outs to your photos in three different ways:
•via the Toolbox,
•via the context menu
•and via the Object settings window.
You can learn more about it in the following sections.
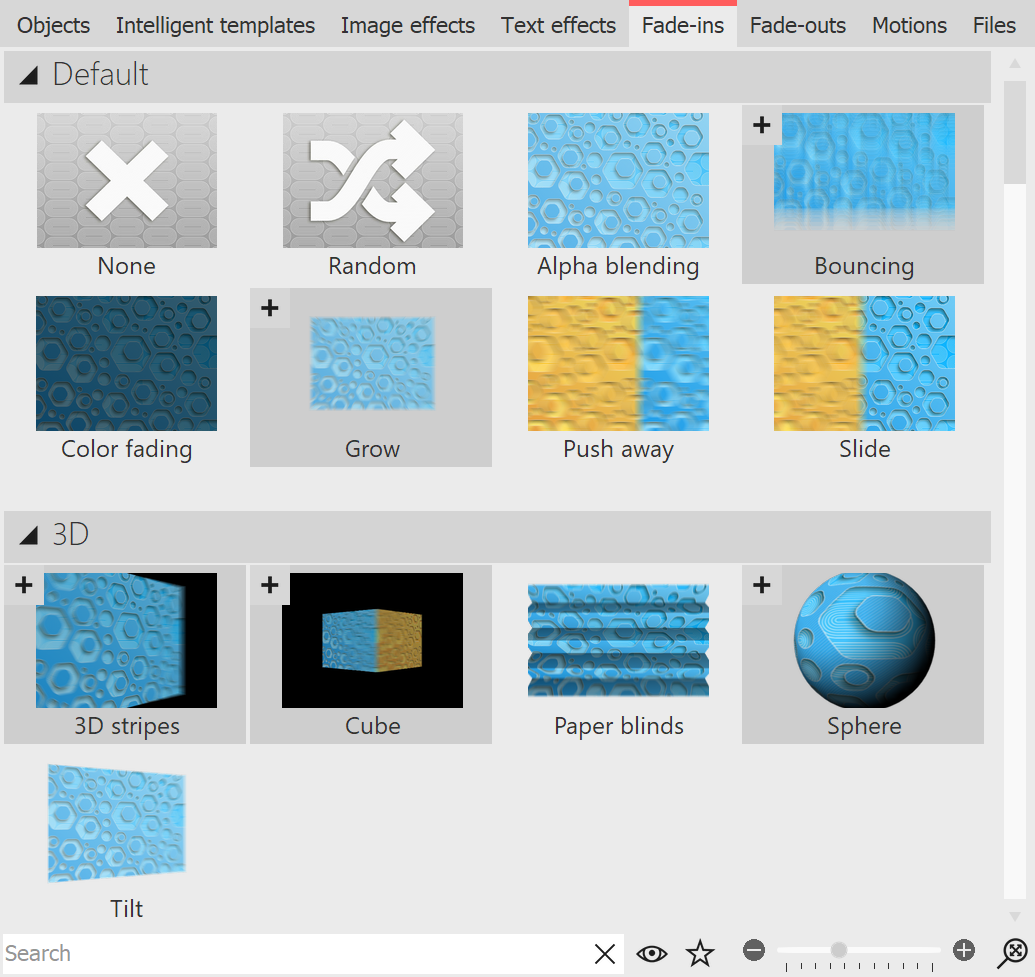
 Fade-ins in the Toolbox Call up the Fade-in or Fade-out tab in the Toolbox. If you click on a Fade-in or Fade-out, you will get a small preview of it. With the first None icon you can remove an insertion from an object. It will then appear without any effect. |
The triangle icon located in front of the category names or transition styles allows you to open and close the individual categories and styles.
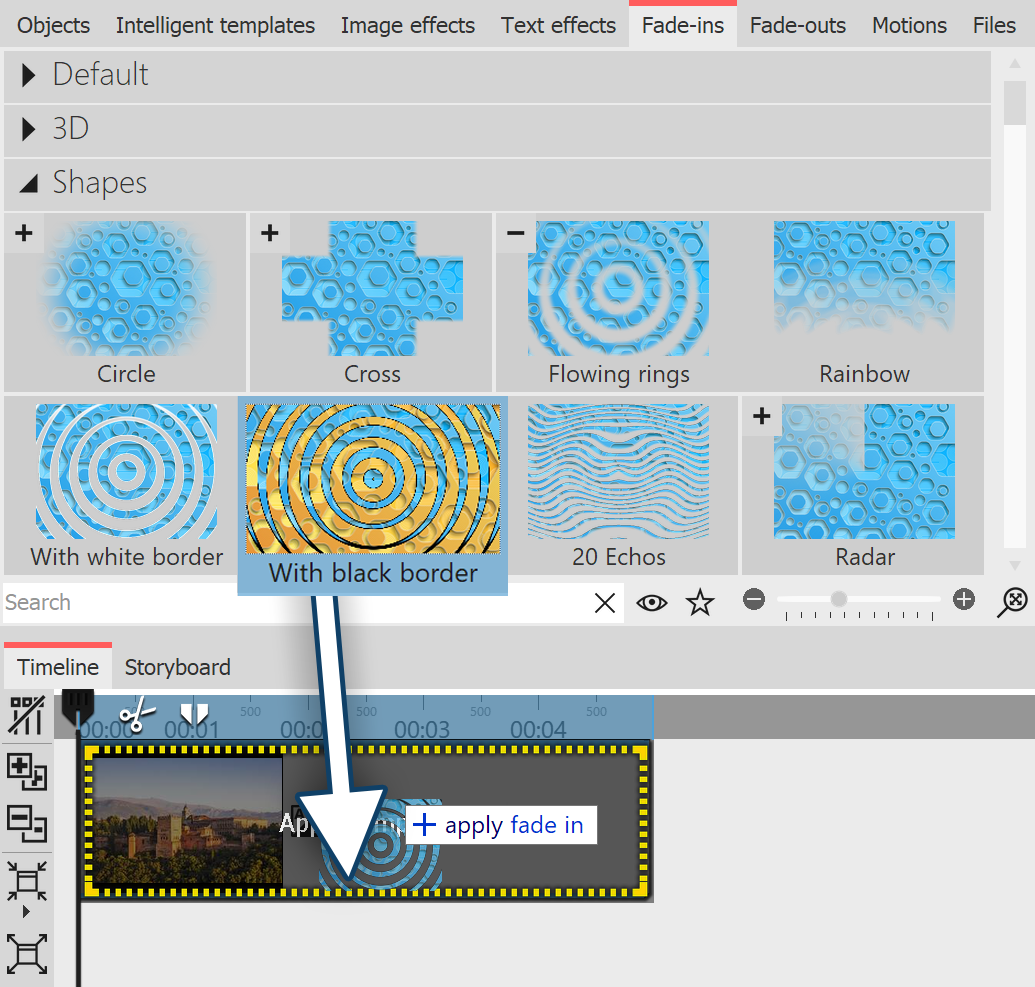
 Add fade-in by dragging on the image in the Timeline Drag the desired Fade-in or Fade-out onto the image in the Timeline while holding down the mouse button. A dashed yellow frame appears around the image in the Timeline if you have placed the Fade-in or Fade-out correctly. You can then release the mouse button. |
If you want to apply a transition to several or all images, select the corresponding images. |
•Pressing the Ctrl + a keys will select all the images present in the project.
•If you want to select only some specific images that are not related, hold down the Ctrl key while clicking the mouse on the images you want to select.
 Click "Apply" Now select a fade-in or fade-out in the Toolbox and click on it with the right mouse button. The context menu appears. If you select the item Apply, the effect will be applied to all selected images. |
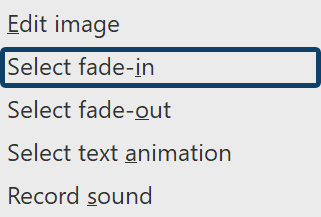
 Set Fade-in or Fade-out from the context menue If you right-click on an object in the Timeline, the context menu opens. There you will find a selection point for Fade-in and for Fade-out, which you can use to specify the desired fading. |
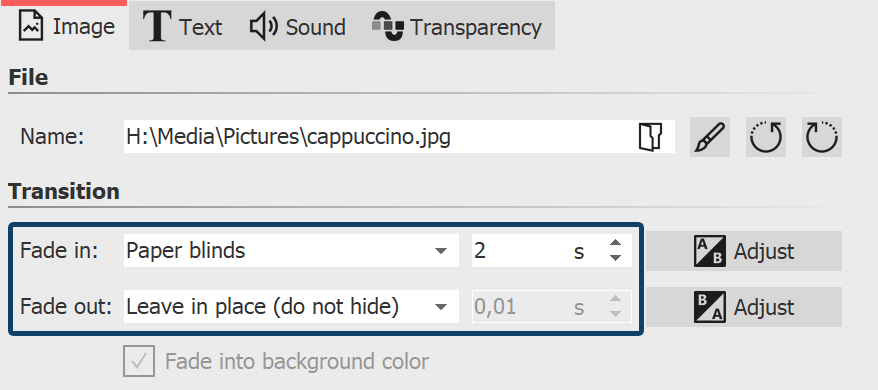
 Set Fade-in and Fade-out Click an image in the Timeline. The transition is set in the Object settings under Image (or Video or Flexi-Collage). |
|
If the Object settings are not displayed in your view, you can call them up via the context menu (right-click on the Image object) of the image. Another possibility is to call up the Object settings under Workspace / Controls. |