|
In the Object settings of an Image you can configure the following settings:
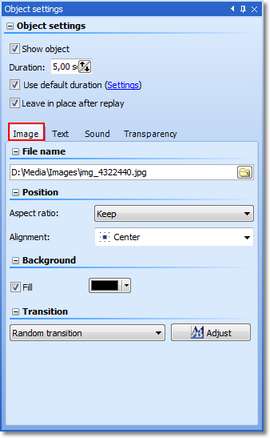
Image
File name
|
Shows the path and file name of your image.
|
Aspect ratio
|
Images have an aspect ratio which is comprised of the height and width of the image. If an image differs from the aspect ratio of the slide show set, it can be decided here how the image should be represented.
Retain: The image retains outlines when being played back.
Crop: Parts are cropped from the edge of the image until the image fits into the correct aspect ratio without edges emerging.
Distort: The image is inserted into the aspect ratio of the slide show, whereby a distortion of the image takes place.
|
Alignment
|
Determines the position of the image on the screen.
|
Fill background
|
The background is always filled if the image is reduced in size or the image differs from the slide show aspect ratio set. It can then occur that the previous image shines through. This can be prevented by means of this function. The color used for filling the background can be changed at your option. In the case of image within image effects, the function must be deselected.
|
Transition
|
Here the Transition can be set or also deselected. For that purpose, in the drop-down list there is None as the first option. With the Adjust button, the transitions can be configured. You can also obtain a preview of all transitions there.
|
Text
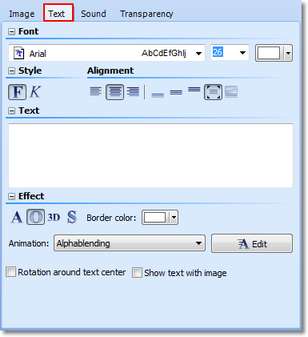
The possible formats are almost always self-explanatory through the icons and you are no doubt familiar with them already from other text programs.
The Alignment, however, has a minor peculiarity.

|
Positions the text at the lower edge of the screen.
|

|
The text is shown in the center of the screen.
|

|
Positions the text at the upper edge of the screen.
|

|
Places the text freely in order to determine the position in the image individually.
|

|
The text is shown underneath the image. That also applies if the image is shown reduced in size.
|
Should you not wish to have separate text animation, activate the option Fade in text with image.
Should the text be shown animated, you can select various ready-made animations from the list. You can still adjust the animation using the Edit button. You can also see a preview of the animations there.
Rotation around the center of the text refers to animations in which the text is rotated. Under Edit you can also determine a different rotation center.
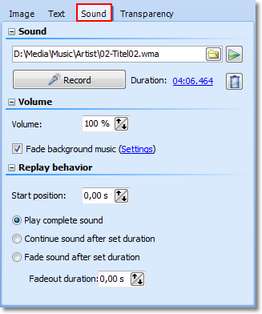
Sound
Folder icon
|
Using the yellow folder you can assign commentaries or pieces of music already included to an image.
|
Play icon
|
Plays back the music file assigned to.
|
Record
|
Opens the Sound Wizard and you can then record a commentary to go with the image.
|
Volume
|
Determines the volume of the sound when played back.
|
Fade background music
|
You can determine whether the volume of the background music should be faded/decreased when playing back the sound.
|
Play back the full length of the sound
|
Plays back the sound in its entirety and thereby adapts the exposure time of the image to the length of the sound.
|
Continue to play the sound after the duration set
|
With this option the image can have a shorter duration than the sound. The sound then simply continues to be played on into the next images until it has come to an end.
|
Fade out the sound after the duration set
|
Should the exposure time of the image have come to an end, but the sound be longer, with this option the sound is faded out at the end of the image. Under Duration you can set the fading out time.
|
Transparency
Animated transparency is described in the design options under Animated transparency.
|


