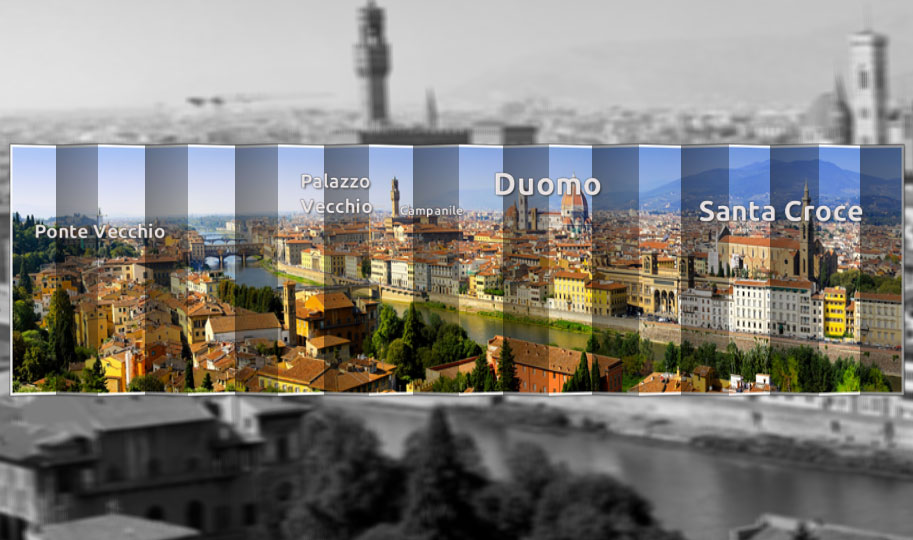
Panoramic photos are really great for shots of a city skyline, landscapes, and especially for drawing the viewers eyes to the details. However, the problem is that when you try to show off your photography skills at home, your TV makes the entire panorama smaller to fit the screen, with SlideShow 9 you can show the full richness of your photo by panning.

Option 1: Panning across landscapes
Let’s start with the simplest variant, a camera panning from left to right. In this video tutorial I will show you how easy it is to pan and show the full view of your panoramas.
For those of you who would rather read the instructions:
- Select and add a panoramic photo by clicking on the Add button/ plus symbol.

- In the Layout designer, click on the camera/panning symbol and then drag the frame (shown with black dots and dotted lines) to left because we want to start showing the section of the panorama on the left first and make the motion flow left to right.
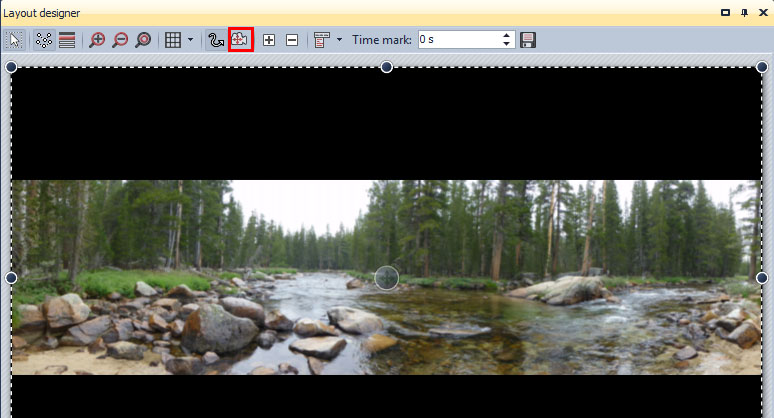
- To the right of the camera symbol is another plus sign, this adds more movement points, click it. An orange dot appears and rectangle, the rest of the photo looks blurry. You need to line up this rectangle with the right edges of the photo.
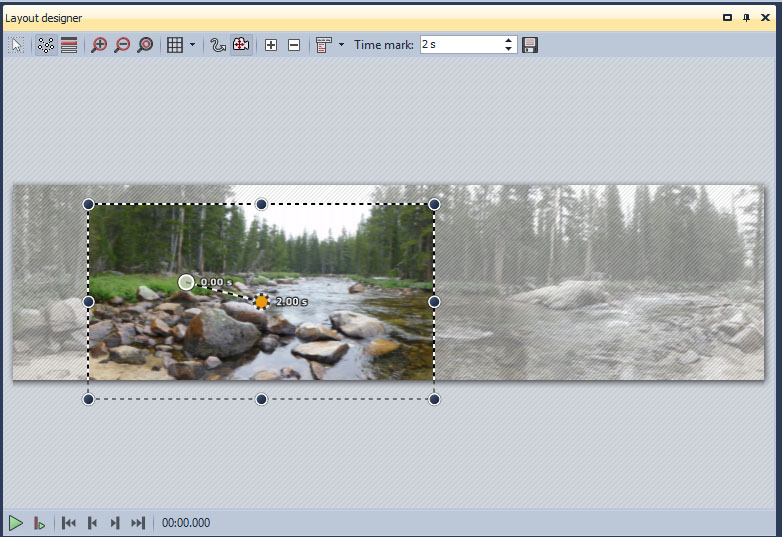
- At the top of the Layout designer you will see the “Time mark” section and that it is automatically set to 2 seconds. You will want to find the right pace for your panorama but we recommend anywhere from 15 to 25 seconds depending on how fast or slow you would like your photo to move from left to right.
* If you would only like to pan across the landscape and end on the right side of your photo, then you can hit play and your panorama is ready to go! If however you would like the end to be a full view of your entire photo, please read on.
- To add one more movement and end your show with the full panoramic photo click on the plus symbol that is in the Layout designer. Another orange dot appears, in the time mark section you will want to add another couple of seconds for the transition to full screen (we added an extra 5).
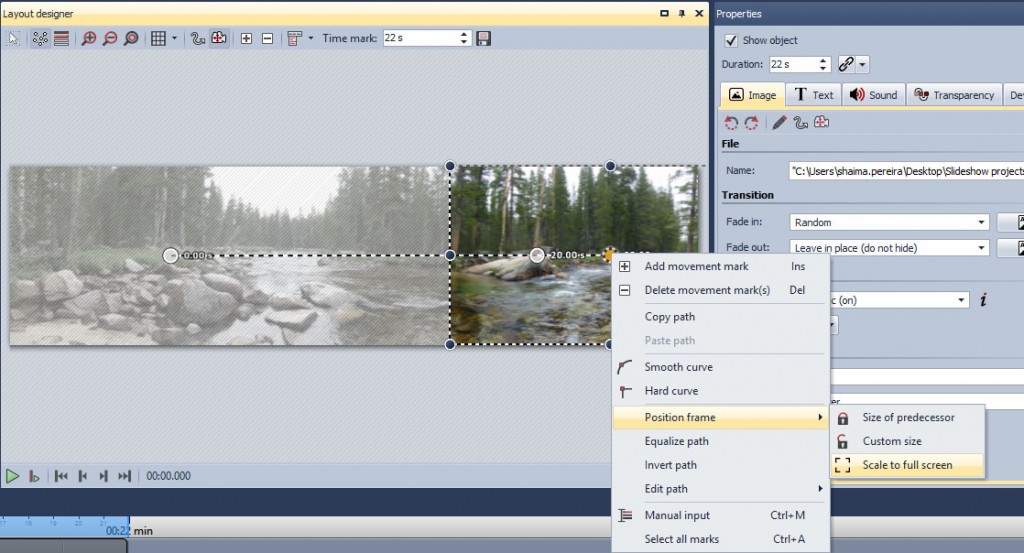
Then right click on the dot. In the drop down menu you will see “position frame” and then you will want to select “scale to full screen”. And that’s it!
Now you can play your show and make sure that you are satisfied with the transition speed between left to right and from right to full screen. To go back and adjust this, just click on the dot that you would like to adjust in the Layout designer and adjust the seconds in the time mark. Finally, if you do not want your photo show to begin with a transition be sure to adjust this in the properties section –> Transition –> Fade in: –> None.
Option 2: Background with blur effect
You can take your panoramas a step further if you would like to show the entire shot in the background (blurred) as well as pan across your photo highlighting details. Here’s how:
Like what you saw? Want to find out about other cool features? Check out our full range of tutorials!


