Many camera owners tend to quickly grab their cameras at the sight of an interesting subject and – click – to pull the trigger. But what comes out is often nothing more than a snapshot.
4 tips for taking better pictures
Tip 1: Stabilize your camera
Nothing is more annoying than blurry pictures of particularly evocative moments that you have taken at dusk or at night. Often, the images that come out are not at all representative of what you wanted to show. To resolve this, it often helps just to stabilize the camera. You don’t always have to have a tripod handy, any solid surface on which you can rest your camera will do. This can help you to achieve great image quality using slow shutter speeds.
Tip 2: What’s included in the picture?
Before you take a photo, take a look at the preview in the viewfinder or camera screen, take a moment to decide what to include in the photo and what to leave out (or in other words take time to accurately position your photo). Some times simply by moving the camera slightly up or down or by a waiting a moment the disruptive element is no longer in the picture.
This is especially important when shooting outdoors or in a crowd, those are situations when you’re most likely to get objects in the image that do not fit the content that you want to photograph. Also, keep on the look out for the sun and getting that in the shot, as it may cause unsightly effects. The more you pay attention to the actual image content, the better your yield of beautiful shots will be at the end.
Aside from adjusting your camera for what to leave out, you should keep in mind that often times it is a good idea to add objects in your photos. For example, if you are photographing a landscape, putting a boat on the shoreline gives the viewer an idea of how vast the scene is in a way that they wouldn’t otherwise be able to imagine without an item to reference size with. Of course, boats on the shore may not always be available; you can also use shoes, rocks, flowers in the foreground, there’s lots of room for creativity with this one.
Tip 3: Don’t place objects in the center
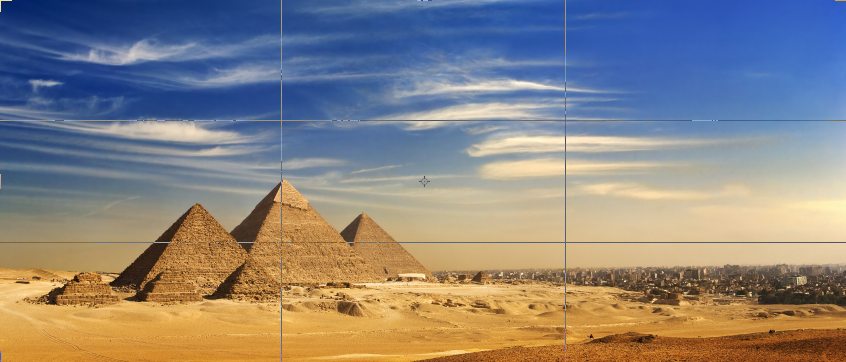
In a previous article I’ve already explained the “rule of thirds”, which is a simplification of the golden ratio basically. To make an image more interesting, the main subject should not be located in the center, but rather in the first or second third.
Imagine a grid in front of you which is located on the image and with equal sections, divided by two horizontal and two vertical lines to get nine equal sections. Ideally, the main subject should be on one of the intersections of the lines.
Even the horizon, which people often place in the middle of the photos of the sky and sea, should be placed either in the upper or lower third. To the viewer’s eye, this makes your image look so much more interesting.
Tip 4: Change your angle
 Everyone can take a picture from eye level, that’s why you see so many of them, and they all look the same.
Why not try to take another point of view and consider your environment from a different perspective. For this you can go down on your knees or go up on a platform or stone. Give your creativity the freedom of expression and think up all kinds of new perspectives, so that your photos will have a special quality to them.
Consider these tips not necessarily as hard and fast rules, because ultimately creativity also means that you don’t have to stick to set targets. However, I hope that you take the next opportunity to try out a few of these suggestions, and that they are helpful to you.

