Selective color photos make for stand out shots, focusing the viewers eyes on a particular focal point in the photograph. So it’s no wonder that they’re popular! They’re also quite easy to make; we’ll show you three ways to make them using two programs, Photoshop and GIMP (freeware). I’m going to show you using the contrast between black and white and red (red accents), but you could do several variations such as a person walking down the street in color and everything around them in black and white or another classic like the yellow New York cabs and the city back drop in black and white, etc. Let’s get started.
Photoshop
1. Duplicate layers
Layers
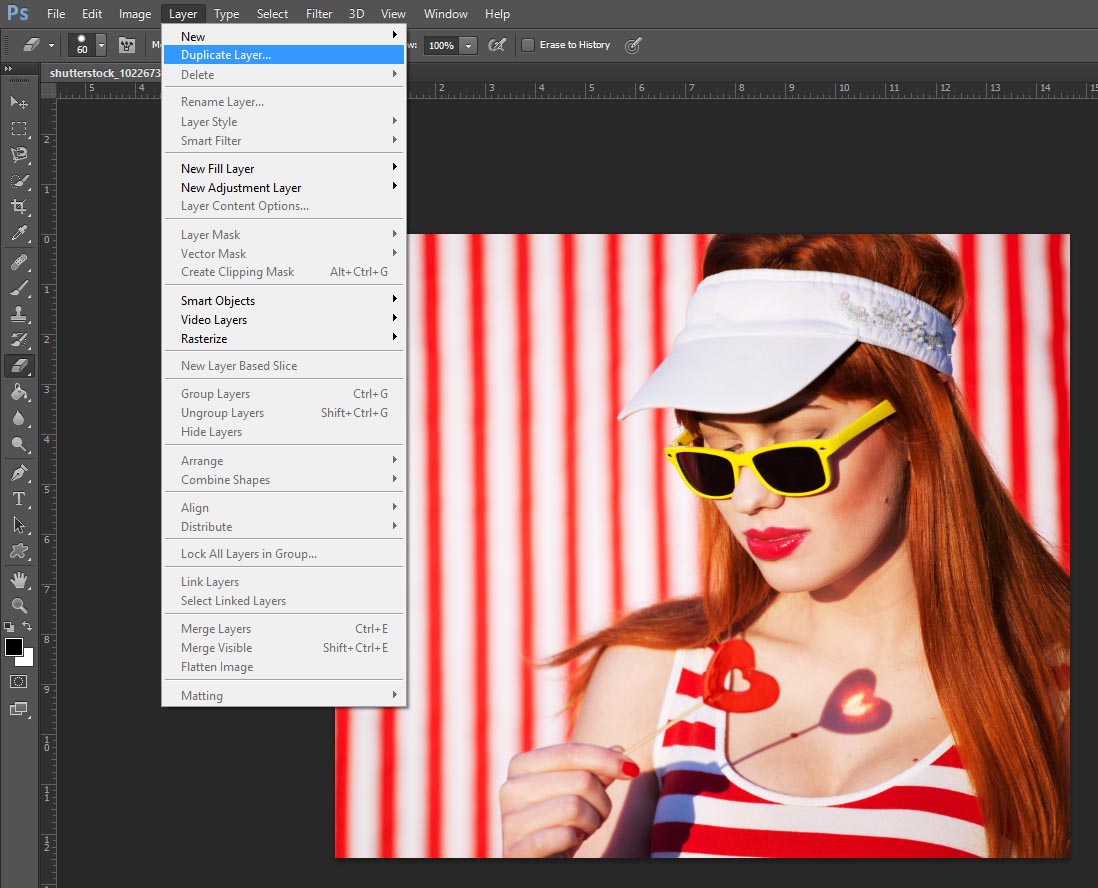
Select the photo that you want to use and open it in Photoshop. Then under the tab layer, select duplicate layer.
Hue and Saturation
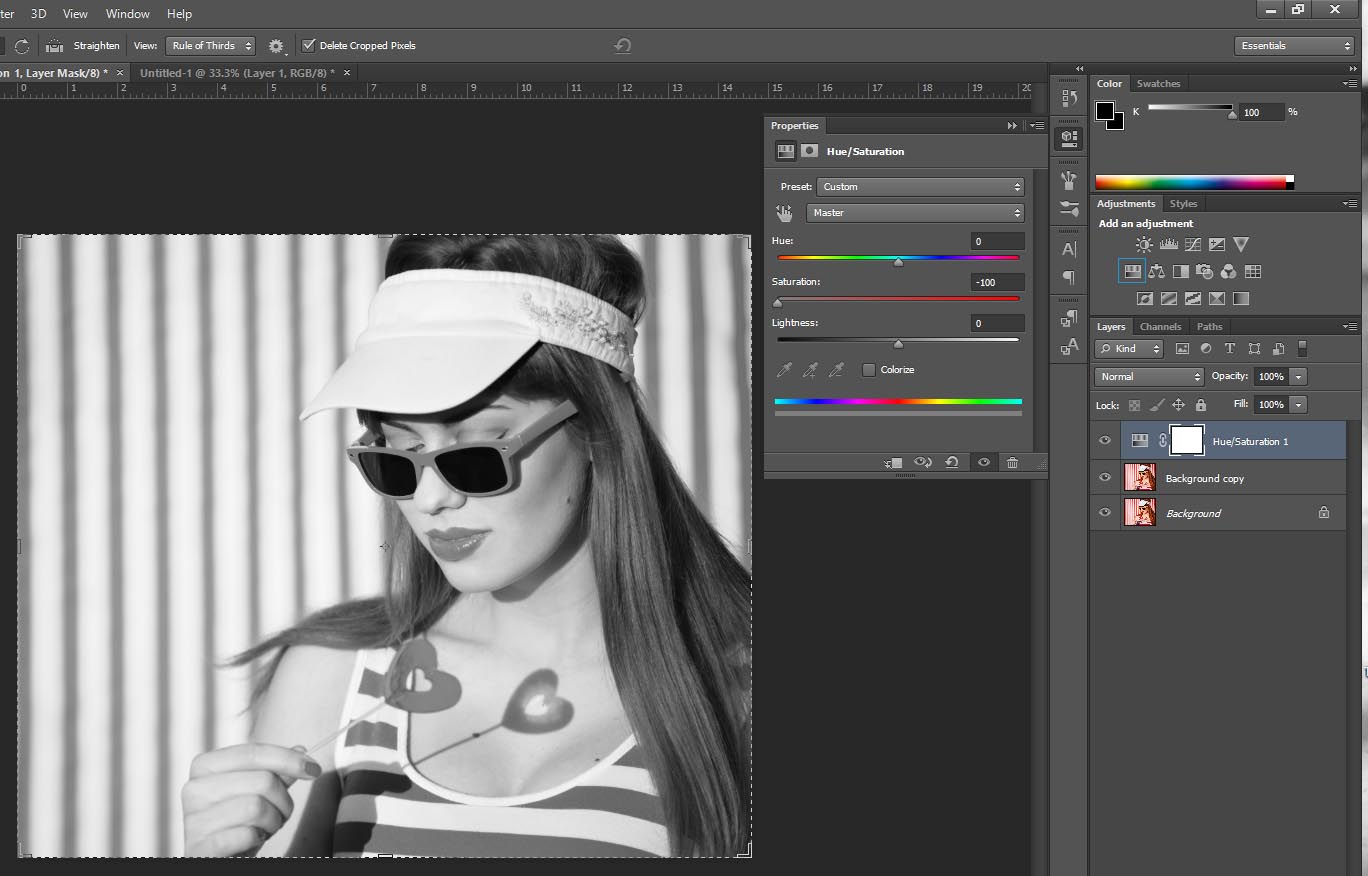
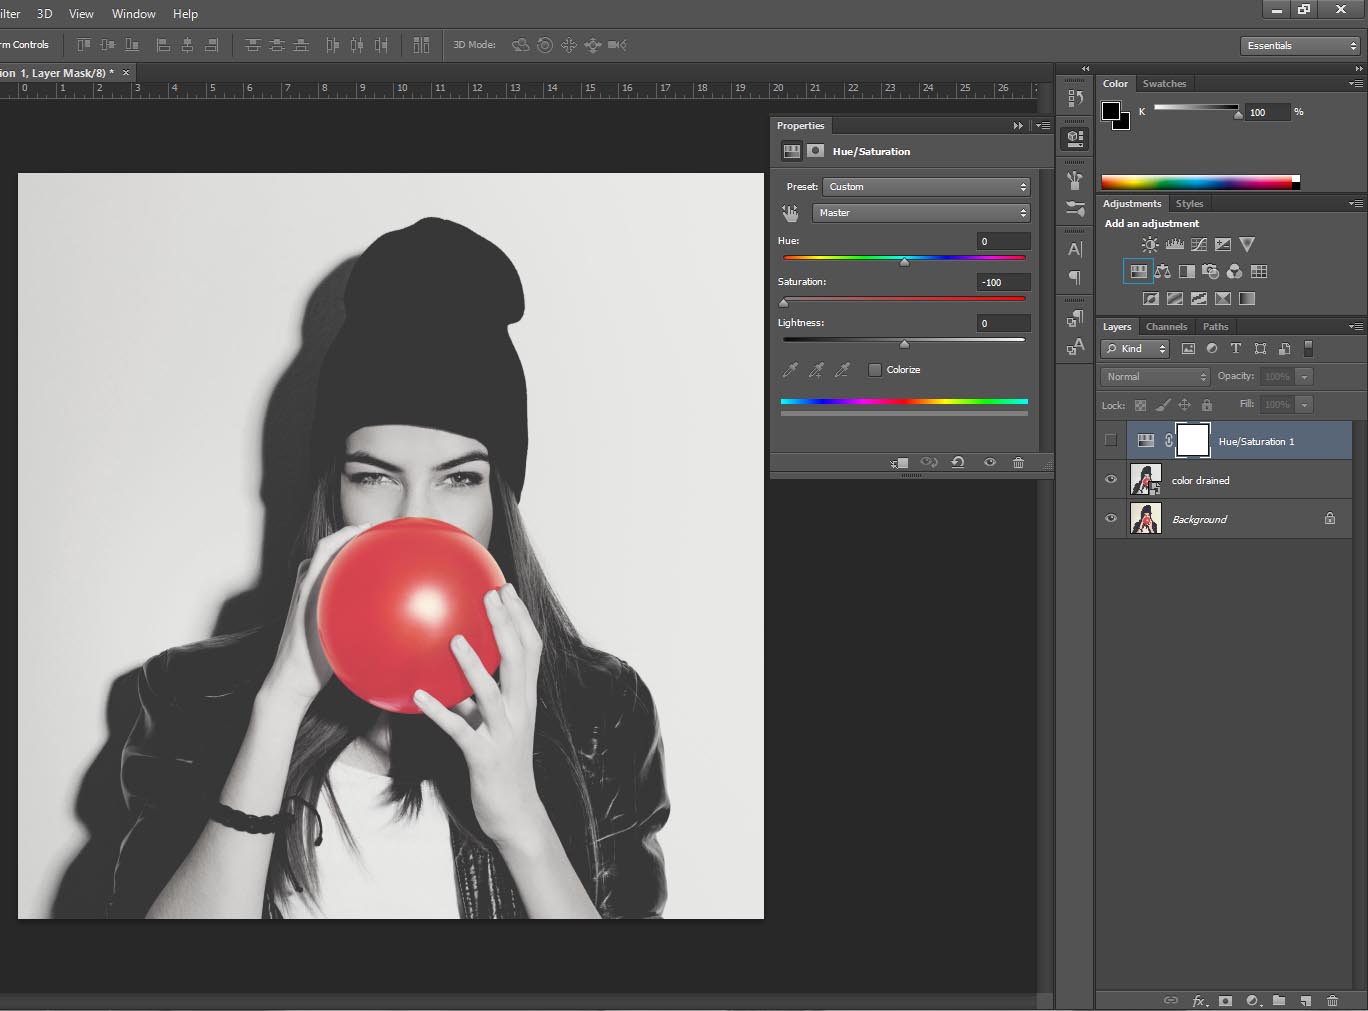
Make sure that the background copy is selected and then use the hue/saturation tool to make the photo black and white by making the saturation -100 (you can adjust this slightly if you want the contrast to be less, if you want sepia instead of black and white, etc).
Eraser Tool
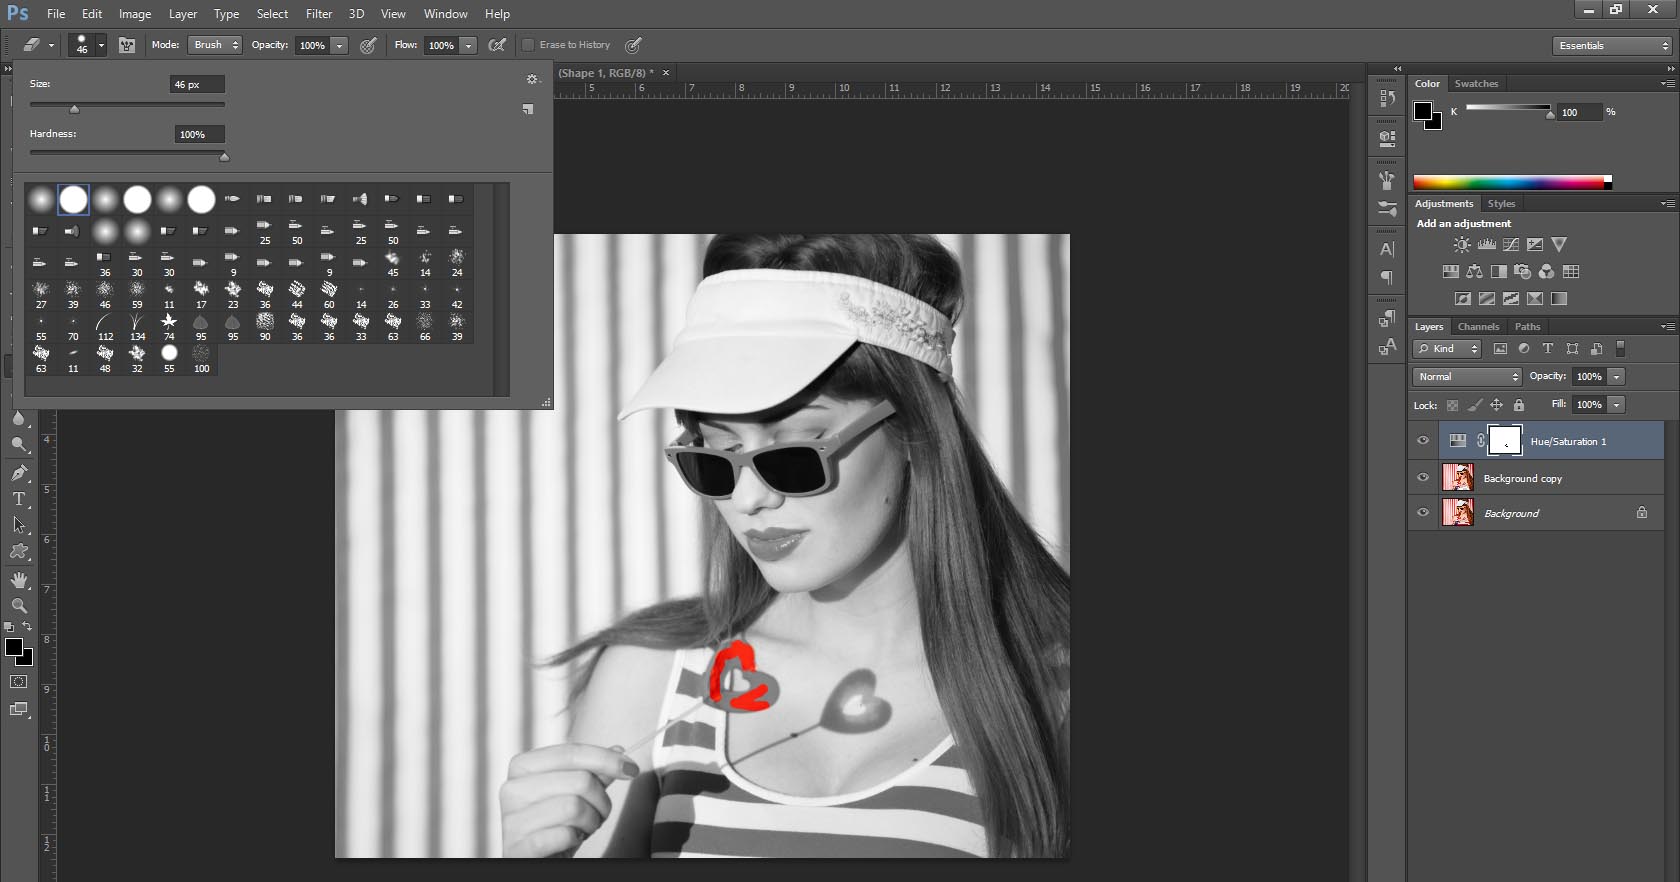
Then select the eraser tool, making sure that the hue/saturation layer is selected, and choose a brush with the hardness set to 100%. Alternatively you can also use one of the fuzzy brushes (59 or 90 are good) as they make smoother edges, giving your photos a more realistic look.
Result
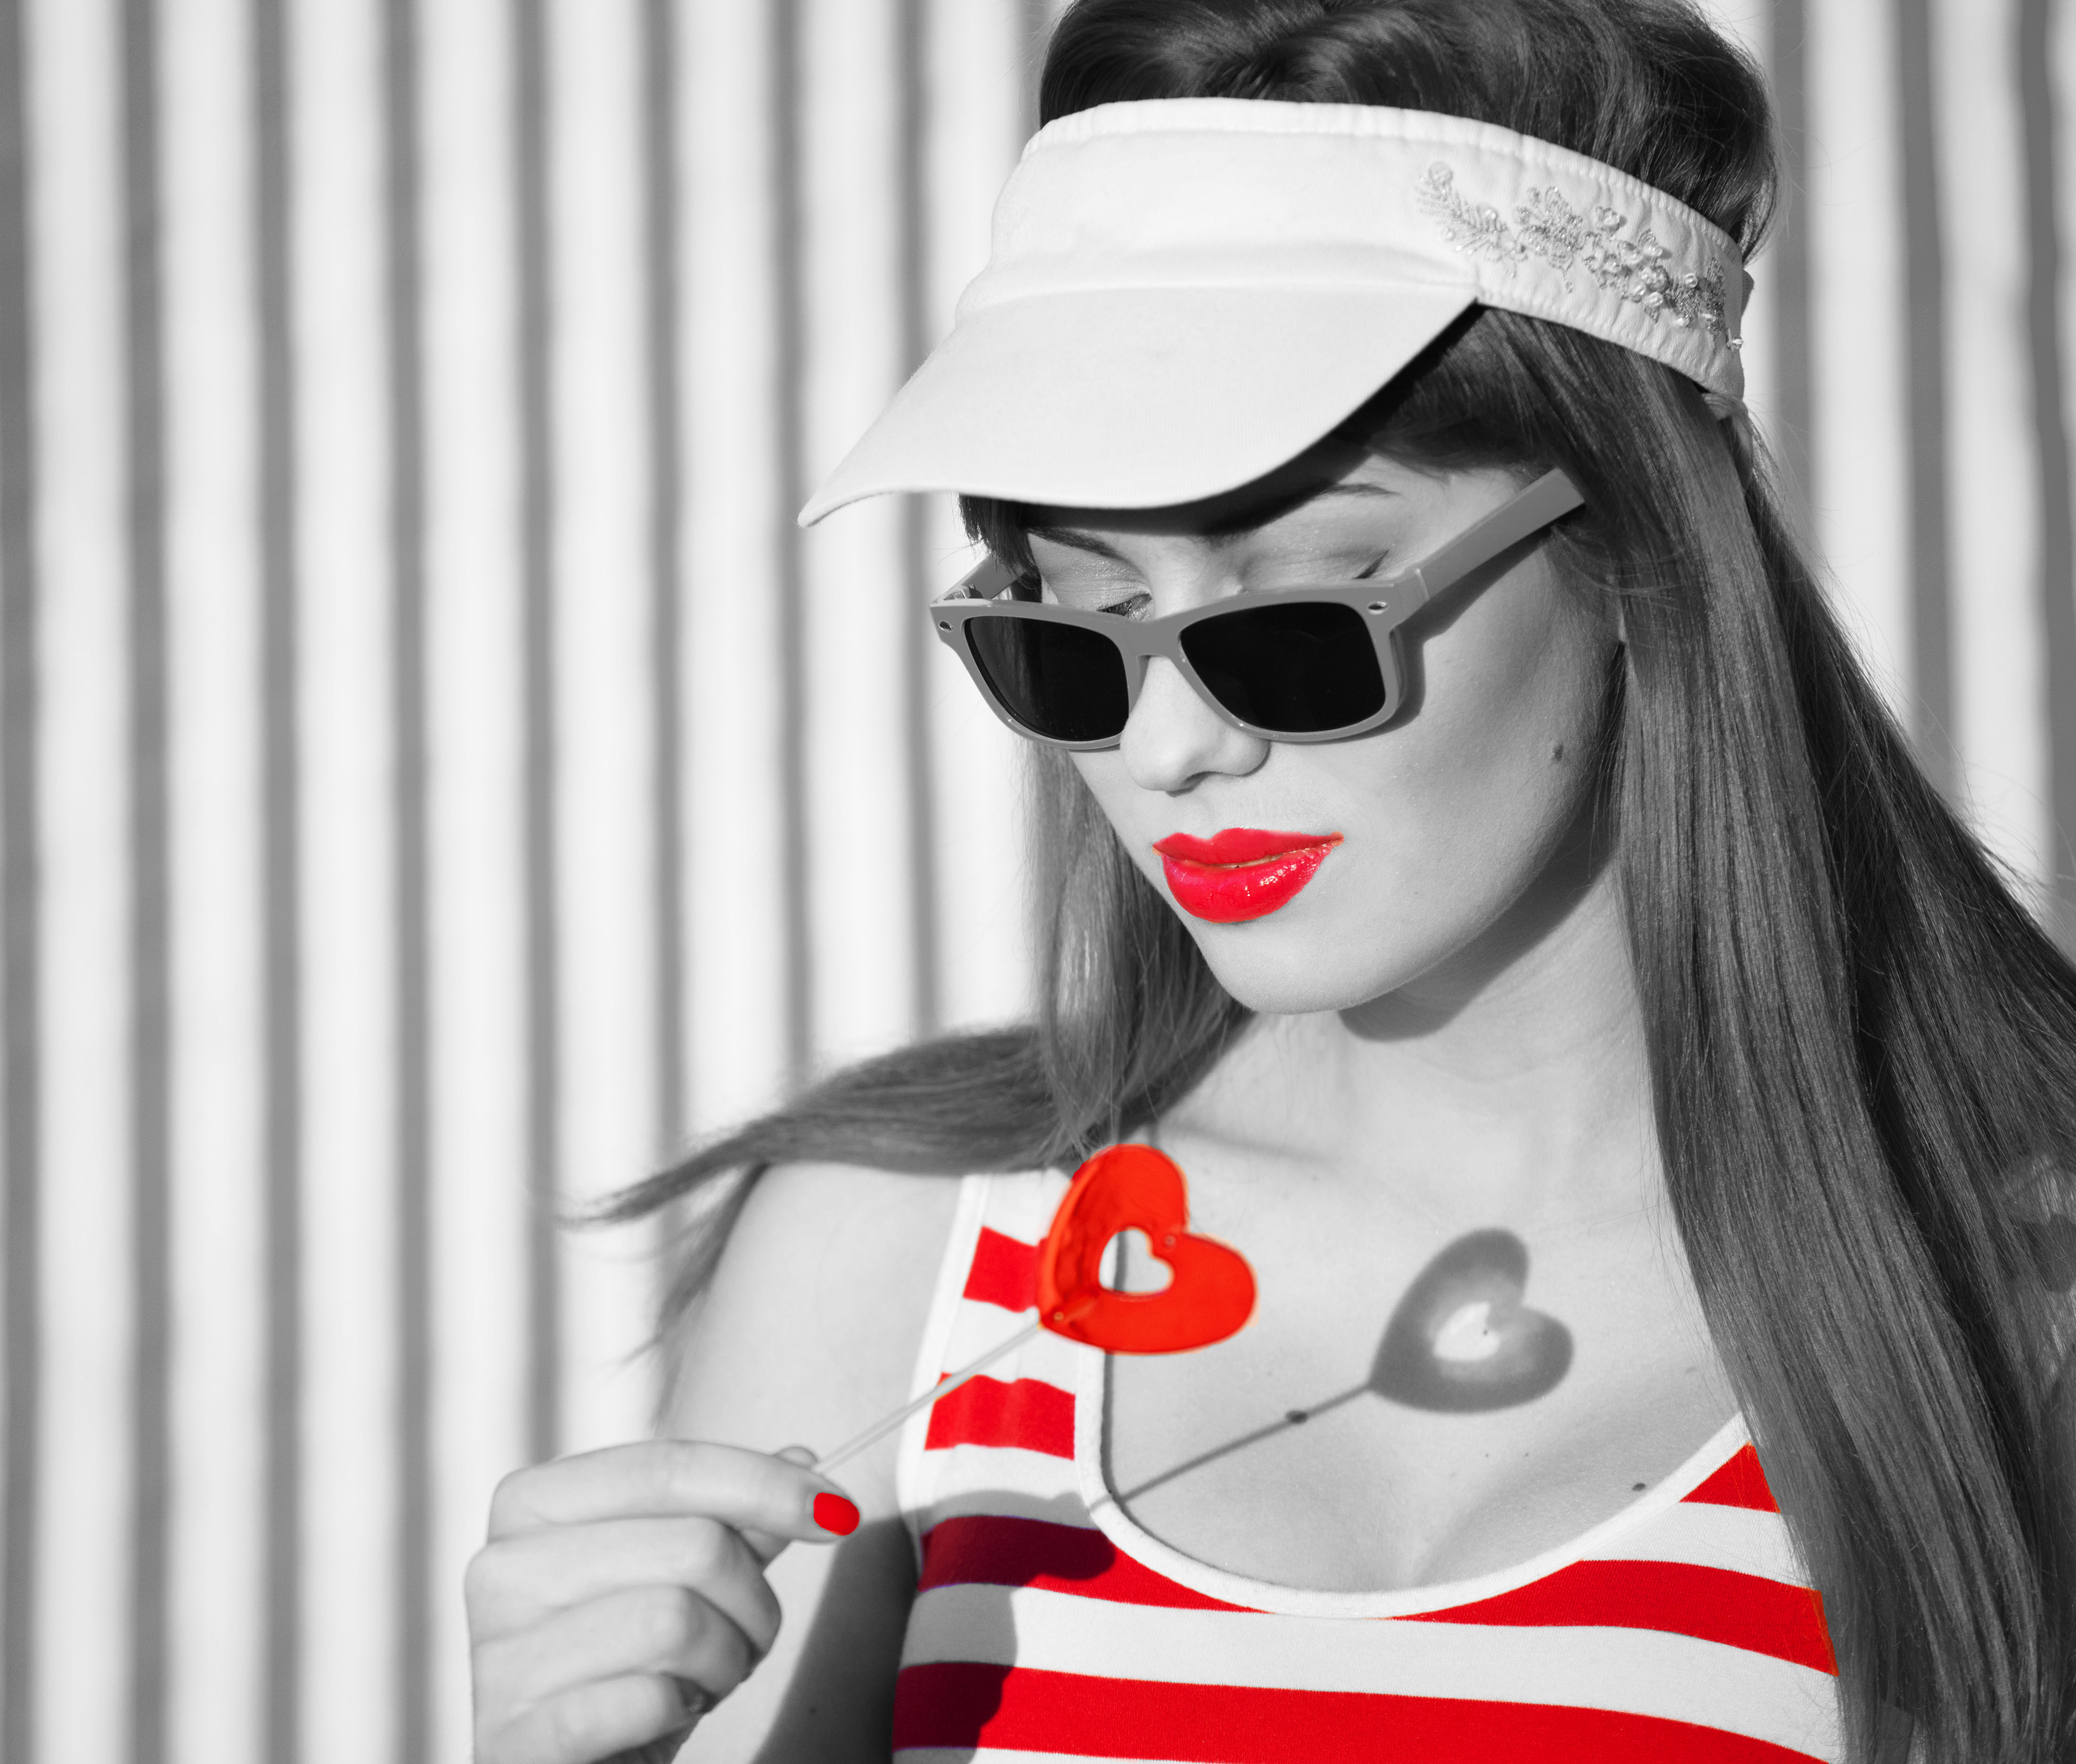
Finally you erase over the areas that you want to appear in color.
2. Inverse selection
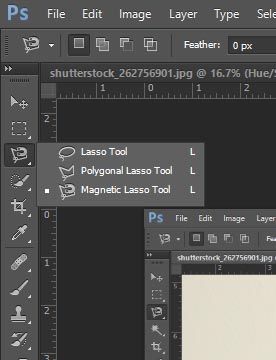
Magnetic Lasso tool
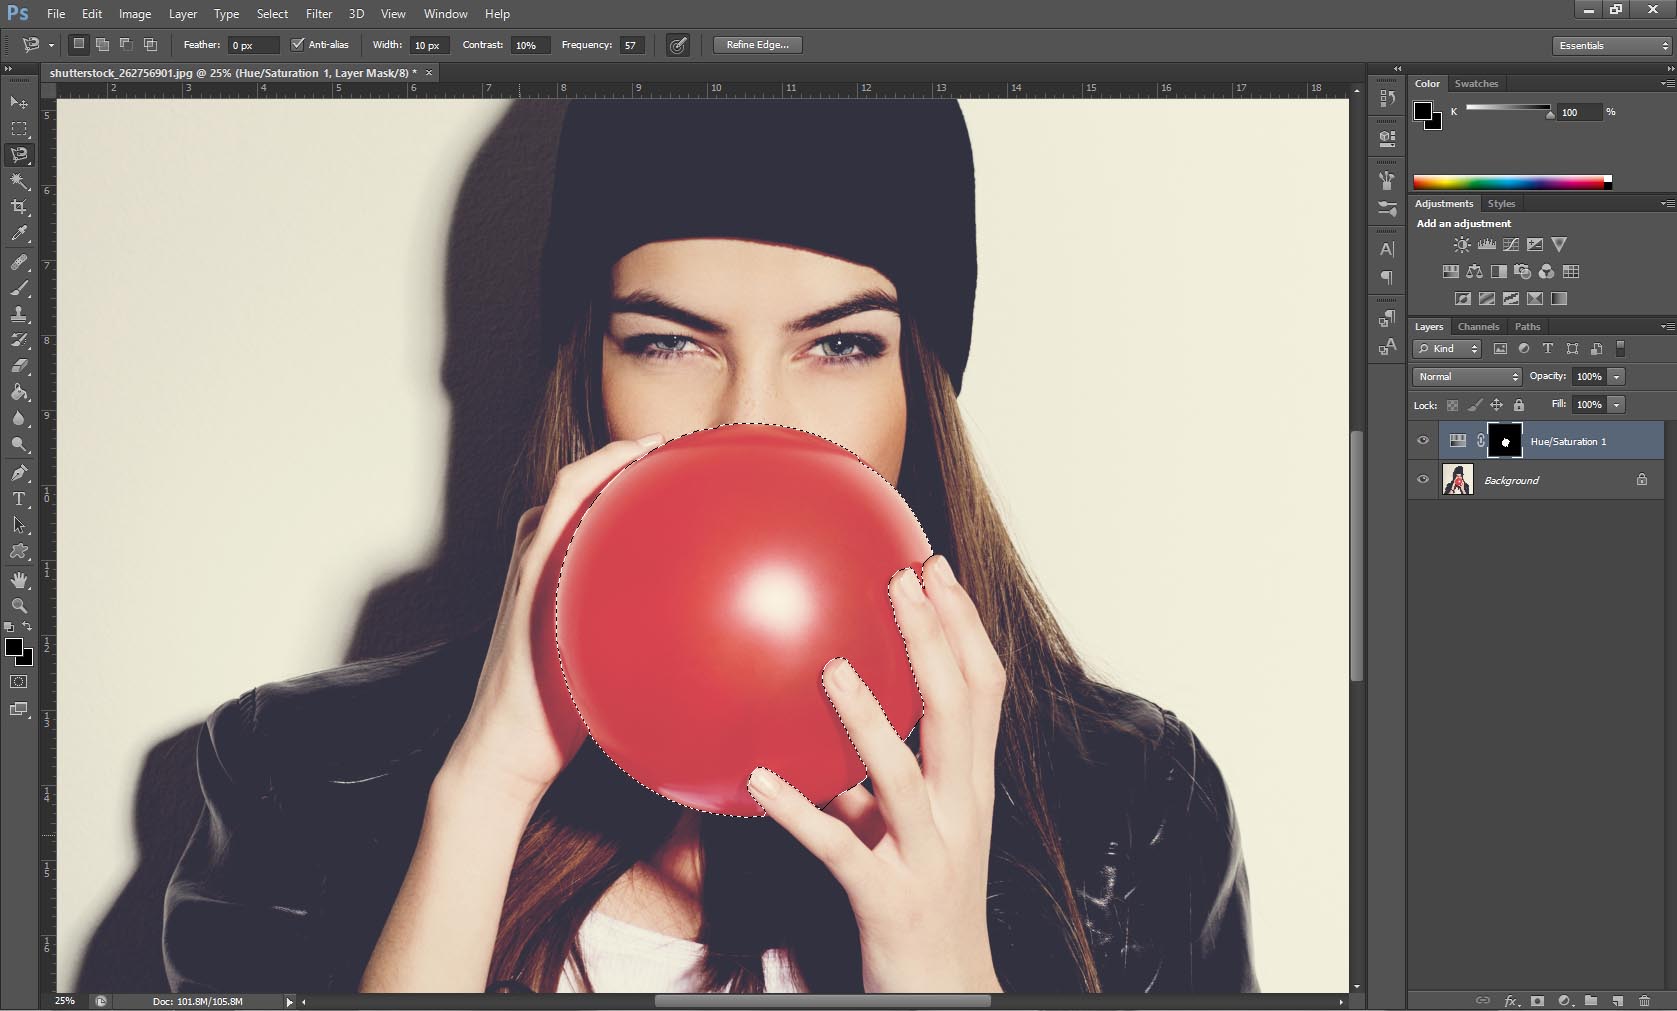
First open the photo that you’d like to use in Photoshop. And then select the magnetic lasso tool to select the area that you want to show up colored in the end.
Polygonal Lasso tool
If there are spots that are not covered sufficiently after using the magnetic lasso tool you can make corrections/additions with the Polygonal lasso tool.
Inverse Selection
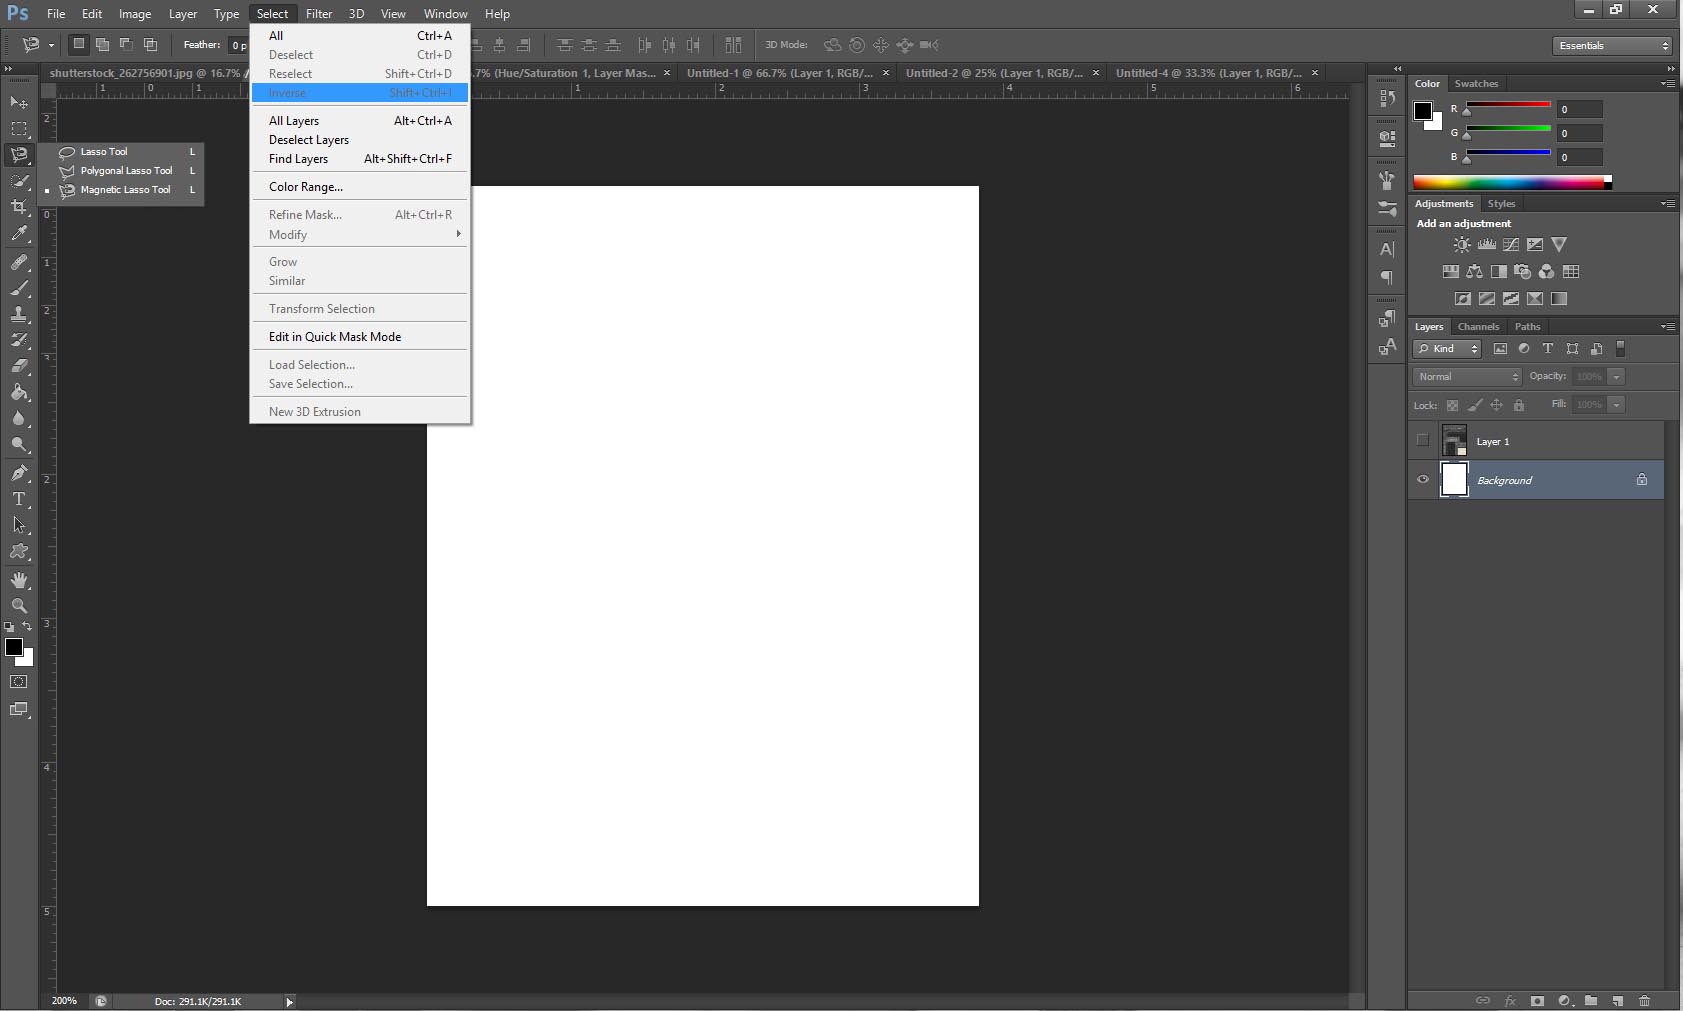
Then under the select tab choose the option inverse or use the shortcut SHFT + CTRL + I. This means that now everything except what you want colored is selected.
Hue and Saturation
Then under the hue/saturation tool, set the saturation to -100 and you will have made the selected area black and white, leaving the rest in color.
GIMP
Duplicate layers
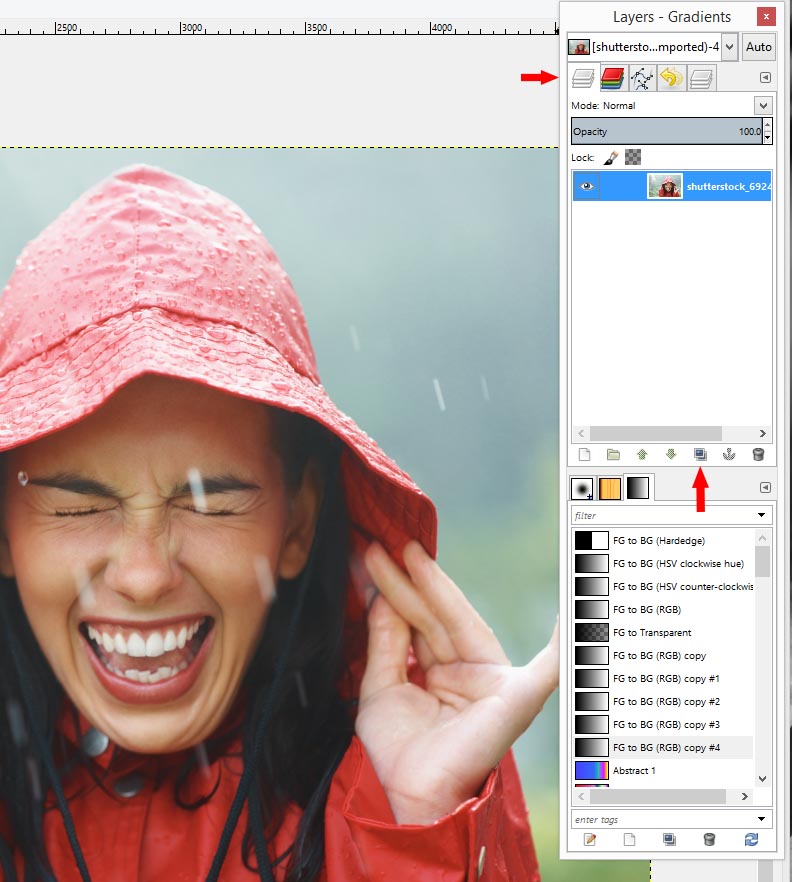
Either drag and drop your photo into GIMP or Open it from File—> Open. Then in the layers box to the right, select the tab that looks like three papers on top of each other, and then the button that looks like two photos on top of one another to add a duplicate layer.
Hue/ Saturation
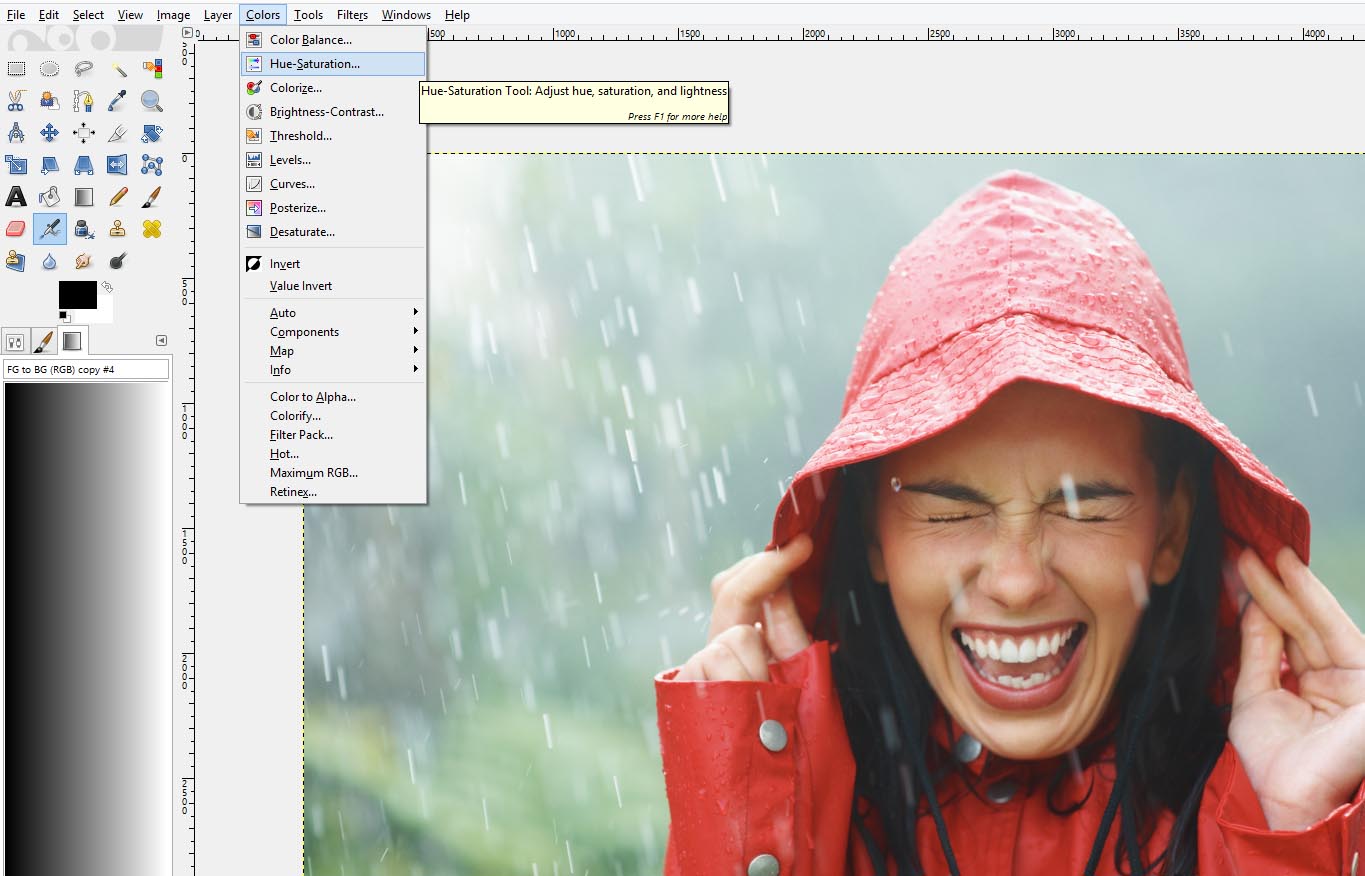
Under the colors tab you’ll find the Hue-Saturation menu. Then a pop-up will come up where you can select how much or little saturation.
Then lower the saturation to -100 and your photo becomes black and white.
Add mask
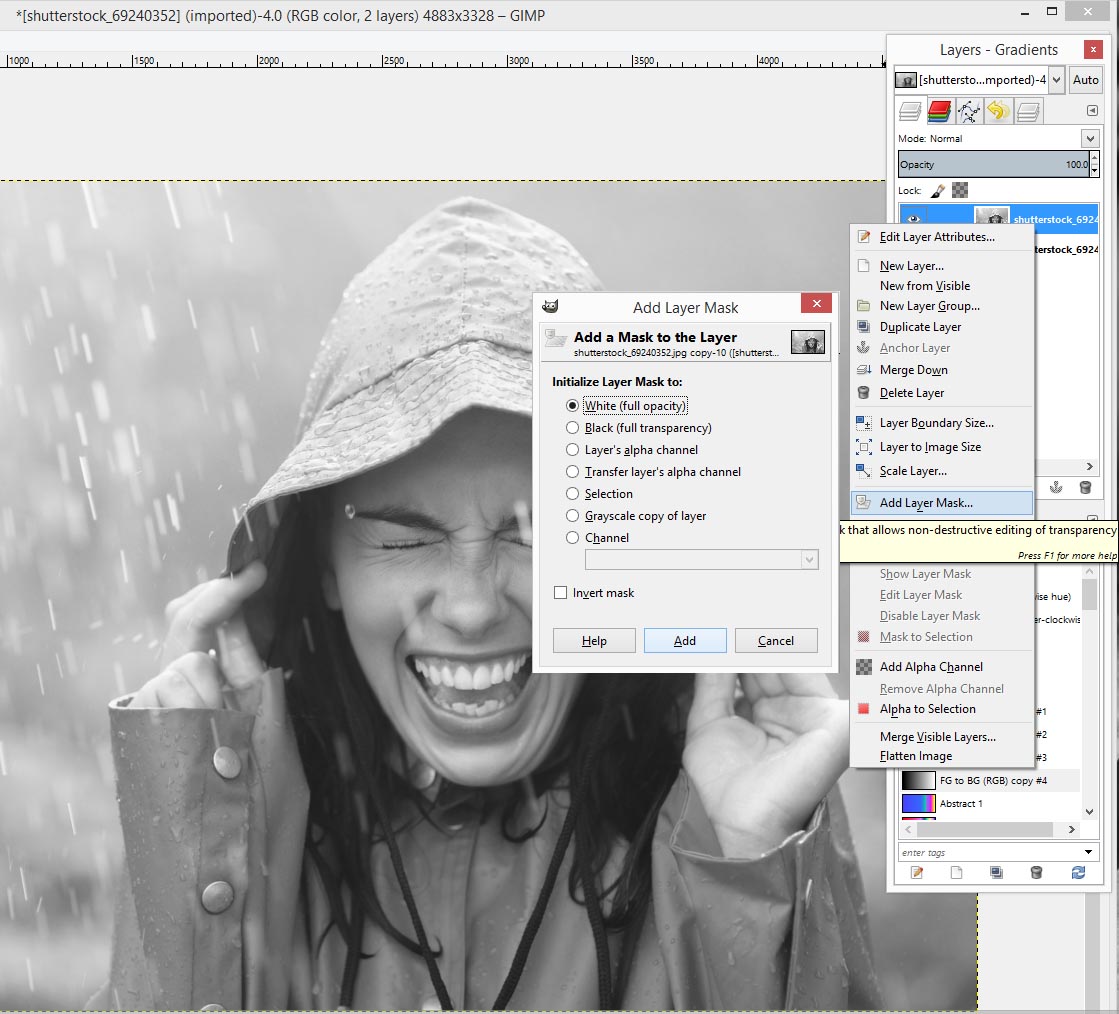
If you right click on the duplicate layer that is now black and white. There is a menu that that has the option Add Layer Mask, then select White (full opacity).
Paintbrush tool
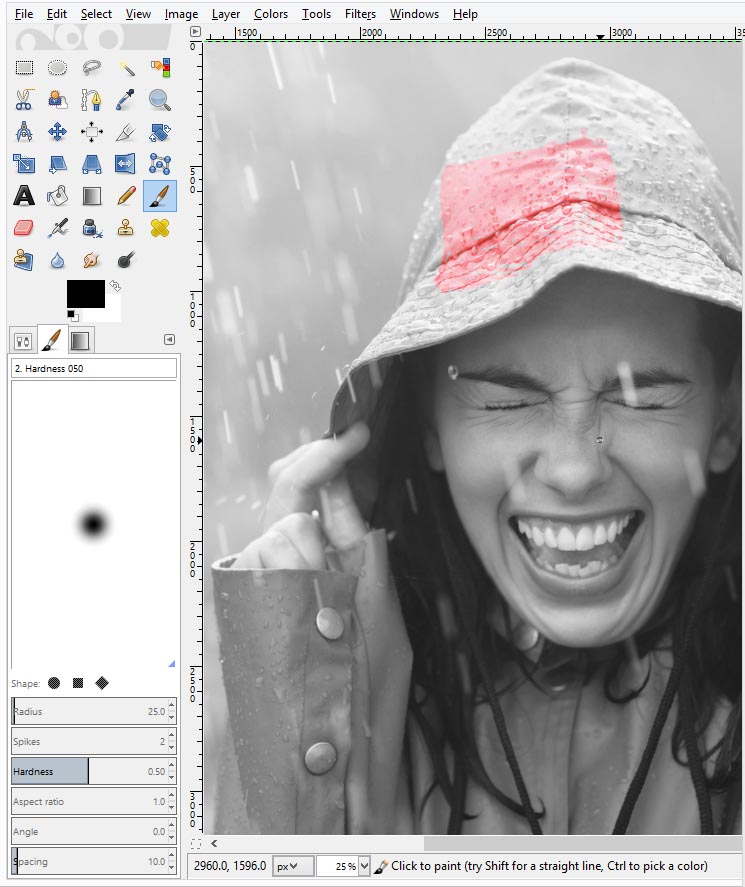
Finally you can use the paintbrush tool to recolor the areas that you want to appear in color. You can choose a brush that’s round, square, or triangular, adjust the hardness and radius if you need a thicker brush.
Some photos live on simplicity, but why not create a visual treat? Enjoy being creative!


